Network Video Recorder User Manual
71
The speed dome starts linear scan from the left limit to the right limit, and you must set the left limit on the
left side of the right limit, as well the angle from the left limit to the right limit should be no more than 180º
.
4.2.8
Calling Linear Scan
Before operating this function, make sure the connected camera supports the linear scan and is in HIKVISION
protocol.
Purpose:
Follow the procedure to call the linear scan in the predefined scan range.
Steps:
1.
Click the button
PTZ
in the lower-right corner of the PTZ setting interface;
Or press the PTZ button on the front panel or click the PTZ Control icon
in the quick setting bar to
enter the PTZ setting menu in live view mode.
2.
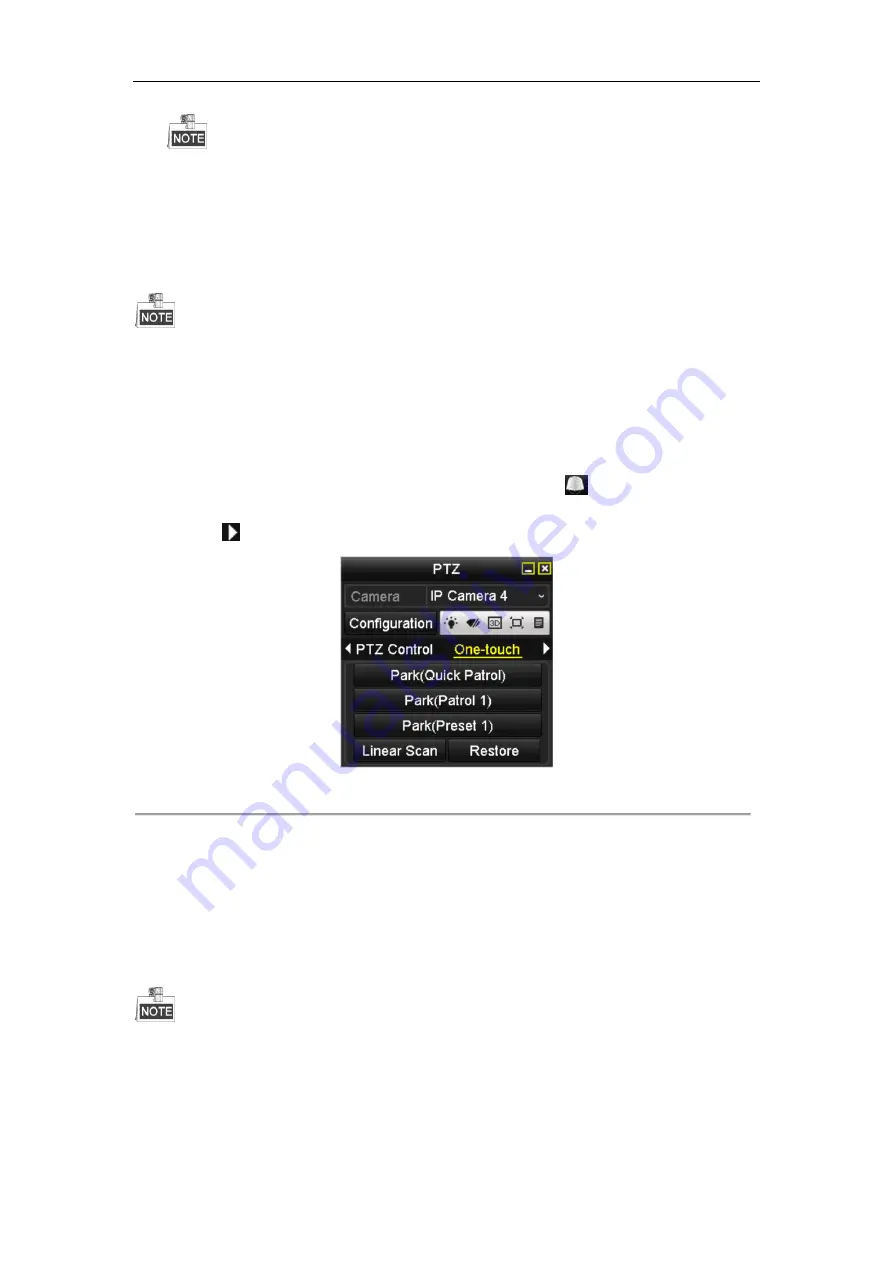
Click the
button to show the one-touch function of the PTZ control.
Figure 4. 11
PTZ Panel - One-touch
3.
Click
Linear Scan
button to start the linear scan and click the Linear Scan button again to stop it.
You can click the
Restore
button to clear the defined left limit and right limit data and the dome needs to
reboot to make settings take effect.
4.2.9
One-touch Park
Before operating this function, make sure the connected camera supports the linear scan and is in HIKVISION
protocol.
Purpose:
For some certain model of the speed dome, it can be configured to start a predefined park action (scan, preset,
patrol and etc.) automatically after a period of inactivity (park time).
Summary of Contents for DS-7600NI-K2
Page 1: ...Network Video Recorder User Manual UD01081B ...
Page 15: ...Network Video Recorder User Manual 14 Chapter 1 Introduction ...
Page 30: ...Network Video Recorder User Manual 29 Chapter 2 Getting Started ...
Page 53: ...Network Video Recorder User Manual 52 Figure 2 41 Edit IP Camera Interface Manual ...
Page 54: ...Network Video Recorder User Manual 53 Chapter 3 Live View ...
Page 65: ...Network Video Recorder User Manual 64 Chapter 4 PTZ Controls ...
Page 75: ...Network Video Recorder User Manual 74 Chapter 5 Recording and Capture Settings ...
Page 83: ...Network Video Recorder User Manual 82 Figure 5 12 Copy Schedule to Other Channels ...
Page 98: ...Network Video Recorder User Manual 97 Chapter 6 Playback ...
Page 117: ...Network Video Recorder User Manual 116 storage device ...
Page 118: ...Network Video Recorder User Manual 117 Chapter 7 Backup ...
Page 129: ...Network Video Recorder User Manual 128 Figure 7 19 Synchronizing ...
Page 130: ...Network Video Recorder User Manual 129 Chapter 8 Alarm Settings ...
Page 144: ...Network Video Recorder User Manual 143 Chapter 9 VCA Alarm ...
Page 157: ...Network Video Recorder User Manual 156 Chapter 10 VCA Search ...
Page 165: ...Network Video Recorder User Manual 164 Chapter 11 Network Settings ...
Page 188: ...Network Video Recorder User Manual 187 Chapter 12 RAID ...
Page 199: ...Network Video Recorder User Manual 198 Chapter 13 HDD Management ...
Page 213: ...Network Video Recorder User Manual 212 Figure 13 26 View HDD Status 2 ...
Page 217: ...Network Video Recorder User Manual 216 Chapter 14 Camera Settings ...
Page 221: ...Network Video Recorder User Manual 220 Chapter 15 NVR Management and Maintenance ...
Page 230: ...Network Video Recorder User Manual 229 Chapter 16 Others ...
Page 242: ...Network Video Recorder User Manual 241 Chapter 17 Appendix ...


