


Network Video Recorder User Manual
167
11.2
Configuring Advanced Settings
11.2.1
Configuring HIK Cloud P2P
Purpose:
HIK Cloud P2P provides the mobile phone application and as well the service platform page to access and manage
your connected NVR, which enables you to get a convenient remote access to the surveillance system.
Steps:
1.
Enter the Network Settings interface.
Menu > Configuration > Network
2.
Select the
Platform Access
tab to enter the HIK Cloud P2P Settings interface.
3.
Check the
Enable
checkbox to activate this feature.
4.
(Optional) If required, select the checkbox of
Custom
and input the
Server Address
. The default server
address is
dev.hik-connect.com
.
5.
To turn the
Enable Stream Encryption
on, you can select its checkbox.
6.
Enter the
Verification Code
of the device.
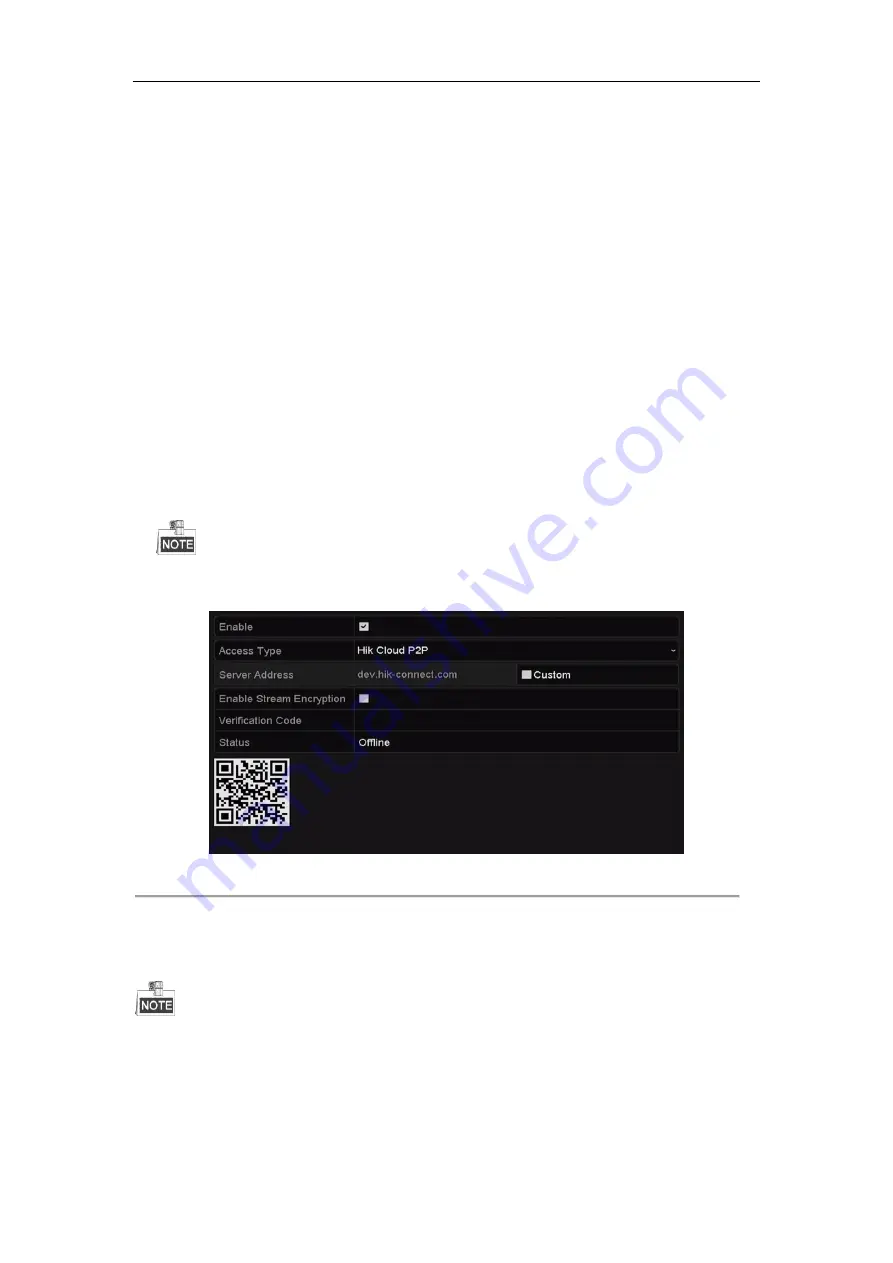
The verification code consists of 6 capital letters and is located at the bottom of the DVR. You can also use the
scanning tool of your phone to quickly get the code by scanning the QR code below.
Figure 11. 3
HIK Cloud P2P Settings Interface
7.
Click the
Apply
button to save and exit the interface.
After configuration, you can access and manage the NVR by your mobile phone on which the HIK Cloud P2P
application is installed or by the official website (www.hik-connect.com).
For more operation instructions, please refer to the help file on the official website (www.hik-connect.com).
11.2.2
Configuring DDNS
Purpose:
Summary of Contents for DS-7600NI-K2
Page 1: ...Network Video Recorder User Manual UD01081B ...
Page 15: ...Network Video Recorder User Manual 14 Chapter 1 Introduction ...
Page 30: ...Network Video Recorder User Manual 29 Chapter 2 Getting Started ...
Page 53: ...Network Video Recorder User Manual 52 Figure 2 41 Edit IP Camera Interface Manual ...
Page 54: ...Network Video Recorder User Manual 53 Chapter 3 Live View ...
Page 65: ...Network Video Recorder User Manual 64 Chapter 4 PTZ Controls ...
Page 75: ...Network Video Recorder User Manual 74 Chapter 5 Recording and Capture Settings ...
Page 83: ...Network Video Recorder User Manual 82 Figure 5 12 Copy Schedule to Other Channels ...
Page 98: ...Network Video Recorder User Manual 97 Chapter 6 Playback ...
Page 117: ...Network Video Recorder User Manual 116 storage device ...
Page 118: ...Network Video Recorder User Manual 117 Chapter 7 Backup ...
Page 129: ...Network Video Recorder User Manual 128 Figure 7 19 Synchronizing ...
Page 130: ...Network Video Recorder User Manual 129 Chapter 8 Alarm Settings ...
Page 144: ...Network Video Recorder User Manual 143 Chapter 9 VCA Alarm ...
Page 157: ...Network Video Recorder User Manual 156 Chapter 10 VCA Search ...
Page 165: ...Network Video Recorder User Manual 164 Chapter 11 Network Settings ...
Page 188: ...Network Video Recorder User Manual 187 Chapter 12 RAID ...
Page 199: ...Network Video Recorder User Manual 198 Chapter 13 HDD Management ...
Page 213: ...Network Video Recorder User Manual 212 Figure 13 26 View HDD Status 2 ...
Page 217: ...Network Video Recorder User Manual 216 Chapter 14 Camera Settings ...
Page 221: ...Network Video Recorder User Manual 220 Chapter 15 NVR Management and Maintenance ...
Page 230: ...Network Video Recorder User Manual 229 Chapter 16 Others ...
Page 242: ...Network Video Recorder User Manual 241 Chapter 17 Appendix ...


