


DS-2CD2D21G0/M-D/NF User Manual
UM DS-2CD2D21G0/M-D/NF 020319NA
60
With the function enabled, you don’t need to configure port mapping for each port, and the camera connects to the Wide
Area Network via the router.
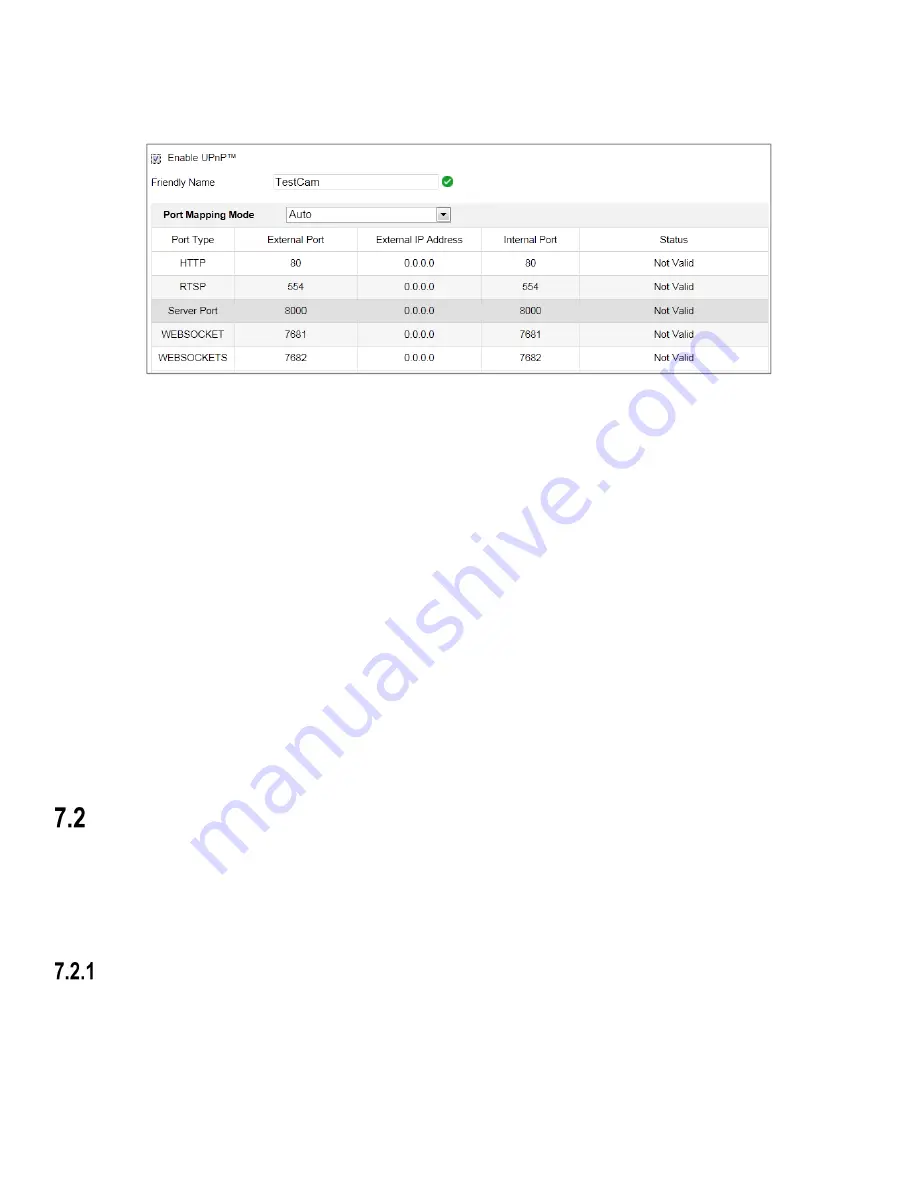
Figure 63, UPnP Settings
1.
Enter the NAT settings interface,
Configuration > Network > Basic Settings > NAT
.
2.
Check the UPnP
™
checkbox to enable the function.
NOTE:
Camera ports are active only when the UPnP
™
function is enabled.
3.
Choose a friendly name for the camera, or you can use the default name.
4.
Select the port mapping mode. Manual and Auto are selectable.
NOTES:
»
If you select Auto, you enable THE UPnP
™
function on the router.
»
If you select Manual, customize the external port value and complete port mapping settings on the router
manually.
5.
Click
Save
to save the settings.
Configure Advanced Settings
Purpose:
You can configure the parameters, including SNMP, FTP, E-mail, HTTPS, QoS, 802.1x, etc., by following the instructions in
this section.
Configuring SNMP Settings
Purpose:
You can set the SNMP function to get camera status, parameters, and alarm related information and manage the camera
remotely when it is connected to the network.
Summary of Contents for DS-2CD2D21G0/M-D/NF
Page 1: ...DS 2CD2D21G0 M D NF Pinhole and Covert Mini Network Cameras User Manual ...
Page 8: ...DS 2CD2D21G0 M D NF User Manual UM DS 2CD2D21G0 M D NF 020319NA 7 Appendix 156 ...
Page 34: ...DS 2CD2D21G0 M D NF User Manual UM DS 2CD2D21G0 M D NF 020319NA 33 ...
Page 68: ...DS 2CD2D21G0 M D NF User Manual UM DS 2CD2D21G0 M D NF 020319NA 67 ...