background image

CHAPTER 14


Content Management Application (CMA)

142

DL.2 User Manual 

Note:

Although running different versions of software on servers is not 

prohibited, it is highly recommended that all servers on the network 

be running the same software version.

Upgrading the CMA Software

Close the CMA before upgrading the CMA software. To Upgrade software: 

1. Download the latest version of the application from the Support section of the High End 

Systems website (

www.highend.com

). A download wizard simplifies installation on your 

personal computer. 

2. A dialog box will give you the option to Run or Save the application. Pressing Run 

automatically un-installs any existing CMA version on your hard drive and installs the new 
version.

Upgrading DL.2 Fixture Software

DL.2 fixture software can only be uploaded to fixtures from the CMA. You must first save the 
latest version of the DL.2 fixture software from the High End Systems website 
(

www.highend.com

) to your hard drive and then use the CMA to upload it to the fixtures on 

your link. To Upgrade DL.2 Fixture Software:

1. Using your internet browser, select the latest version from the support section of the High 

End Systems website. A dialog box will give you the option to Save. 

2. Select the location and press Save again to put a copy of the Fixture software on your 

local drive.

3. Click on All Servers in the left pane of CMA Management window.
4. Right click anywhere in the CMA Window or use the Server’s pull down menu to select 

Upgrade Software. The Upgrade Wizard will prompt you to browse to the location where 
you saved a copy of latest version. 

5. After locating the upgrade file, press Next. The Upgrade Wizard displays a list of all 

servers connected to the fixture network. 

Summary of Contents for DL.2

Page 1: ...emark of Belden Inc Microsoft DirectX and Windows are either registered trademarks or trademarks of Microsoft Corporation in the United States and or other countries Super HAD and Sony are registered...

Page 2: ...cy Farms Lane Austin TX 78758 USA voice 512 836 2242 fax 512 837 5290 Toll Free 800 890 8989 Customer Service High End Systems Inc 2105 Gracy Farms Lane Austin TX 78758 USA voice 800 890 8989 fax 512...

Page 3: ...nded by 92 31 EEC and 93 68 EEC Equipment referred to in this declaration of conformity was first manufactured in compliance with the following standards in 2005 Safety EN 60598 1 1997 EN 60598 2 17 1...

Page 4: ...lass A digital device pursuant to part 15 of the FCC rules These limits are designed to provide reasonable protection against harmful interference when the equipment is operated in a commercial enviro...

Page 5: ...Any use of this product other than consumer personal use in any manner that complies with the MPEG 2 Standard for encoding video information for packaged media is expressly prohibited without a licens...

Page 6: ...UCT OR CAUSED BY PRODUCT DEFECTS OR THE PARTIAL OR TOTAL FAILURE OF ANY PRODUCT REGARDLESS OF THE FORM OF ACTION WHETHER IN CONTRACT TORT INCLUDING NEGLIGENCE STRICT LIABILITY OR OTHERWISE AND WHETHER...

Page 7: ...parties and raves are all examples of public performance and permission must be obtained Suppose I want to use a still photo or a magazine cover or a television clip Do I have to obtain permission fo...

Page 8: ...tual property issues How much does it typically cost to license copyrighted material The answer depends entirely on what material you want to use and how you plan to use it Prices can range from hundr...

Page 9: ...t Application software Features 1 System 1 Graphics Engine 2 Content Management Application 2 Hardware 2 Related Products and Optional Accessories 3 Chapter 2 Setup and Configuration Hardware setup in...

Page 10: ...d Shutdown Options 17 Placing Fixture in Road Case 17 Chapter 3 The DL 2 Menu System You can use the DL 2 fixture s Menu System to configure the fixture review diagnostic feedback and view content inf...

Page 11: ...ervers with a WholeHog Console 36 Adding a Fixture 36 DMX Output Displays 36 16 bit DMX 37 Wholehog III Programming Notes 37 Play Speed 37 Mask Strobe 37 Play Modes Opacity 37 CMY 37 Control Channel F...

Page 12: ...rame Parameters 47 Segment Selection Examples 48 Defining Playback 48 Playback Mode 48 Playback Speed 49 Chapter 7 Graphic Functions Rotation Position Scale You can independently control each Graphic...

Page 13: ...Timing 78 Sync To 78 Chapter 10 Global Functions Global Graphic controls affect the composite image created by defining two or three separate object graphics You can adjust intensity define masks sele...

Page 14: ...Cycle 92 Chromakey Coarse Inverse 93 Chromakey Fine 93 Chromakey Medium 94 Chromakey Medium Inverse 94 CMY Add All Pixels 95 CMY Add Non black Pixels 95 Color DeConverge 96 Colorize Gray Scale 96 Edge...

Page 15: ...Sinewave Horizontal w Z axis Wobbulation 112 Sinewave Vertical w X axis Wobbulation 113 Sinewave Vertical w Y axis Wobbulation 113 Sinewave Vertical w Z axis Wobbulation 113 Texture Ripple Asymmetrica...

Page 16: ...ientation 126 Camera Effects 126 Chapter 14 Content Management Application CMA A Content Management Application CMA running on your workstation or laptop computer gives you remote control of uploading...

Page 17: ...139 Cloning User Content 140 Deleting Content 141 DMX Summary 141 Upgrading Software 141 Verifying Software Versions 141 Upgrading the CMA Software 142 Upgrading DL 2 Fixture Software 142 Viewing and...

Page 18: ...ontent 164 Performing the System Restore 165 Appendix A DL 2 DMX Protocol 169 This table describes the Standard Dual and Single Protocol for DL 2 fixtures Appendix B MSpeed Conversion Table 219 This t...

Page 19: ...225 DMX and RS 485 Projector Link 225 Appendix E Safety Information Appendice E Importantes Informations Sur La S curit 228 Anhang E Wichtige Hinweise F r Ihre Sicherheit 229 Ap ndice E Informaci n Im...

Page 20: ...xx DL 2 User Manual...

Page 21: ...ile combining camera and light from the same source to allow a unique point of view the camera also features optical and digital zoom frame rate and invert effects as well as freeze frame color negati...

Page 22: ...ontrol to provide system wide intensity level Overall image Color Mixing applied to composite media stream image Color Effects including edge colors allow for combined image color mixing Multiple Mask...

Page 23: ...ated Products and Optional Accessories The following table lists related products and accessories available for the DL 2 fixture For more information contact your High End Systems dealer distributor s...

Page 24: ...CHAPTER 1 Product Overview 4 DL 2 User Manual...

Page 25: ...ith the following One DL 2 fixture in road case Two mounting brackets One safety cable Documentation CD that contains CMA application User Manual in pdf format Fixture software Recovery software image...

Page 26: ...lug Therefore install a line cord cap in accordance with the following code The core which is coloured green and yellow must be connected to the plug terminal which is marked with the letter E or by t...

Page 27: ...t the same time USB 1 100 120 V 50 60Hz 7A 200 240 V 50 60Hz 3 5 A USB 2 S Video Output S Video In VGA Input for external source RGBHV input for external video source 5 pin DMX512 Data In and to anoth...

Page 28: ...of the fixture Air filters both fixture and projector should be checked and cleaned on a regular basis When used in a closed or fixed environment where fog or haze is used we recommend at least a wee...

Page 29: ...using the mounting bracket to the fixture s base Use the following steps to mount a DL 2 fixture on a standard truss 1 Due to it s size and weight at least two people should support the fixture while...

Page 30: ...and less degradation over long distances For cable and connector specification see Cable and Connector Specifications on page 225 Test each cable with a voltage ohm meter VOM to verify correct polari...

Page 31: ...rnet network to synchronize playback and access the CMA software for remote content management and fixture configuration If you are using a DMX console and other automated lighting products compatible...

Page 32: ...the major functions of the fixture and its internal projector are oriented properly Shortcut Holding down the inner most i e middle two menu tab buttons for more than two seconds will home the unit WA...

Page 33: ...panel gives access to the fixture s onboard menu system Chapter 3 The DL 2 Menu System describes the menu system configuration options in detail Note Most configuration features are also available thr...

Page 34: ...ommands Update software The following are recommended hardware requirements for the CMA Windows XP or Mac OS 10 4 or later Microsoft Net Framework 1 1 with Service Pack 1 installed 100 1000 base Ether...

Page 35: ...The DL 2 Menu System on page page 19 DMX Source defines the source of DMX data and has two options DMX512 Data is transmitted over standard DMX cables Art Net Data is transmitted over Ethernet cables...

Page 36: ...ew all the servers on the fixture network Select a server in the left pane to view its configuration information in the right pane To select a DMX Source type 1 Scroll down the Configuration list in t...

Page 37: ...of DMX data loss The default time is 10 min To edit the length of time the fixture waits for a DMX input before shutting down use the CMA see Editing Configuration Values on page 144 or the fixture s...

Page 38: ...CHAPTER 2 Setup and Configuration 18 DL 2 User Manual 4 Place the DL 2 fixture in its provided road case for shipping 1 Place Top over the fixture first 2 Bring sides of case together and latch...

Page 39: ...ptions on page 120 Menu Panel Components The LCD screen displays the menu arranged with a series of Menu Tabs along the left side for accessing configuration screens and options on the currently activ...

Page 40: ...f instead of dimming it to video black If you turn the LCD off and then remove power to the DL 2 the LCD power will restore the default ON when you reapply power to the fixture Note The LCD screen pow...

Page 41: ...ld will be highlighted Press the Enter button to go into edit mode the selected field and a list box will open to show all the options for that field Use the Up Down keys to scroll through the items i...

Page 42: ...splayed values Refresh Timer On DMX values updated instantly Off Display does not refresh Protocol View Motion Displays fixture Movement and Camera parameter values Global Displays Intensity Iris Edge...

Page 43: ...or lamp on whenever the fixture is connected to power Manual Turns on the projector lamp when Projector Lamp On DMX Turns the projector lamp on with DMX input default Projector OSD Menu On Navigation...

Page 44: ...mp Status Projector Air Filter Test Home Motion All Home Resets all mechanical functions to default positions Motion Pan Tilt Resets Pan and Tilt functions to default positions Motion Iris Zoom Focus...

Page 45: ...f DMX data and has two options DMX512 Data is transmitted over standard DMX cables Art Net Data is transmitted over Ethernet cables using the Art Net protocol Set the number of DMX Universes and DL 2...

Page 46: ...ormation on specific Motion and Camera parameters see Chapter 12 Fixture Motion Functions on page 119 Chapter 13 Live Video Input and Control on page 123 DMX_Protocol _Global Screen The Global tab dis...

Page 47: ...s of eight DMX values each per screen The Offset number at the beginning of each line indicates the first DMX channel with a value displayed on that line Use the scroll bar at the left of the offset n...

Page 48: ...5 seconds Short is the default setting After 10 minutes of no data the fixture will shut down the projector and the motion functions Fans remain on to maintain the temperature control for the internal...

Page 49: ...he projector tab provides settings related to the internal projector functionality Use the Projector Input option to select which input the projector should accept When External is selected the projec...

Page 50: ...ontrol the projector menu rather than the LCD menu To revert back to the Menu display press one of the six side menu buttons When the Projector Control Menu is set to Off the projector control menu is...

Page 51: ...ibrate Motors realigns the Pan and Tilt stepper motors after maintenance procedures The DL 2 can also be remotely homed via a DMX controller see Control Function Options on page 120 or through the Con...

Page 52: ...ion is often used to track fixture hours for a show or a rental period The number field displays the number of hours the fixture has been operating since the last reset Pressing the Fixture Hours Rese...

Page 53: ...re Reboot Media Server restarts the fixture s internal graphics engine software Delete User Content removes all user content on the selected fixture s Upgrade Factory Content lets you reinstall factor...

Page 54: ...CHAPTER 3 The DL 2 Menu System 34 DL 2 User Manual...

Page 55: ...annel Determining a DMX Start Channel The DMX Start Channel is the first channel of a fixture s channel range on a DMX link There are 512 available channels on each DMX universe divided among all the...

Page 56: ...hog 3 library systems This allows for ease of programming as well as the ability to adjust quickly for any of the various DMX protocol options There are three basic fixtures used to control a single D...

Page 57: ...annel to the appropriate value and adjust the DMX channel for the strobe speed This will override the Mask Edge parameter as per the DL2 DMX Protocol Play Modes Opacity Using the Graphic fixture type...

Page 58: ...CHAPTER 4 DMX Programming Basics 38 DL 2 User Manual...

Page 59: ...es with a separate software system on a separate computer when preparing for a show You can adjust both Black Level and Contrast for each cue and for each image Graphics Control Hierarchy There is a h...

Page 60: ...to DL 2 fixture s internal projector A 3 D object with a texture is selected Graphic Engine Function Flow Object 2 Content Visual Mode Effect 1 Effect 2 Global Effect 1 Global Effect 2 Mask Edge Fade...

Page 61: ...age you can Adjust the composite image intensity level Apply visual effects including colormixing and geometric effects Select a mask shape size it and apply edge fades and color to the mask Apply and...

Page 62: ...CHAPTER 5 Graphics Engine Overview 42 DL 2 User Manual...

Page 63: ...view and manage content see Content Management Application CMA on page 127 Selecting Content Three Parameters control Content selection To define an image you have to set DMX values greater than 0 for...

Page 64: ...er created object files Stock Objects have a fixed DMX value and cannot be edited DMX values 1 149 are reserved for identifying stock object files User created object files must be assigned a unique D...

Page 65: ...d as follows DMX values from 1 38 select from the stock Media collections that shipped with your DL 2 fixture A DMX value of 39 is reserved for a Setup and Test folder DMX Values 40 239 are reserved f...

Page 66: ...12 HES_Gothic Set of themed video loops 13 HES_Digital_Aerials _2 Digital still images and animations designed specifically for aerial effects 14 HES_Theme_Stills Nature stills foliage and flowers 15...

Page 67: ...dia file to play using the In Frame and Out Frame parameters By default the In Frame is the beginning of the media file and the Out Frame is the end of the file Media files can have different lengths...

Page 68: ...k skips from the end of the file to the beginning Defining Playback After selecting and defining a media file segment to display on a 3 D object you can choose from several Playback Modes and assign a...

Page 69: ...d media file s Playback Mode The Playback Speed for a media file is used whenever the Playback Mode Parameter s DMX value is assigned to any Play Forward option Default DMX Value 128 Playback at norma...

Page 70: ...CHAPTER 6 Graphic Functions Defining Content 50 DL 2 User Manual...

Page 71: ...e the easiest and most reliable content selection rendering and output Rotating a 3 D Object The Rotation parameters for each object control 3 D object rotation with 16 bit precision You can rotate a...

Page 72: ...tion Reducing the DMX value below the midpoint indexes the object in a counterclockwise direction When the DMX value for a rotation parameter is greater than the 720 limit in either direction the obje...

Page 73: ...or the composite image see Global Viewpoint Mode on page 89 Default DMX Value 32768 50 No X Rotation Tip Using this parameter you can turn one object through another of Value Range Function 1 24 Conti...

Page 74: ...for the composite image see Global Viewpoint Mode on page 89 Default DMX Value 32768 50 No Y Rotation Tip Using this parameter you can turn one object through another of Value Range 1 24 Continuous va...

Page 75: ...ent angle by changing the viewpoint in space for the composite image see Global Viewpoint Mode on page 89 Tip Using this parameter you can turn one object around another of Value Range 1 24 Continuous...

Page 76: ...educed below the midpoint an inverted image is enlarged Use the X Y and Z Scale parameters together to enlarge or shrink a 3 D object proportionally X Scale The X Scale parameter scales the selected 3...

Page 77: ...e the object s vertical component A DMX value of 128 50 sets the object at its normal size Values less than 50 shrink the object vertically to the smallest at 0 Values greater then 50 enlarge the obje...

Page 78: ...t s thickness A DMX value of 128 50 sets the object at its normal size Values less than 50 shrink the the object thickness until it reaches a point at a value of 0 Values greater then 50 enlarge the o...

Page 79: ...in relation to each other X Position The X Position parameter moves your object along the x axis with 16 bit precision The midpoint of the 16 bit DMX value range centers the image on the X axis Value...

Page 80: ...he midpoint of the 16 bit DMX value range centers the image on the Y axis Values below the DMX midpoint move the object down and values above the DMX midpoint move the object up Default DMX Value 3276...

Page 81: ...ears to become smaller and object above the DMX midpoint move the object toward the viewer and appears to become larger Default DMX Value 32768 50 object centered in frame Tip This parameter can creat...

Page 82: ...CHAPTER 7 Graphic Functions Rotation Position Scale 62 DL 2 User Manual...

Page 83: ...the opacity of an individual 3 D object from completely transparent to full opacity using this parameter Increase opacity from not visible at a value of zero to full opacity at a value of 255 Default...

Page 84: ...ot Used Not Used 1 Content Optimization Enhances image black level and contrast Adjusts Back Level Adjusts Contrast 2 Push to Sepia Fades from original image color to sepia Adjusts Fade Adjusts Satura...

Page 85: ...nd Contrast to optimize the projected image for your performance environment You can use it to easily modify the black level and contrast for a specific application The Exposure Control option provide...

Page 86: ...a DMX value 0 to a range of sepia shades at a value of 255 100 Modifier 2 Adjusts color saturation from no adjustment at a DMX value 0 to full saturation at a value of 255 100 Original Content Visual...

Page 87: ...r at a DMX value 0 to a range of red tones at a value of 255 100 Modifier 2 Adjusts color saturation from no adjustment at a DMX value 0 to full saturation at a value of 255 100 Original Content Visua...

Page 88: ...effect image contrast Modifier 1 At a DMX value of 0 the image will be full color As you increase the DMX value more gray is introduced until at a DMX value of 255 all color has been replaced with sha...

Page 89: ...e is no effect applied but Modifier 2 can still affect image contrast Modifier 1 Adjusts the black level of the grayscale image from a DMX value of 0 Full brightness to 255 completely black Modifier 2...

Page 90: ...colors Note In this visual mode you won t see a change in the image until you adjust the Modifier 1 parameter Modifier 1 Adjusts color polarization level The higher the value the more color detail wi...

Page 91: ...value of 128 50 Increasing values above 50 reveals more of the image in black and white to complete at a value of 255 100 Modifier 2 Not Used Fire Gradient Visual Mode Parameter DMX value 8 This opti...

Page 92: ...to the lowest level at a DMX value of 255 Modifier 2 You must set a DMX value of 128 to see no black level adjustment Red is subtracted from the image at DMX values of 128 to 0 Green is subtracted fro...

Page 93: ...posure Control provides finer Contrast and Black level control than than the Content Optimization option which pushes colors to saturation more quickly Modifier 1 Adjusts black level from 0 full black...

Page 94: ...ts selection NA NA NA 1 CMY RGB inverse Cyan Magenta Yellow 2 CMY add to all pixels Cyan Magenta Yellow 3 CMY add to all non black pixels Cyan Magenta Yellow 4 RGB add all pixels Red Green Blue 5 RGB...

Page 95: ...age selects scan line fades to converted image Not Used 33 Transparent Wipes opens the selected graphic to reveal another graphic positioned behind it Area of wipe Selects center of wipe Selects from...

Page 96: ...Red Green Blue 48 Tiling On x axis scaler y axis scaler NA 64 Sinewave Circular with x axis wobbulation Amplitude Frequency Phase 65 Sinewave Circular with y axis wobbulation Amplitude Frequency Phase...

Page 97: ...effect the object you have synchronized with it Setting an object to sync to itself will have no effect DMX Value Option 0 No selection 1 Synchronize playback time with object 1 media file 2 Synchroni...

Page 98: ...s sequence until the master fixture resets all the clocks If a synchronizing fixture s media segment has a longer sequence length it restarts at the In Frame point before completing its entire sequenc...

Page 99: ...between individual objects Use this parameter to adjust the intensity of a composite image over the separate Graphic Object s Opacity parameter settings Increase intensity from not visible at a DMX v...

Page 100: ...GB Add All Pixels Red Green Blue 5 RGB Add 2 All Pixels Red Green Blue 6 RGB Add All Non black Pixels Red Green Blue 7 RGB Swap to GBR Red to Green Green to Blue Blue to Red 8 RGB Swap to BRG Red to B...

Page 101: ...elect key color using Modifier channels Red Green Blue 31 Chromakey Coarse Inverse select key color using Modifier channels Red Green Blue 32 Scan Line converts image colors to colors in a single line...

Page 102: ...s fading 45 Intensity key turns pixels of selected intensity transparent Selects Color Scheme Defines Intensity bandwidth Controls Transparency 46 Raindrop simulates raindrops falling on a liquid surf...

Page 103: ...A Global Effect Mode parameter option lets you define a Mask color see Global Effect Mode 1 and Effect Mode 2 on page 80 and on page 139 DMX value Strobe DMX Value Mask Shapes 0 128 Round iris mask c...

Page 104: ...set at a value of 255 100 the mask is sized to leave the image 100 visible When Mask Size is set at 0 the mask totally covers the composite image Tip Crossfading the Mask Size parameter can create uni...

Page 105: ...Default DMX Value 0 no edge fade applied to mask Adjust the amount of edge fade from 1 no edge fade to 255 maximum edge fade When a Mask Select parameter value of Note A Global Effect Mode parameter o...

Page 106: ...right When projecting abutting images adjusting the Edge Fade parameter lets you smooth the line between two images and also allows you to change an object s boundary Default DMX Value 0 all edges ar...

Page 107: ...alues to zero will place the four corners of the image at the four corners of the projector output Adjusting keystone x values toward 255 100 moves the respective corner x positions horizontally towar...

Page 108: ...ge horizontally from no expansion at a value of 128 to maximum expansion at a value of 255 Y Ratio The Y Ratio parameter shapes the output to adjust for keystone effects created in certain output situ...

Page 109: ...space Perspective View Spherical Coordinates This Viewpoint mode creates a 3 D space with a perspective view of a 3 D space Viewpoints are located in terms of X Y and Z positions located on a sphere s...

Page 110: ...r this component of the viewpoint position Default DMX Value 32768 center DMX values above the center of the range move counterclockwise to the maximum vertical angle at a value of 65535 100 DMX value...

Page 111: ...whether to apply a color effect option to an individual object or to the composite image at the global level After you select a mode using either a Graphic Object Effect Mode or a Global Effect Mode p...

Page 112: ...position This option allows you to apply color to the background Modifier 1 Defines the red color component from DMX values of 0 no red to 255 100 maximum red saturation Modifier 2 Defines the green c...

Page 113: ...t as the chromakey in terms of Red Green and Blue values The Inverse Chromakey Coarse parameter selects a color range 40 either side of the defined value and then sets every other color as chromakeyed...

Page 114: ...as the chromakey in terms of Red Green and Blue values The Chromakey Medium parameter selects a color range 25 either side of the defined value Modifier 1 Defines the red color component from 0 no red...

Page 115: ...across all pixels including black pixels Modifier 1 Increases cyan color component from 0 no adjustment to 255 100 maximum cyan saturation Modifier 2 Increases magenta color component from 0 no adjus...

Page 116: ...original image position Modifier 1 Moves the image s red component up from 0 no adjustment to 255 100 maximum distance from original position Modifier 2 Moves the image s green component down and righ...

Page 117: ...nt to 255 100 maximum blue saturation Modifier 3 Increases green color component from 0 no adjustment to 255 100 maximum green saturation Glow Effect Mode parameter DMX value 73 Glow colorizes and cre...

Page 118: ...Effect Mode parameter DMX value 45 This option turns pixels of a selected intensity transparent or applies the reverse effect Modifier 1 Selects intensity from a DMX value of 0 no intensity to 255 10...

Page 119: ...s option adds color to all pixels including black using the RGB color model Modifier 1 Increases red color component from 0 no adjustment to 255 100 maximum red saturation Modifier 2 Increases blue co...

Page 120: ...ns the red component from no adjustment at a value of 0 to cyan at a value of 255 100 Modifier 2 Transitions the green component from no adjustment at a value of 0 to magenta at a value of 255 100 Mod...

Page 121: ...ed in the Media file A DMX Value of 128 no adjustment DMX values below 128 50 reduce color value DMX values over 128 increase color value Modifier 2 Scales Green in the Media file A DMX Value of 128 n...

Page 122: ...een all green values become blue and all blue values become red Modifier 1 Transitions red color component to green from 0 no color change to 255 100 green Modifier 2 Transitions green color component...

Page 123: ...he media file to scan Modifier 2 Adjusts the mapping transition Modifier 3 Not used Solarize 1 Effect Mode parameter DMX value 9 This effect option remaps colors to a narrow value range and inverts th...

Page 124: ...color component from 0 no adjustment to 255 100 maximum red saturation Red color values below the threshold are eliminated Modifier 2 Increases blue color component from 0 no adjustment to 255 100 ma...

Page 125: ...mix the 3 D object to one solid color Modifier 1 Increases red color component from 0 no adjustment to 255 100 maximum red saturation Modifier 2 Increases green color component from 0 no adjustment to...

Page 126: ...either stock or custom content The native aspect ratio of one DL 2 fixture s output is 4 3 Some of the arrays configured in conjunction with the collage generator will output a dif ferent overall asp...

Page 127: ...rray Configuration Array W x H Aspect Ratio Maximum Recommended Image Resolution W x H DL 2 Units 2x1 8 3 1440 W x 540 H 2 3x1 4 1 1760 W x 440 H 3 4x1 16 3 2016 W x 378 H 4 Array Configuration Array...

Page 128: ...horizontal edge search size from 0 no adjustment to 255 100 maximum adjustment Modifier 2 Adjusts vertical edge search size from 0 no adjustment to 255 100 maximum adjustment Modifier 3 Adjusts compa...

Page 129: ...the horizontal position of the lens centerpoint from 0 left edge to 255 100 right edge of output Modifier 2 Controls the vertical position of the lens centerpoint from 0 top edge to 255 100 bottom edg...

Page 130: ...255 100 right edge of output Modifier 2 Controls the vertical position of the twisted area s centerpoint from 0 top edge to 255 100 bottom edge of output Modifier 3 Controls the direction and amount o...

Page 131: ...ecting the media file that is applied as a texture Modifier 1 Adjusts the size amplitude of the wobble from 0 no adjustment to 255 100 maximum size Modifier 2 Adjusts the rate frequency of the wobble...

Page 132: ...fecting the media file that is applied as a texture Modifier 1 Adjusts the size amplitude of the wobble from 0 no adjustment to 255 100 maximum size Modifier 2 Adjusts the rate frequency of the wobble...

Page 133: ...ecting the media file that is applied as a texture Modifier 1 Adjusts the size amplitude of the wobble from 0 no adjustment to 255 100 maximum size Modifier 2 Adjusts the rate frequency of the wobble...

Page 134: ...est speed DMX values below the midpoint increase speed in a backward direction from no adjustment to 0 fastest speed Texture Ripple Circular Effect Mode parameter DMX value 24 Varies the distance of r...

Page 135: ...w the midpoint increase speed in a backward direction from no adjustment to 0 fastest speed Texture Ripple Vertical Effect Mode parameter DMX value 23 Varies the distance of reference points to the ap...

Page 136: ...justment Values below the midpoint size a single image to 0 maximum image magnification Values above the midpoint increase number of images displayed to 255 100 maximum Modifier 2 Adjusts the size and...

Page 137: ...at a value of 0 to the largest at a value of 255 100 Modifier 2 Selects the center of a wipe effect s separation Modifier 3 Selects the wipe option Each option occupies a portion of the DMX value rang...

Page 138: ...CHAPTER 11 Effect Mode Options Descriptions 118 DL 2 User Manual...

Page 139: ...rom its programmed position If a physical obstruction prevents the fixture from correcting its position this correction feature times out to prevent wear on the motors If the fixture s position correc...

Page 140: ...For a listing of exact MSpeed times see Appendix B MSpeed Conversion Table Control Function Options The Control parameter remotely initiates various fixture operations and allows access to the interna...

Page 141: ...g orientation then the unit will remain in Ceiling orientation until another command is sent to switch back to Floor This allows the Control parameter to revert to another value without losing the ori...

Page 142: ...l result in unpredictable performance Optional If the projector is mounted on the ceiling flip the display by selecting a Control parameter DMX value from 209 212 4 Set the Dimmer parameter DMX value...

Page 143: ...e camera is mounted on the front of the DL 2 near the projector iris to point wherever the DL 2 fixture is directed All of the camera functions can be controlled via a DMX console see Controlling the...

Page 144: ...information about the Projector Input field on the Set_Projector Screen on page 29 Remotely through the CMA see Editing Configuration Values on page 144 Via the DMX console commands see Projector Con...

Page 145: ...meter uses two DMX channels to provide 16 bit control of the camera s zoom function This includes an 18 optical and 12 digital zoom for a total of 216 combined zoom range You can adjust the Camera Zoo...

Page 146: ...information from the entire image It outputs the proper value using the color temperature on a range of values from 3000 to 7500K and is the suggested default setting Other settings for this paramete...

Page 147: ...the DL 2 fixture discovery packets to automatically discover the IP Addresses and Fixture IDs of all the DL 2 fixtures on the network SMB File Transfers The cross platform SMB file transfer protocol i...

Page 148: ...ixtures as well as the CMA software The messages contain information that allows the DL 2 fixtures to communicate with each other and the CMA to communicate with all the DL 2 fixtures on the network T...

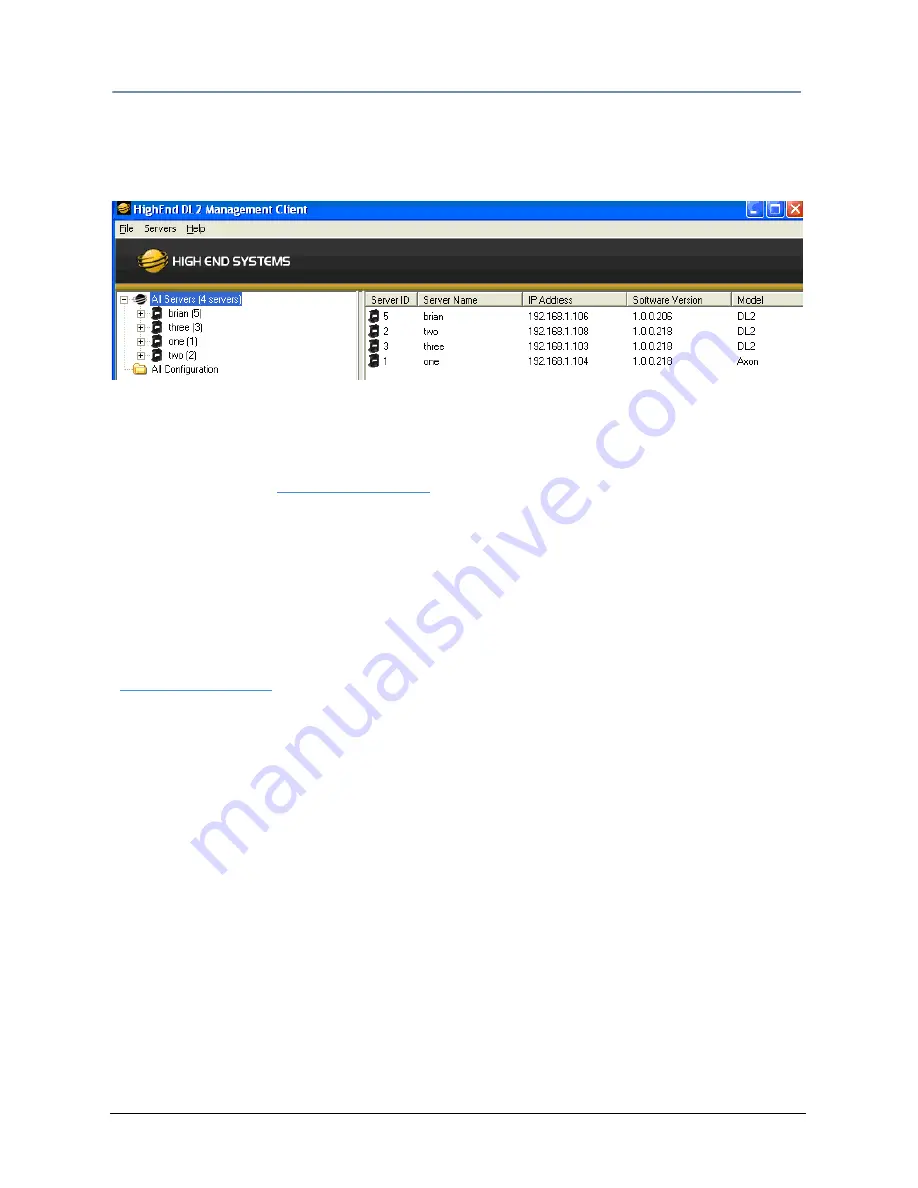
Page 149: ...tware Version Number Model identifies the fixture type Note Clicking in a column heading sorts the table according to the values in that column In the All Server view the drop down menu or a right cli...

Page 150: ...lso be provided through upgrades from High End Systems This content is read only You won t be able to download edit the DMX values or remove these files from the fixture Custom User Content You can cr...

Page 151: ...ned a unique DMX value between 150 255 Viewing Server Configuration Data Selecting an individual server from the list in the left pane displays all the configuration values for that server in the righ...

Page 152: ...iles in this collection Date the folder was last modified Viewing Files Selecting the actual media folder reveals its contents Name of the file This value is editable for User content See Naming and D...

Page 153: ...ng it Assigning DMX Values to User Content The DMX Value associated with each file and folder makes it easy to use the DMX control protocol to identify a unique media file or 3D object There are up to...

Page 154: ...ally assign any valid DMX value to your files or folders by selecting the file or folder in the right pane and then using the pull down menu or the right click popup selecting Edit DMX A dialog box wi...

Page 155: ...drive Drag and Drop Copy and Paste commands Cloning transfers the User Content files and their DMX value assignments from one DL 2 server to other server s on the fixture network Creating a Content A...

Page 156: ...rovided they are A valid file format jpg gif png bmp avi mpg m2v for Media Files x for 3D Object files You are uploading them to the appropriate User content folder on the DL 2 fixture server To uploa...

Page 157: ...een Fixtures The CMA can transfer both individual files or entire folders between fixtures The DMX values assigned to the files are transferred along with the files themselves You can also simultaneou...

Page 158: ...a later date Creating a Local Archive For CMA Running Windows XP 1 Under the FILE menu select Create Local Archive to launch the archiving wizard 2 Click on Add Media Folder This will add a media fold...

Page 159: ...the folder structure recognized by the CMA The Creative Local Archive compresses these files into a dlc format that can be recognized for uploading Use the following folder structure in preparing file...

Page 160: ...ed in that show with one operation To clone user content 1 In the Management Client Window select All Server in the left pane 2 Select the Server with the content you want to clone in the right pane 3...

Page 161: ...edia or object files The File DMX value for media or object files To view the DMX summary table 1 Select All Servers from the left pane of the Management Client Window 2 Select a Server in the right p...

Page 162: ...ture software can only be uploaded to fixtures from the CMA You must first save the latest version of the DL 2 fixture software from the High End Systems website www highend com to your hard drive and...

Page 163: ...Fixture ID various Projector settings DMX Start Channel etc can be modified configured All of these settings are available for each fixture through the fixture menu system see Chapter 3 The DL 2 Menu...

Page 164: ...ons in the left pane The right pane now displays configuration values for all the DL 2 servers on the fixture link in a sortable table Click in the column heading to sort by that column s values A sym...

Page 165: ...Current Temperature Read only Box Maximum Temperature Read only Box Minimum Temperature Read only Box Temperature Reset Pressing Reset restores value to Current Temperature CPU Current Temperature Re...

Page 166: ...r Temperature Reset Pressing Reset restores value to Current Temperature Head Current Temperature Read only Head Maximum Temperature Read only Head Minimum Temperature Read only Head Temperature Reset...

Page 167: ...p On On Off Projector Zoom Value 0 255 Upgrade Content Press Upgrade to upgrade stock content Restore Settings Press Restore to revert to factory fixture settings Self Test Focus On tests focus mechan...

Page 168: ...CHAPTER 14 Content Management Application CMA 148 DL 2 User Manual...

Page 169: ...crewdriver Gloves Protective eyewear Mild glass cleaner containing no ammonia and a soft lint free cotton cloth Pan and Tilt Locking The DL 2 fixture is equipped with mechanical pan and tilt locking l...

Page 170: ...etailed message concerning the large format Error Warning filter message The following messages will give you information regarding the status of the DL 2 filter system Filter Missing Error A filter n...

Page 171: ...turn screws on the top cover and remove the top cover 4 Slide the top cover back to free it from the front bezel Inspect the filters 5 Lift the prefilter away from the filter bracket 6 Remove the two...

Page 172: ...er turn screws 14 Carefully replace the rear bezel making sure to position but do not force the gasket against the lamp cover located on the back of the projector and Relatch the rear bezel assembly C...

Page 173: ...ove the back bezel 4 Loosen the two phillips head screws and open the lamp cover 5 Loosen the two phillips head screws grasping the handle and pull out the lamp assembly 6 Replace the lamp assembly se...

Page 174: ...eplace the fuse with a 5A slow blow fuse only 6 Replace the side and top panels Cleaning or Replacing the Front Window To access the front window 1 Remove the four phillips head screws two on each sid...

Page 175: ...river Boards The DL 2 fixture is designed with two motor driver boards 1 The board that controls the motors for the tilt focus zoom and iris functions as well as fans is located in the fixture head 2...

Page 176: ...the fixture undisturbed for 10 minutes while calibration occures Replacing Fixture Base Driver Board To replace motor driver board located in the fixture base housing 1 Disconnect power to the fixtur...

Page 177: ...n the second from the top and second from the bottom Tab Select buttons for more than two seconds opens the iris when the fixture software is not running to allow navigation for content upgrades and m...

Page 178: ...e up down arrows to scroll through the list in the top pane When an item is highlighted in the top pane the bottom pane details information associated with that error Supported Error Warning Messages...

Page 179: ...the end of it s rated life Replace soon Projector Communication Error PROJ COMM ERROR The system is unable to communicate to the Projector Check the Comm cable connections at serial port on the back o...

Page 180: ...re s Motion Control system is receiving power Location LED State Problem Description Fixture Head Card LD1 Steady Orange No S3 iris sensor open Red Green or OFF Yes Link communication error LD2 Slow F...

Page 181: ...L 2 If you re using the projector s on screen programming system you can override zoom and focus using the menu system see Projector Control on page 121 The LCD Menu display is off If the Blue LED is...

Page 182: ...generation of IP addresses is handled just as IP addresses are handled for Window networks Is there a limit to the Ethernet cable run length from the fixtures to the CMA Ethernet Cat 5 limit is 100 m...

Page 183: ...th will need to be updated All system restore operations require the DL 2 System Restore CD that ships with each DL 2 fixture If you have misplaced or damaged this CD you may contact High End Systems...

Page 184: ...restore depending on the speed of your USB DVD drive Partial System Restore Preserving Content A partial system restore will replace the following components Microsoft Windows Embedded Operating Syste...

Page 185: ...cessary you may need to use a USB hub although this should only be a requirement if you wish to use a mouse 3 Power on or reboot the DL 2 When you see Hit any key to boot from CD press a key on your k...

Page 186: ...m your selection Press Confirm and the restore will begin 7 Allow the restore to run This will take between 10 30 minutes depending on the speed of your USB drive Status will be displayed throughout t...

Page 187: ...gate in the DL 2 menu to the Rst tab Select the Upgrade Content button You will see the filenames scroll by as the content is copied to the fixture Wait until you see the Upgrade Successful message 12...

Page 188: ...CHAPTER 16 Restoring the System 168 DL 2 User Manual...

Page 189: ...peed See Appendix B for conversion tables 0 255 0 100 0 0 9 Macro Reserved for future use 0 255 0 100 0 0 10 Control Function Safe 0 9 NA 0 0 Fixture Movement and Camera Control Options Set Dimmer Cha...

Page 190: ...0 External RGBHV to Projector 221 224 NA Graphics Engine to Projector default 225 228 Changing Graphics Engine Inputs Set Dimmer Channel 0 S Video In to Graphic Engine Internal Camera to Camera Out 2...

Page 191: ...ed and Blue gain value adjustment 128 191 50 74 Reserved no change from previous state 192 255 75 100 18 Camera Orientation Flip OFF Mirror OFF 0 63 0 25 0 0 Flip OFF Mirror ON 64 127 26 50 Flip ON Mi...

Page 192: ...Mod2 green Mod3 blue 6 RGB Swap to GBR Mod1 red Mod2 green Mod3 blue 7 RGB Swap to BRG Mod1 red Mod2 green Mod3 blue 8 Solarize 1 If color value DMX value invert color Mod1 red Mod2 green Mod3 blue 9...

Page 193: ...d1 red Mod2 green Mod3 blue 26 Chromakey Medium Select key color using Mod1 red Mod2 green Mod3 blue 27 Chromakey Coarse Select key color using Mod1 red Mod2 green Mod3 blue 28 Chromakey Inverse Fine...

Page 194: ...y transparent Mod1 Color Scheme selection Mod2 Intensity bandwidth Mod3 1 128 makes selected intensity transparent 129 255 inverts transparency 45 Raindrop effect Mod1 controls size speed Mod2 seeds t...

Page 195: ...yellow 3 RGB Add all pixels Mod1 red Mod2 green Mod3 blue 4 RGB Add 2 all pixels Mod1 red Mod2 green Mod3 blue 5 RGB Add non black pixels Mod1 red Mod2 green Mod3 blue 6 RGB Swap to GBR Mod1 red Mod2...

Page 196: ...te Mod3 offset 24 Texture Ripple Asymmetrical Circular Mod1 size Mod2 rate Mod3 offset 25 Chromakey Fine Select key color using Mod1 red Mod2 green Mod3 blue 26 Chromakey Medium Select key color using...

Page 197: ...le maps pixel intensity to color Mod1 Color Scheme selection Mod2 Zero intensity point in color scheme Mod3 Fading 44 Intensity key turns pixels of selected intensity transparent Mod1 Color Scheme sel...

Page 198: ...ng from inside out 1 NA Rectangle closing from outside in 2 Rectangle closing from inside out 3 Checkerboard variation 1 4 Checkerboard variation 2 5 Radial wipe variation 1 6 Radial wipe variation 2...

Page 199: ...riation 1 138 Triangles variation 2 139 Rectangular wrap 140 Tiles closing in 141 Horizontal doors closing 142 Horizontal doors closing from opposing sides 143 Vertical doors closing from outside in 1...

Page 200: ...dge Fade Left Adjusts the image s left edge diffusion from hard edge 0 to maximum fade 255 0 255 0 100 0 0 Global Keystone Correction 38 Top Left X Move top left corner x value to center 0 255 0 100 0...

Page 201: ...aphic 3 11 Reserved 12 255 49 50 Viewpoint Position X Maximum horizontal angle clockwise 0 0 32768 50 Center 32768 50 Maximum horizontal angle counterclockwise 65535 100 51 52 Viewpoint Position Y Max...

Page 202: ...edia File No selection 0 0 0 0 First Media File 1 NA Additional Media Files 2 255 2 255 61 62 In Frame Defines the beginning of a media file segment as a percentage of the movie length 0 65535 0 100 0...

Page 203: ...on 3 12 Sync to object 1 and negative rotation 1 13 Sync to object 2 and negative rotation 2 14 Sync to object 3 and negative rotation 3 15 Reserved Defaults to mode 0 no selection 16 255 68 Sync To N...

Page 204: ...sual Mode from 0 to maximum 0 255 0 100 0 0 72 Effect Mode 1 Off no effects selection 0 0 0 0 CMY simulates CMY by subtracting RGB reduces color values Mod1 cyan Mod2 magenta Mod3 yellow 1 NA CMY Add...

Page 205: ...verted red Mod3 blue to inverted green 19 Edge Detect Color Mod1 horizontal size Mod2 vertical search size Mod3 comparison threshold 20 Edge Detect B W Mod1 horizontal size Mod2 vertical search size M...

Page 206: ...lens size 37 Cartoon Edge Mod1 Edge Color Mod2 Contrast Mod3 Edge detection sensitivity 38 Color DeConverge Mod1 Moves red up Mod2 Moves green down and right Mod3 Moves blue down and left 39 Horizonta...

Page 207: ...Wobbulation Mod1 size Mod2 rate Mod3 offset 68 Sinewave Horizontal with Z axis Wobbulation Mod1 size Mod2 rate Mod3 offset 68 Sinewave Vertical with X axis Wobbulation Mod1 size Mod2 rate Mod3 offset...

Page 208: ...d3 blue 9 Solarize 2 if color value DMX invert color Mod1 red Mod2 green Mod3 blue 10 Solarize if color value DMX set color to 0 Mod1 red Mod2 green Mod3 blue 11 Solarize 4 if color value DMX set colo...

Page 209: ...using Mod1 red Mod2 green Mod3 blue 28 Chromakey Inverse Fine Select key color using Mod1 red Mod2 green Mod3 blue 29 Chromakey Inverse Medium Select key color using Mod1 red Mod2 green Mod3 blue 30 C...

Page 210: ...eeds the random number generator and Mod3 controls raindrop rate 46 Scale RGB Mod1 scale red Mod2 scale green Mod3 scale blue Maximum of Mod1 Mod2 and Mod3 sets overall color range 47 Tiling On Scaler...

Page 211: ...tation around X axis fast to slow 0 16382 0 24 32768 50 Continuous rotation stop 16383 25 Rotates the object counterclockwise around X axis in steps to 720 degrees absolute 16384 32767 26 49 0 rotatio...

Page 212: ...50 Increases object size along X axis from minimum to actual size 1 127 1 49 Actual size along X axis 1 1 128 50 Increases object size along X axis from actual to maximum size 129 254 51 99 Maximum o...

Page 213: ...5 51 100 91 92 Y Position Moves object down from center of display 0 36767 0 49 32768 50 Centers object along Y axis in display 32768 50 Moves object up from center of display 36769 65535 51 100 93 94...

Page 214: ...e No selection 0 0 0 0 First Media File 1 NA Additional Media Files 2 255 2 255 99 100 In Frame Defines the beginning of a Media File segment as a percentage of the movie length 0 65535 0 100 0 0 101...

Page 215: ...on 3 12 Sync to object 1 and negative rotation 1 13 Sync to object 2 and negative rotation 2 14 Sync to object 3 and negative rotation 3 15 Reserved Defaults to mode 0 no selection 16 255 106 Sync To...

Page 216: ...isual Mode from 0 to maximum 0 255 0 100 0 0 110 Effect Mode 1 Off no effects selection 0 0 0 0 CMY simulates CMY by subtracting RGB reduces color values Mod1 cyan Mod2 magenta Mod3 yellow 1 NA CMY Ad...

Page 217: ...verted red Mod3 blue to inverted green 19 Edge Detect Color Mod1 horizontal size Mod2 vertical search size Mod3 comparison threshold 20 Edge Detect B W Mod1 horizontal size Mod2 vertical search size M...

Page 218: ...lens size 37 Cartoon Edge Mod1 Edge Color Mod2 Contrast Mod3 Edge detection sensitivity 38 Color DeConverge Mod1 Moves red up Mod2 Moves green down and right Mod3 Moves blue down and left 39 Horizonta...

Page 219: ...Wobbulation Mod1 size Mod2 rate Mod3 offset 68 Sinewave Horizontal with Z axis Wobbulation Mod1 size Mod2 rate Mod3 offset 68 Sinewave Vertical with X axis Wobbulation Mod1 size Mod2 rate Mod3 offset...

Page 220: ...d3 blue 9 Solarize 2 if color value DMX invert color Mod1 red Mod2 green Mod3 blue 10 Solarize if color value DMX set color to 0 Mod1 red Mod2 green Mod3 blue 11 Solarize 4 if color value DMX set colo...

Page 221: ...using Mod1 red Mod2 green Mod3 blue 28 Chromakey Inverse Fine Select key color using Mod1 red Mod2 green Mod3 blue 29 Chromakey Inverse Medium Select key color using Mod1 red Mod2 green Mod3 blue 30 C...

Page 222: ...seeds the random number generator and Mod3 controls raindrop rate 46 Scale RGB Mod1 scale red Mod2 scale green Mod3 scale blue Maximum of Mod1 Mod2 and Mod3 sets overall color range 47 Tiling On Scale...

Page 223: ...rotation around X axis fast to slow 0 16382 0 24 32768 50 Continuous rotation stop 16383 25 Rotates the object counterclockwise around X axis in steps to 720 degrees absolute 16384 32767 26 49 0 rotat...

Page 224: ...50 Increases object size along X axis from minimum to actual size 1 127 1 49 Actual size along X axis 1 1 128 50 Increases object size along X axis from actual to maximum size 129 254 51 99 Maximum o...

Page 225: ...51 100 129 130 Y Position Moves object down from center of display 0 36767 0 49 32768 50 Centers object along Y axis in display 32768 50 Moves object up from center of display 36769 65535 51 100 131...

Page 226: ...File No selection 0 0 0 0 First Media File 1 NA Additional Media Files 2 255 2 255 137 138 In Frame Defines the beginning of a Media File segment as a percentage of the movie length 0 65535 0 100 0 0...

Page 227: ...on 3 12 Sync to object 1 and negative rotation 1 13 Sync to object 2 and negative rotation 2 14 Sync to object 3 and negative rotation 3 15 Reserved Defaults to mode 0 no selection 16 255 144 Sync To...

Page 228: ...isual Mode from 0 to maximum 0 255 0 100 0 0 148 Effect Mode 1 Off no effects selection 0 0 0 0 CMY simulates CMY by subtracting RGB reduces color values Mod1 cyan Mod2 magenta Mod3 yellow 1 NA CMY Ad...

Page 229: ...verted red Mod3 blue to inverted green 19 Edge Detect Color Mod1 horizontal size Mod2 vertical search size Mod3 comparison threshold 20 Edge Detect B W Mod1 horizontal size Mod2 vertical search size M...

Page 230: ...lens size 37 Cartoon Edge Mod1 Edge Color Mod2 Contrast Mod3 Edge detection sensitivity 38 Color DeConverge Mod1 Moves red up Mod2 Moves green down and right Mod3 Moves blue down and left 39 Horizonta...

Page 231: ...Wobbulation Mod1 size Mod2 rate Mod3 offset 68 Sinewave Horizontal with Z axis Wobbulation Mod1 size Mod2 rate Mod3 offset 68 Sinewave Vertical with X axis Wobbulation Mod1 size Mod2 rate Mod3 offset...

Page 232: ...d3 blue 9 Solarize 2 if color value DMX invert color Mod1 red Mod2 green Mod3 blue 10 Solarize if color value DMX set color to 0 Mod1 red Mod2 green Mod3 blue 11 Solarize 4 if color value DMX set colo...

Page 233: ...using Mod1 red Mod2 green Mod3 blue 28 Chromakey Inverse Fine Select key color using Mod1 red Mod2 green Mod3 blue 29 Chromakey Inverse Medium Select key color using Mod1 red Mod2 green Mod3 blue 30 C...

Page 234: ...seeds the random number generator and Mod3 controls raindrop rate 46 Scale RGB Mod1 scale red Mod2 scale green Mod3 scale blue Maximum of Mod1 Mod2 and Mod3 sets overall color range 47 Tiling On Scale...

Page 235: ...rotation around X axis fast to slow 0 16382 0 24 32768 50 Continuous rotation stop 16383 25 Rotates the object counterclockwise around X axis in steps to 720 degrees absolute 16384 32767 26 49 0 rotat...

Page 236: ...50 Increases object size along X axis from minimum to actual size 1 127 1 49 Actual size along X axis 1 1 128 50 Increases object size along X axis from actual to maximum size 129 254 51 99 Maximum o...

Page 237: ...51 100 167 168 Y Position Moves object down from center of display 0 36767 0 49 32768 50 Centers object along Y axis in display 32768 50 Moves object up from center of display 36769 65535 51 100 169...

Page 238: ...APPENDIX A DL 2 DMX Protocol 218 DL 2 User Manual...

Page 239: ...85 D9 6 25 216 85 D8 6 56 215 84 D7 6 89 214 84 D6 7 22 213 84 D5 7 56 212 83 D4 7 91 211 83 D3 8 27 210 82 D2 8 63 209 82 D1 9 00 208 82 D0 9 39 207 81 CF 9 77 206 81 CE 10 17 205 80 CD 10 58 204 80...

Page 240: ...32 52 121 5v 81 32 51 122 91 80 31 50 124 31 79 31 4F 125 73 78 31 4E 127 15 77 30 4D 128 58 76 30 4C 130 02 75 29 4B 134 39 72 28 48 135 86 71 28 47 137 34 70 27 46 138 82 69 27 45 140 32 68 27 44 1...

Page 241: ...ames since it s a progressive display device not interlaced End of sequence Sequence Style All the encoders have demos and will batch encode ExpertHD need a small script and a settings file to batch e...

Page 242: ...ubobjects as long as item 4 is followed An example would be an object composed of an array of disconnected spheres or cubes Managing Custom Content The Content Management Application running on your o...

Page 243: ...mm 23 4in x 23 6in x 35 9in Weight 53 5 kg 118 lbs Road Case Dimensions 699mm x 724 mm x 1080mm 27 5in x 28 5in x 42 5in Weight Fixture Roadcase 107 5kg 237lbs 254 mm 10 0 in 254 mm 10 0 in 35 9 in 91...

Page 244: ...ness uniformity 90 Contrast ratio 1200 1 full on full off Display technology 1 3 LCD w MLA 3 panels Panel resolution 1024 x 768 dots Zoom Lens Throw Ratio 1 8 2 4 1 Camera Module Specification Constru...

Page 245: ...tance 20 Ohm 100 ft Nominal impedance 100 140 Ohm Connectors Two 5 pin male and female XLR connectors Pin 1 Ground Pin 2 Data Pin 3 Data Pin 4 Secondary data Pin 5 Secondary data Terminator 5 pin male...

Page 246: ...APPENDIX D DL 2 Specifications 226 DL 2 User Manual...

Page 247: ...coloured markings identifying the terminals in your plug proceed as follows the core which is coloured green and yellow must be connected to the terminal in the plug which is marked with the letter E...

Page 248: ...es 1 Si cet quipement est livr sans prise de cable veuillez connecter la prise de cable correcte selon le code suivant marron phase bleu neutre vert jaune terre 2 D brancher le courant avant de change...

Page 249: ...erhalten wurde ist der entsprechende Netzkabelstecker entsprechend dem folgenden Code anzubringen Braun Unter Spannung stehend Blau Neutral Gr n Gelb Erde 2 Vor dem Austauschen von Lampen oder vor Wa...

Page 250: ...te equipo sin el conector de alimentacion monte usted el conector correcto seg n ia clave siguente moreno vivo azul neutral verde amarillo tierra 2 Desconecte el suministro de energ a antes de cambiar...

Page 251: ...fiammabile 2 Mantenere l apparecchio a un minimo di 1 0 metri 3 28 piedi di distanza dai materiali combustibili 3 Sostituire i fusibili usando soltanto quelli del tipo e della taratura adatta 4 Manten...

Page 252: ...APPENDIX E Safety Information 232 DL 2 User Manual...

Reviews: