4 Planning and installation – Installing the heating system
46
18.
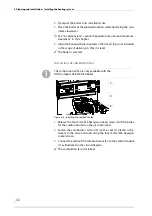
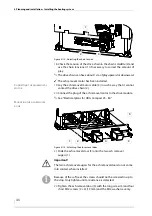
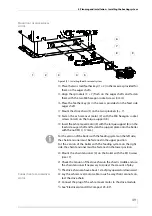
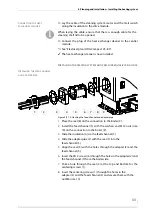
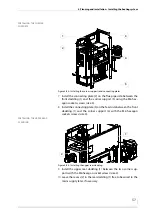
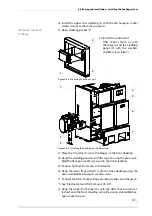
Check the tension of the drive chain in the chain’s middle (2) and
use the chain tensioner (1) if necessary to correct the amount of
play.
✎
The drive chain can have about 1 cm of play upward or downward.
✓
The ash removal motor has been installed.
C
ONNECTING
THE
ASH
REMOVAL
MOTOR
19.
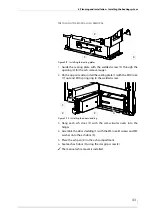
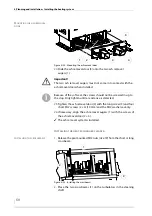
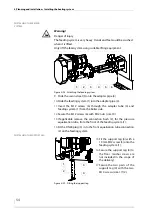
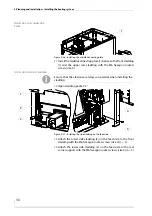
Lay the ash removal motor cable (3) in such a way that it cannot
contact the drive chain (2).
20.
Connect the plug of the ash removal motor to the drive module.
✎
See “Electrical plans for HDG Compact 25 - 80”.
M
OUNTING
THE
ASH
REMOVAL
DOOR
21.
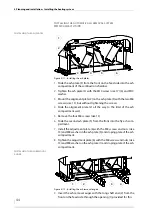
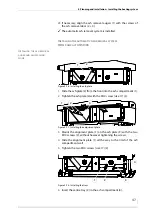
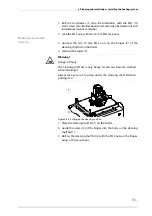
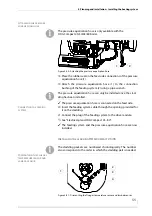
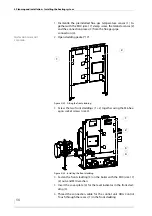
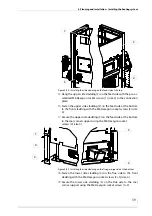
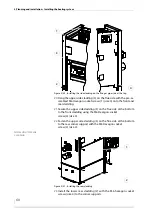
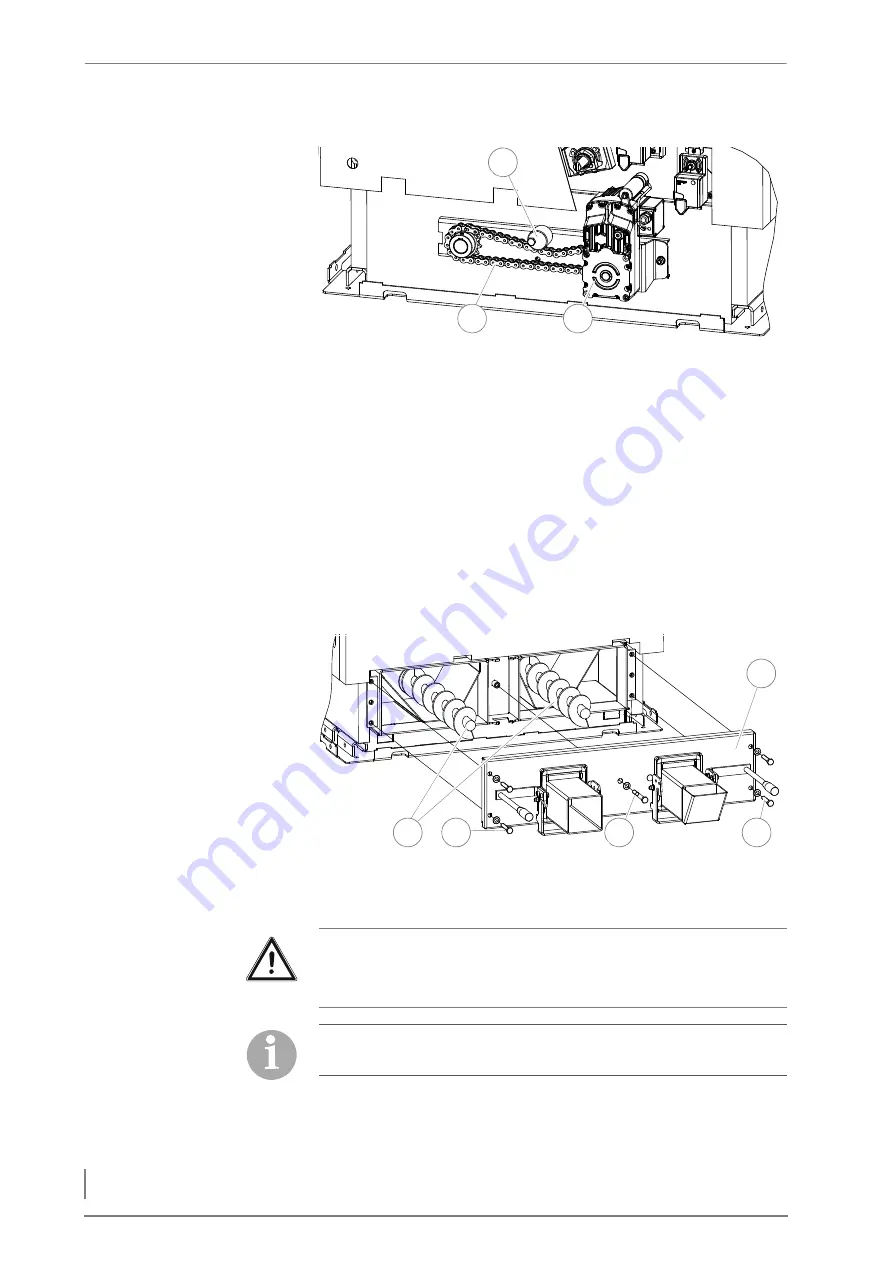
Slide the ash removal door (5) onto the two ash removal
augers (1).
22.
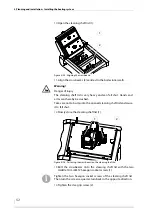
Tighten the ash removal door (5) with the long screw (3) and four
short M12 screws (2 + 4) (19 mm) and the M12 washers evenly.
Figure 4/14 - Adjusting the chain tension
1
2
3
Figure 4/15 - Attaching the ash removal door
5
4
3
1
2
Important!
The two ash removal augers for the ash removal door do not come
into contact when installed.
Because of the soft seal, the screws should not be screwed in up to
the stop. Only tighten until a resistance is detected.


