


4 Planning and installation – Installing the heating system
41
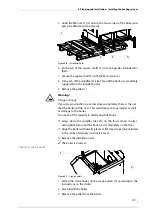
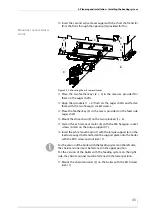
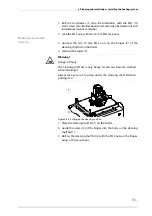
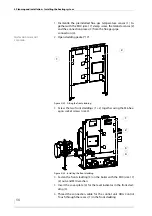
5.
Undo the M8 (size 13) (2) nuts in the four corners of the boiler and
press the M8 screws downwards.
6.
Push each of the square shafts (3) into the guides intended for
them.
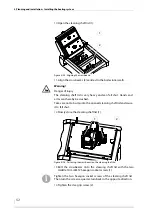
7.
Secure the square shaft (3) with the M12 screw (2).
8.
Turn each of the spindles (4) (size 24) until the boiler is completely
supported on the installation aid.
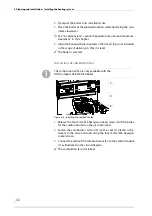
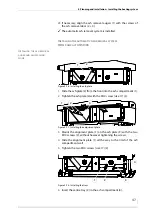
9.
Remove the pallet (1).
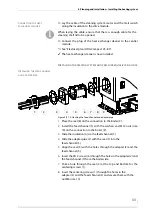
10.
Screw down the spindles (size 24) on the four corners in alter-
nating brief turns until the boiler rests completely on the floor.
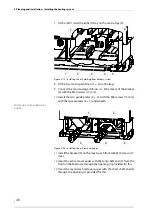
11.
Align the boiler with plastic plates or flat steel strips (not included
in the scope of delivery) so that it is level.
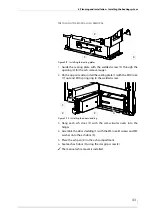
12.
Remove the installation aid.
✓
The boiler is erected.
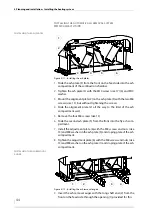
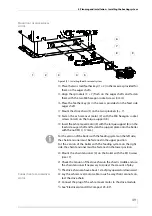
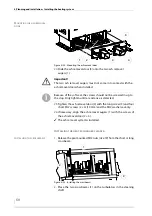
T
RANSPORT
WITH
A
CRANE
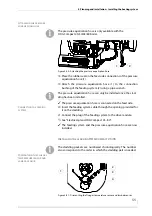
1.
Fasten the crane hooks on the crane eyelets (3) according to the
instructions on the sticker.
2.
Carefully lift the boiler.
3.
Remove the pallet from the boiler.
Figure 4/6 - Installation aid
4
1
3
2
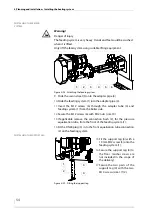
Warning!
Danger of injury
If you screw a spindle on a corner down completely, there is the risk
that the boiler will tip over. This could cause serious injuries as well
as damage to the boiler.
Turn each of the spindles in alternating brief turns.
Figure 4/7 - Crane eyelets
2
1