18
Ver 1.2
4.3. Initial Startup
When the device is first powered on, it boots into the startup interface. This interface guides you step by step
through the device setup process. You can configure the language of usage, time zone, date & time settings. At
this time, the tablet also connects to the internet using any available data network via the SIM cards. If no
network is available, then you get an option to connect to any available Wi-Fi network. Optionally, you may also
associate a Google account with the device at this time. Doing this is highly recommended. A Google account is
required for using many pre-installed Google applications like Gmail. A Google account is required for installing
applications from the Google Play Store.
Once you are through the setup process, then the device is ready to use.
4.4. Home Screen
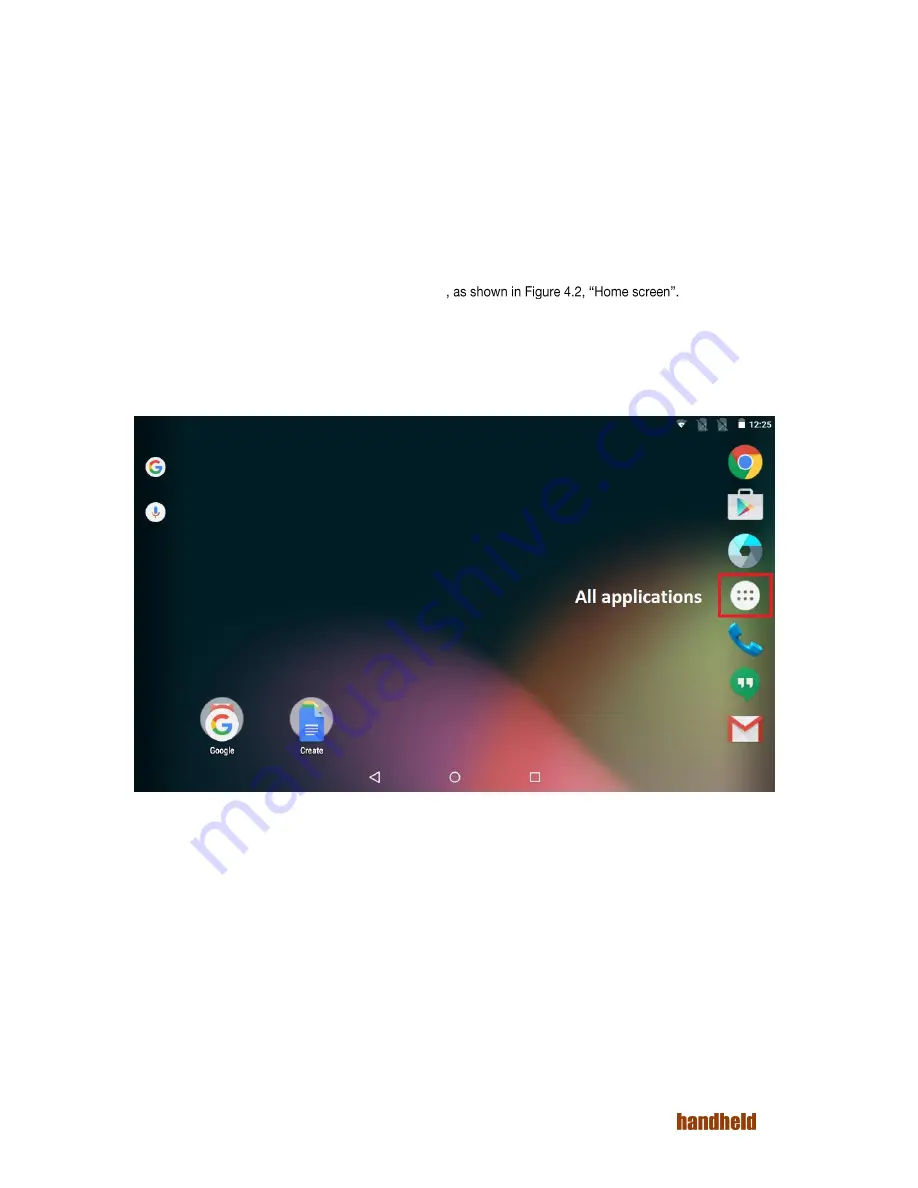
The tablet boots to the home screen after initial startup
You can start various applications by touching their icons.
The top of the screen is the status bar, which shows:
o
On the right side, the current system time, battery status and connectivity status.
o
On the left side, notification icons. To see notifications, swipe down with a finger.
To see the all the installed applications, touch the icon at the center.
FIGURE 4.2. HOME SCREEN
Summary of Contents for ALGIZ RT7
Page 1: ...ALGIZ RT7 MANUAL ...
Page 5: ...5 Ver 1 2 10 2 Arcontia RFID Module eTicket version only 56 11 Barcode Scanner 58 12 USB 59 ...
Page 10: ...10 Ver 1 2 ...
Page 27: ...27 Ver 1 2 Figure 5 11 Paired devices list FIGURE 5 12 BLUETOOTH SETTINGS MENU ...
Page 29: ...29 Ver 1 2 FIGURE 5 14 SELECT POWER CLASS FIGURE 5 15 BLUETOOTH STATUS ...
Page 32: ...32 Ver 1 2 FIGURE 5 19 STATIC IP CONFIGURATION DIALOG FIGURE 5 20 ETHERNET PROPERTIES ...
Page 60: ......


