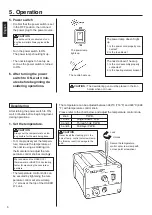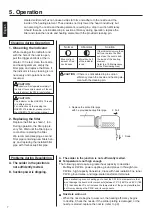
6
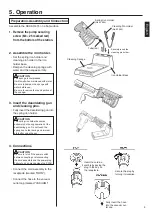
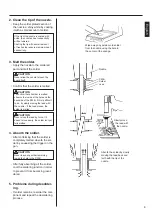
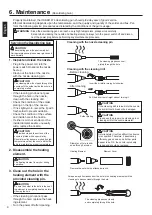
Wipe away any oxide or old solder
from the nozzle using the hole in
the center of the sponge.
2. Clean the tip of the nozzle.
• Keep the solder-plated section of
the nozzle a shiny white by coating
it with a small amount of solder.
If the tip of the nozzle is coated with
oxide, the nozzle’s heat conductivity
will be lowered.
Coating the tip with a small amount
of fresh solder ensure maximum heat
conductivity.
3. Melt the solder.
• Apply the nozzle to the soldered
part and melt the solder.
CAUTION
Never allow the nozzle to touch the
board itself.
• Confirm that the solder is melted.
CAUTION
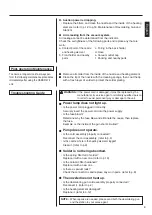
To confirm that all solder is melted,
observe the inside of the hole and the
backside of the P.W.B. If this is difficult
to do, try slowly moving the lead with
the nozzle – If the lead moves, the
solder is melted.
CAUTION
Never move the lead by force. If it
doesn’t move easily, the solder isn’t yet
fully melted.
4. Absorb the solder.
• After confirming that the solder is
completely melted, absorb the sol-
der by squeezing the trigger on the
gun.
CAUTION
Never leave any solder remaining
inside the hole in the P.W.B.
• After fully absorbing all the solder,
cool the soldering junction in order
to prevent it from becoming resol-
dered.
5. Problems during desolder-
ing.
• If solder remains, resolder the com-
ponent and repeat the desoldering
process.
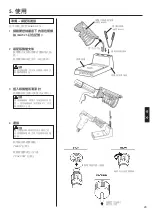
Nozzle
P.W.B.
Solder
Lead
Slowly move
the lead with
the nozzle.
Absorb the solder by slowly
moving the lead back and
forth with the tip of the
nozzle.
English
Summary of Contents for 474
Page 19: ...3 18 1 2 M4 25 380 480 HAKKO...
Page 21: ...20 5 B1094 B1095 HAKKO 474 1 M4 25 2 3 4 IRON VACUUM...
Page 22: ...21 1 2 1 2 5 6 3 5 3 1 HAKKO 191 HAKKO 192 HAKKO 474 380 480 1 2 3 4 5 6...
Page 23: ...22 2 3 4 5...
Page 24: ...23 1 HAKKO 475 HAKKO 475 HAKKO 475 2 1 3 3 2 1 A B A 70 80 25 25 5 25...
Page 25: ...24 HAKKO 474 B 25_26 20 25 26 24 20 28 a b c d e f...
Page 26: ...6 25 HAKKO 474 1 2 3...
Page 27: ...26 6 A1033 A1033 4 A1033 5...
Page 28: ...27 1 A1009 2 1 2 3 A1009 S20 6 VACUUM...
Page 29: ...28 7 23 2 4 1 2 3 4 24V 50W 5 1 3 CAL 380 CAL...


