


4. Installation
Do not install the product in a location subject to high temperature (over 50°C), low temperature (below -10°C),
or high humidity. Doing so may cause fire or electric shock. Keep out of direct sunlight and heat radiation
sources. This may cause fire. Avoid aiming the camera directly towards extremely bright objects such as the sun,
as this may damage the image sensor.
Do not install the unit in humid, dusty or sooty locations. Doing so may cause fire or electric shock. Install it in a
place with good ventilation.
When installing the unit, fasten it securely and firmly. A falling unit may cause personal injury.
If you want to relocate the already installed product, be sure to turn the power off and then move or reinstall it.
4.1. Preparation for Dome Camera Setup
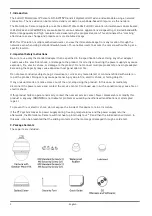
Please note that there will be a PE covering and PE cloth sheets on the dome cover. Furthermore, there will be a
protective covering on the camera and PE cloth sheets on the camera body and a lens cap on the lens for
shipping protection. Follow the steps below to remove those protective materials.
Step 1: Unpack the dome package and take out the dome body.
Step 2: Rotate and remove the protective cover and the PE cloth sheets from the camera body and take off the
lens cap.
Step 3: Remove the PE covering and the cloth sheets from the dome cover.
Step 4: Attach the dome cover to the dome body.
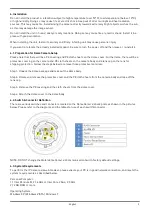
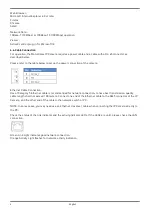
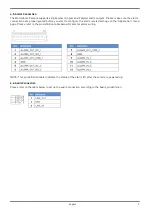
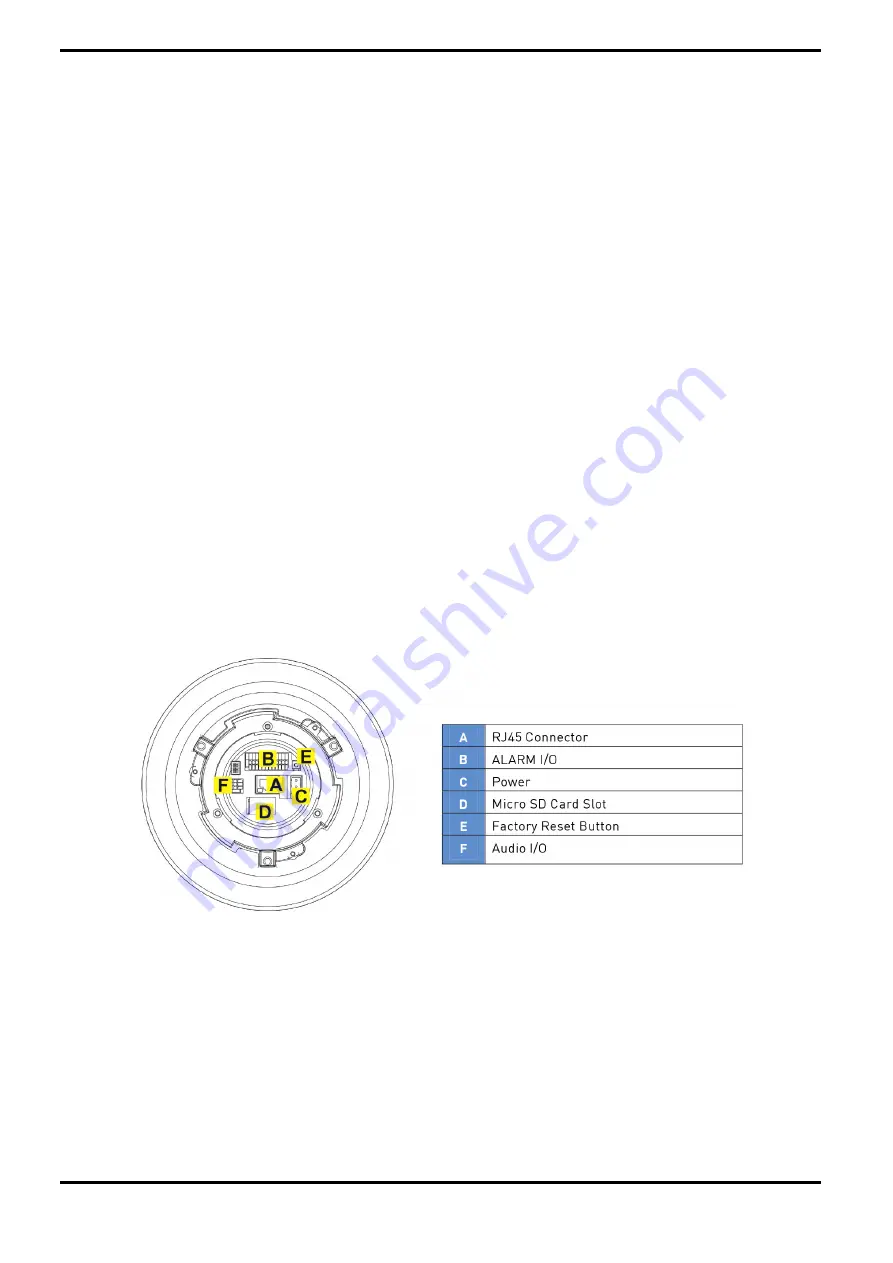
4.2. Switch & Connector Definition
There are various switches and connectors located on the Dome Camera’s back plate as shown in the pictures
below. Please refer to the diagrams and the tables for use of each switch/connector.
NOTE: DO NOT change the Motordome Camera’s Communication Switch factory default settings.
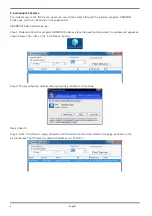
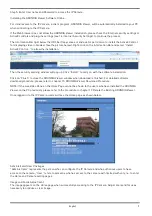
4.3. System Requirements
To perform the IP Camera via web browser, please ensure your PC is in good network connection, and meets the
system requirements as described below.
Personal Computer :
1.) Intel Pentium M, 2.16 GHz or Intel Core 2 Duo, 2.0 GHz
2.) 2 GB RAM or more
Operating System :
Windows XP / Windows VISTA / Windows 7
3
English
Summary of Contents for GCI-K2795P
Page 2: ......
Page 13: ...11 English ...
Page 14: ...Click on Save to confirm the setting 12 English ...
Page 97: ...95 English ...


