


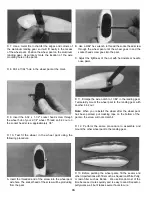


Fuselage and Tail:
1 1/4" strips at fin and stab as described
2 Aft fuselage bottom
3 Forward fuselage bottom
4 Fuselage right side up to the top center of the turtle
deck and center of nose
5. Fuselage left side up to the top center of the turtle deck
and center of nose, overlapping by 1/8"
6 Fin TE followed by stab tip and TE
7 Stab bottom, followed by top
8 Fin right side, followed by the left side
9 Elevator LE and root ends
10 Elevator bottoms, followed by the top
11 Rudder LE, right side followed by the left side
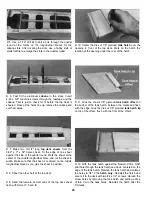
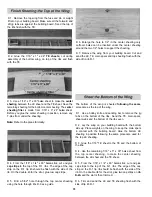
Wing:
1 Tips of bottom wing
2 Trailing edges of bottom wing
3 Bottom right, followed by the left wing panel
4 Top right, followed by the left wing panel
5 Tips of top wing
6 Trailing edges of top wing
7 Bottom right followed by the left wing panel
8 Top right, followed by the left wing panel
9 Aileron tips, followed by the bottom and top of
the ailerons
After the model is covered, use fuelproof model paint,
30-mmute epoxy thinned with alcohol or finishing resin to
coat areas that may be exposed to raw fuel or exhaust
residue such as the firewall and wing saddle
Top Flite LustreKote fuelproof paint is recommended for
painting all ABS plastic and aluminum parts At least one
coat of LustreKote primer is highly recommended to fill in
small scratches left from sanding as well as small pin holes
in the f i l l e r Wet sand between coats with 400-gnt
sandpaper and apply a second coat of primer if necessary
Before painting the canopy use a scissors or a hobby knife
to trim along the molded cut lines True the edges with your
bar sander and 220-grit sandpaper Use 400-gnt
sandpaper to scuff the frame portion of the canopy so the
paint will stick We recommend you paint the canopy frame
with Pactra Formula-U or Chevron Perfect Paint Use
masking tape or frisket film to cover the portion of the
canopy that is not to be painted If you are not sure that the
paint is compatible with the clear canopy, test the paint on
a leftover piece of canopy material For painting the pilot,
we have discovered that acrylic water base paints such as
the types found at craft stores work great The acrylic
paints look realistic on the pilots because they are flat Best
of all, they cleanup with water We covered the cockpit
floor, sides and backrest with 600-gnt sandpaper glued in
place with 3M Super 77 spray adhesive
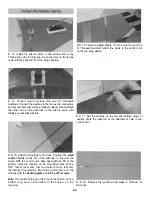
1 Starting with the elevators and stab, cut the covering
from the hinge slots
Installing CA Hinges
The hinge material supplied in this kit consists of a
3-layer lamination of mylar and polyester It is specially
made for the purpose of hinging model airplane control
surfaces Properly installed, this type of hinge provides
the best combination of strength, durability and ease of
installation We trust even our best show models to
these hinges, but it is essential to install them correctly.
Please read the following instructions and follow them
carefully to obtain the best results These instructions
may be used to effectively install any of the various
brands of CA hinges
The most common mistake made by modelers when
installing this type of hinge is not applying a sufficient
amount of glue to fully secure the hinge over its entire
surface area, or, the hinge slots are very tight, restricting
the flow of CA to the back of the hinges This results in
hinges that are only "tack glued approximately 1/8" to
1/4" into the hinge slots The following technique has been
developed to help ensure thorough and secure gluing
Drill a 3/32" hole, 1/2" deep, in the center of the hinge
slot. If you use a Dremel" MultiPro" for this task, it will
result in a cleaner hole than if you use a slower speed
drill Drilling the hole will twist some of the wood fibers
into the slot, making it difficult to insert the hinge, so you
should reinsert the knife blade, working it back and forth
a few to clean out the slot
38


