2. D GLUE THE 1/16" PLYWOOD LANDING GEAR SUP-
PORTS TO THE RIBS
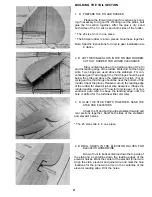
Start on the right wing panel by gluing the 1/16 ply
brace on the left side of rib 2 and on the right side of rib 3.
(For the left panel the brace glues on the right side of rib 2
and on the left side of rib 3.) When the glue is dry sand the
braces to the rib contour. Note that the landing gear block
will be flush with the bottom sheeting not the bottom of
the rib. (Conventional gear locations are shown through-
out the instructions.)
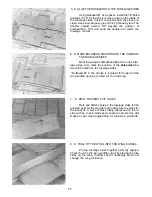
3. D PIN THE BOTTOM SPAR OVER THE PLANS; PLACE
RIBS ON THE SPAR
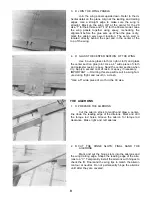
Pin the bottom spar on the waxed paper covered
plans. Temporarily install all the ribs to the spar making
sure they are 90 degrees to the building board and that the
landing gear notches are down. (Waxed paper is not shown
for clarity.)
4. D GLUE THE TRAILING EDGE TO THE RIBS; GLUE
THE RIBS TO THE BOTTOM SPAR
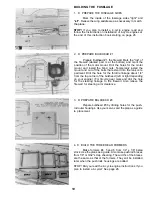
For the 40 size, align the top edge of the trailing
edge stock to the top edge of the building shim (see size
below). For the 20 and 60 size, align the trailing edge to the
top of the shim as shown in the drawing below. Use waxed
paper in between the shim and the trailing edge and pin
them together. Center the trailing edge to the rib ends.
Glue the trailing edge to the ribs with the shim pinned to the
work surface. Glue the ribs to the bottom spar. DO NOT
GLUE THE SHIM TO THE TRAILING EDGE! USE THE
SHIM AGAIN WHEN YOU BUILD THE LEFT WING PANEL.
Shim Sizes:
20 = 1/4 x 5/8
40 = 3/32 x 7/8
60 = 1/4 x 3/4
5. D GLUE THE RIBS TO THE LEADING EDGE
Use a straight edge and draw a straight line on the back
of the leading edge about 3/32" from the top. Using 1/4 x 1/4 x 36
balsa stock as a shim under the leading edge (for the 40 size),
align the top of the ribs to the line and glue them in place to the
leading edge. The leading edge is intentionally wider than
necessary to allow for slight warpage. Do not fight a slight warp
but instead glue the leading edge to the ribs making sure there is
at least 3/32" above and below the ribs for sheeting. Later the
excess will be carved off.
* Use an 1/8" shim for the 20 size.
* Use a 5/8" shim for the 60 size.
4
Summary of Contents for Super Sportster 20
Page 33: ...33...
Page 34: ...34...
Page 35: ...35...
Page 36: ...36...
Page 37: ...37...
Page 41: ...Use trim MonoKote and these letters to create your trim scheme on your Sportster 41...
Page 43: ...PUSHROD LINKAGES 43...

