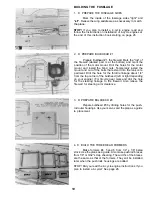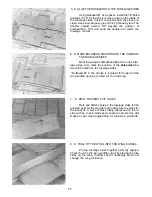
17. D GLUE THE FUSELAGE TO THE DECK BASE
Glue the fuselage sides/bulkhead assembly to the
deck base/former assembly. Fuselage sides are glued to
the sides of the deck base and the sides of the formers.
The deck base should glue to the rear of bulkhead #3.
DO NOT GLUE THE FUSELAGE TOGETHER AT THE TAIL
UNTIL YOU READ THE NEXT STEP!
18. D GLUE THE HINGE TO THE FUSELAGE TAIL;
GLUE THE FUSELAGE SIDES TOGETHER AT
THE TAIL
Glue the fuselage sides together at the tail. Con-
ventional gear-glue the rudder hinge just below stab place-
ment. Use the rudder hinge slot as a guide to placement.
Do not glue the area at the tail where the tail wheel strut
mounting tab will glue later. (Tricycle gear-glue the bottom
hinge at the tail at this time. Use the rudder as a guide to
placement.)
late glue, glue both elevator and rudder housings in place
except at bulkhead #3. This will be glued later when the
servos are installed. You may trim the housings at the exits
now.
IMPORTANT NOTE: The pushrods supplied in this kit are steel rod-in-a-tube type We strongly recommend that you use these pushrods,
installing them as straight as possible, as they provide a very rigid
linkage between the servos and the control surfaces We do not
recommend the use of flexible plastic inner pushrods for this
model, as their elasticity may result in control surface flutter. See page
43 for recommended pushrod hookups.
20. D GLUE IN 1/4" BRACING AT THE TAIL
Glue 1/4" triangle stock (1/4" x 1/4" for the 20 size) at the
bottom sides of the deck base between former #6 and the tail.
Angle cut the ends of the tri stock at the tail for a good glue joint.
14
Summary of Contents for Super Sportster 20
Page 33: ...33...
Page 34: ...34...
Page 35: ...35...
Page 36: ...36...
Page 37: ...37...
Page 41: ...Use trim MonoKote and these letters to create your trim scheme on your Sportster 41...
Page 43: ...PUSHROD LINKAGES 43...

