KayakDD-1 Digital Production Switcher
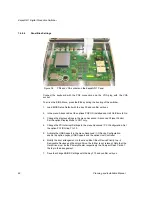
4. Push the battery forward
5. Close frame and fasten all screws.
7.4.9.2
Open KayakDD-1 Panel
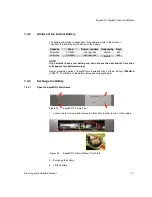
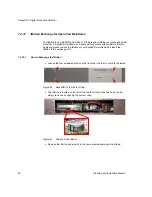
1. Loosen the twelve screws around the panel (on every side three).
Figure 35
KayakDD-1 Control Panel
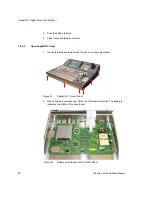
2. When all screws are loosened, lift the top of the panel carefully. The battery is
located in the middle of the base board
Figure 36
Battery on the Board of the Control Panel
80
Planning and Installation Manual
Summary of Contents for KayakDD-1
Page 8: ...KayakDD 1 Digital Production Switcher Planning and Installation Manual 7 ...
Page 9: ...KayakDD 1 Digital Production Switcher 8 Planning and Installation Manual ...
Page 11: ...KayakDD 1 Digital Production Switcher 10 Planning and Installation Manual ...
Page 15: ...KayakDD 1 Digital Production Switcher 14 Planning and Installation Manual ...
Page 33: ...KayakDD 1 Digital Production Switcher 32 Planning and Installation Manual ...
Page 89: ...KayakDD 1 Digital Production Switcher 88 Planning and Installation Manual ...
Page 90: ...KayakDD 1 Digital Production Switcher Planning and Installation Manual 89 ...

