


96
System Configuration
Adding Fonts to a Kaleido
-
IP
3 Click
Configure
, under
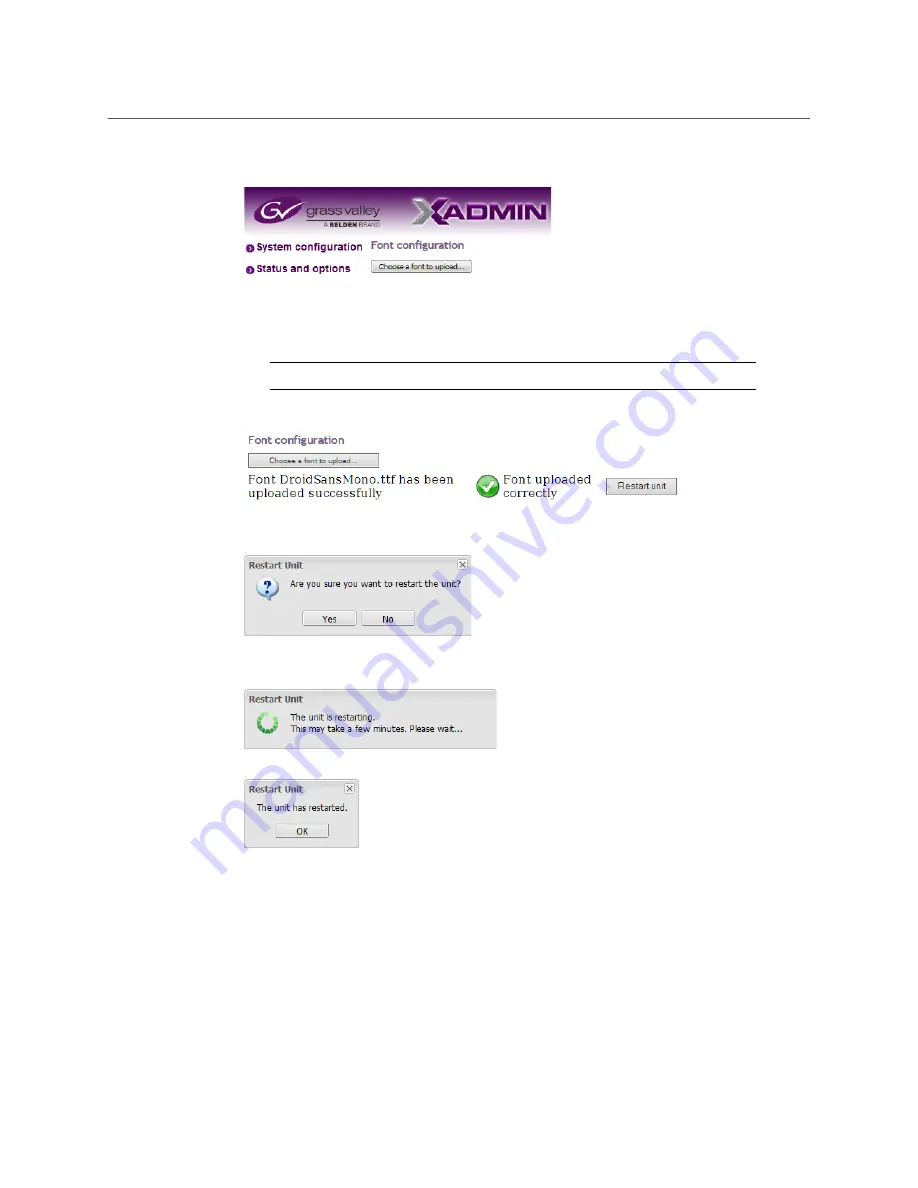
Font configuration
.
The “Font configuration” page appears.
4 Click
Choose a font to upload
.
A file chooser window appears.
5 Navigate to the font file you want to upload, select it, and then click
Open
.
A progress indicator appears momentarily, followed by a confirmation message.
6 Click
Restart unit
.
The system prompts you to confirm.
7 Click
Yes
to proceed.
Your multiviewer will shut down, and then start again. This may take a while.
Once the multiviewer has restarted, the system notifies you.
8 Click
OK
.
The XAdmin
Status and Options
page appears.
9 Make sure the same font is available on the client PC where you use XEdit. (To install a
font on Windows 7 or later, right-click the TTF file, and then click
Install
.)
10 Close XEdit and then open it again.
The new fonts are now available, if you:
• Connect XEdit to the multiviewer.
• Download the database from the multiviewer to your local workspace
Note:
The Kaleido Software supports true type fonts (TTF) only.
Summary of Contents for KALEIDO-IP X130
Page 12: ...12 Notices ...
Page 16: ...16 Table of Contents ...
Page 19: ...19 Kaleido IP X330 X130 Installation Service Manual Overview of the Kaleido IP System ...
Page 20: ...20 Overview Overview of the Kaleido IP System ...
Page 28: ...28 Multiviewer Cabling Changing the Output Resolution ...
Page 114: ...114 Maintenance Troubleshooting Disposal and Recycling Information ...
Page 123: ...123 Kaleido IP X330 X130 Installation Service Manual ...