14
7. Pull the vinyl through the printer, underneath the label tension
plate, under the print head, and through the adjustable label
guide on the underside of the tension plate. (Be sure the vinyl is
under the media sensor below the print head.)
8. Snap the cutter back in place, and close the print head.
9. Close the printer cover, and turn on the DuraLabel 7000.
4.4 Adjusting for Different-sized Vinyl
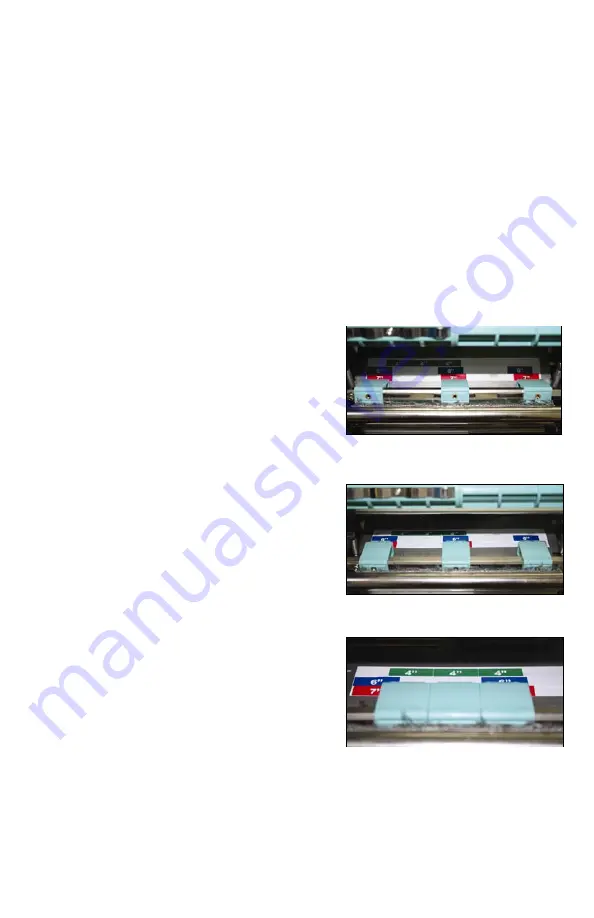
The DuraLabel 7000 can print three tape widths: 4”, 6” and 7”. Three
Adjustable Pressure Tabs can slide laterally above the print head in
order to apply direct pressure to the print head at their adjusted
locations. Before printing, make sure to adjust the Pressure Tabs to their
appropriate positions for 4’’, 6’’, or 7’’ vinyl, shown below.
7” Vinyl
1. Pull and twist the print head
release lever to open the print
area.
2. Adjust the Pressure Tabs to be
aligned with the
RED 7’’
box
markers, shown directly behind
the Pressure Tabs.
6” Vinyl
1. Pull and twist the print head
release lever to open the print
area.
2. Adjust the Pressure Tabs to be
aligned with the
BLUE 6’’
box
markers, shown directly behind
the Pressure Tabs.
4” Vinyl
1. Pull and twist the print head
release lever to open the print
area.
2. Adjust the Pressure Tabs to be
aligned with the
GREEN 4’’
box
markers, shown directly behind
the Pressure Tabs.
Summary of Contents for DuraLabel 7000
Page 31: ...31 Notes...
Page 32: ...32 2008 2009 Graphic Products Inc All Rights V1 0 6 9 09...


