


10
11
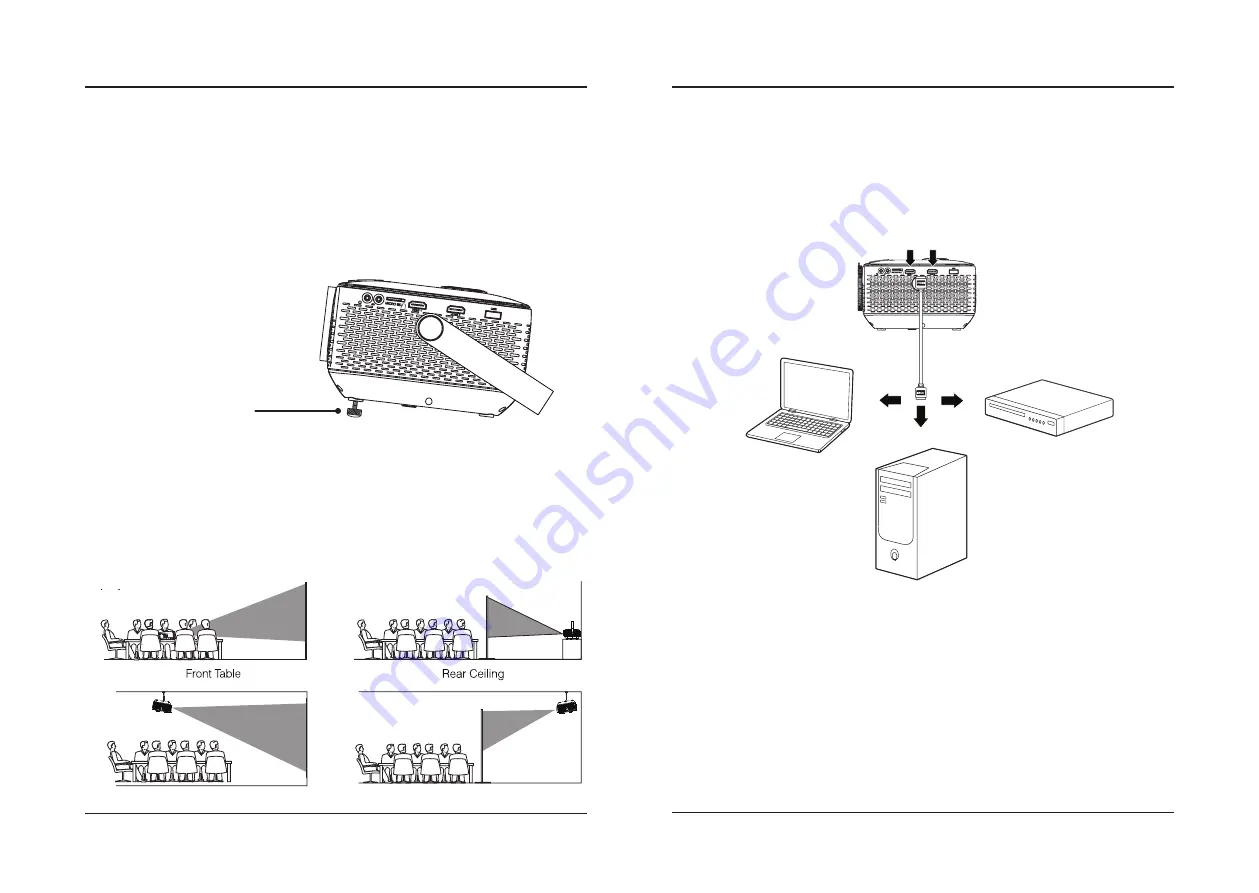
Connect to HDMI on
laptop or PC.
Connect to HDMI on DVD,
Blu-Ray, or other source.
HDMI
HDMI offers superior sound and picture quality, and is the easiest way to play media from a computer, Blu-Ray player,
or other device with an HDMI output.
Requires an HDMI cable (not included) and a device with an HDMI output.
1. Using an HDMI cable, connect the
HDMI 1 or 2 input
on the projector to the
HDMI output
on your media
player or computer.
2. Set the projector's
Source
to the
connected HDMI input
and use the controls on the connected device to select
and play media.
HDMI Inputs
Connecting to Other Devices
Important Note:
If there is no sound from the projector's internal speakers when connected via HDMI, please check the connected
device's audio settings and make sure it is set to "PCM Stereo" mode.
This unit does not support Dolby.
Projector Placement
For best results, place the projector in a dark room or other dimly lit area. The projector will display a screen size from
30
˝
to 150
˝
. Adjust the projector angle and distance to best suit your needs.
Use the unit with a dedicated projector screen for best picture resolution. If placing the projector behind the viewing
screen (unit in front of/projecting toward viewers), a special screen will be required. Projector screens are not included.
If you are not using the unit with a screen, a smooth, white or lightly colored surface will provide the best results.
Use the Angle Adjustment Knob
to fine tune the projector's height.
Angle Adjustment
Viewing Options
The projector can be used to project onto a wall or screen. It can be mounted from a ceiling or placed on a table.
Be sure to aim the remote at the sensor on the front or rear of the projector. See page 6 for sensor locations on the
projector. When projecting from the rear position, a special screen will be needed (not included) to display the image.
Note: Please remember to
remove lens cover.
Summary of Contents for PJ770B
Page 1: ...210 145 80...


