8
9
Projector Setup
Charging the Battery
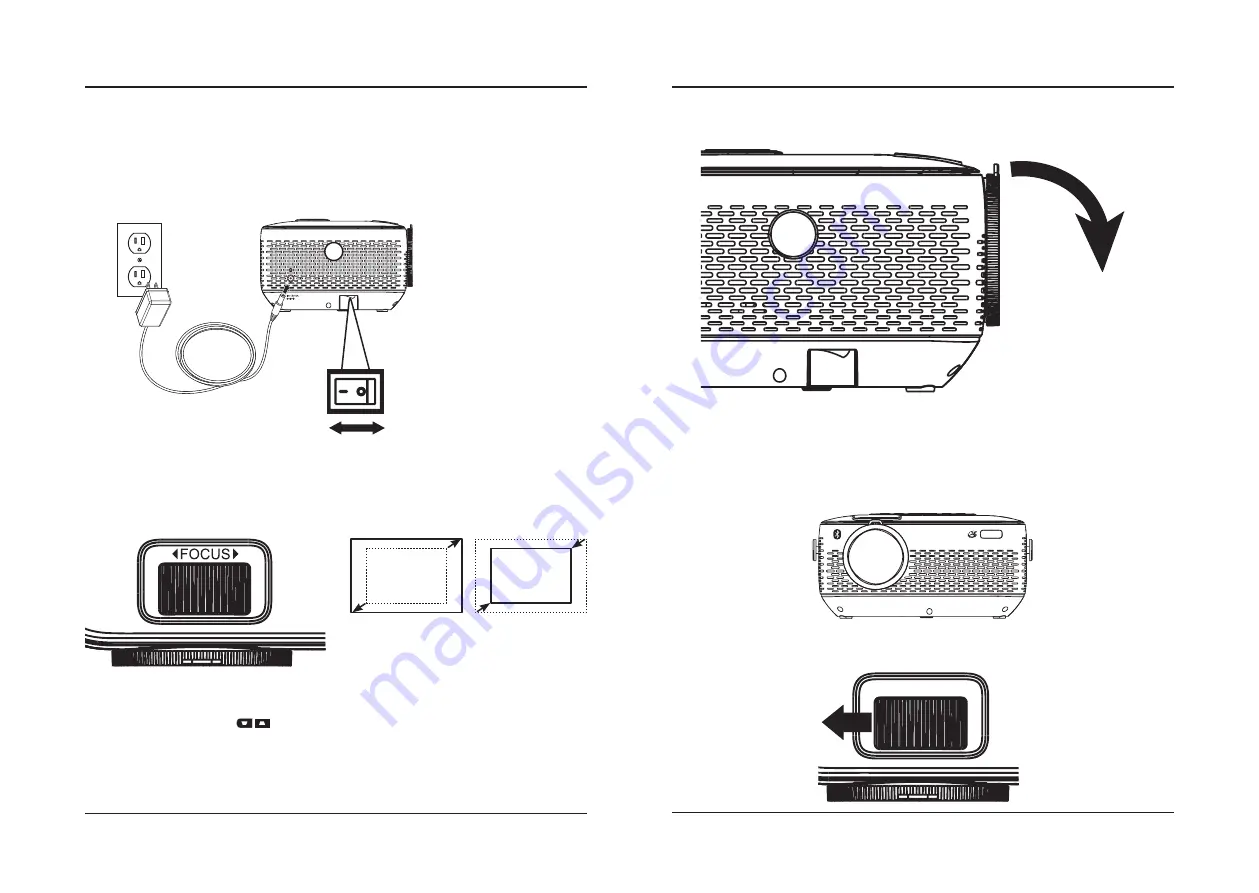
Connect the included charging cable to the DC Power Input on the projector and a standard power outlet. The
Charging Indicato
r will turn red while charging and it will switch to green when fully charged. Total charging time is
approximately 7 hours.
Switch the
Power Switch
to the ON position, then press the
Power
button to turn the projector ON or OFF. Battery life
is approximately 3 hours when at 50% Brightness/volume level. This unit has a
Main Power Switch
, which gives the
unit power and puts the unit in standby. When powered ON and in standby mode the battery will last approximately
5 hours.
ON
OFF
Main Power Switch
Please make sure to flip this switch to the
ON position to power the unit.
NOTE: THE BATTERY INDICATOR
WILL FLASH WHEN THE
BATTERY IS LOW, PLEASE
RECHARGE.
Image Adjustment
Keystone Adjustment
For Keystone Correction, press the
OK
1
2
3
4
5
6
7
8
9
0
SOURCE
GOTO
ZOOM/WIDE
MENU
FLIP
VOL –
VOL +
EXIT
buttons on
the remote.
You can also adjust Keystone Correction by pressing
the
Menu
button on the remote, going to the
Options
Menu
and selecting
Keystone Correction
. Use the
Up and Down Arrow
buttons to manually adjust the
Keystone Correction.
Focus Adjustment
Increase or reduce image size to sharpen image.
Removing the Lens Cap
Please remember to remove the lens cap before attempting to view media.
Putting Lens Cap On
1. When putting the lens cap back on, please make sure that you retract the lens back
into the projector to avoid damaging the lens . You can do this by:
ON
OFF
IR
1. Orient the projector with the lens facing you, as shown below.
2. Scroll the focus ring all the way to the left. Once the lens is fully retracted back
inside, you may then place the lens cover back on.
Summary of Contents for PJ770B
Page 1: ...210 145 80...


