background image

16

17

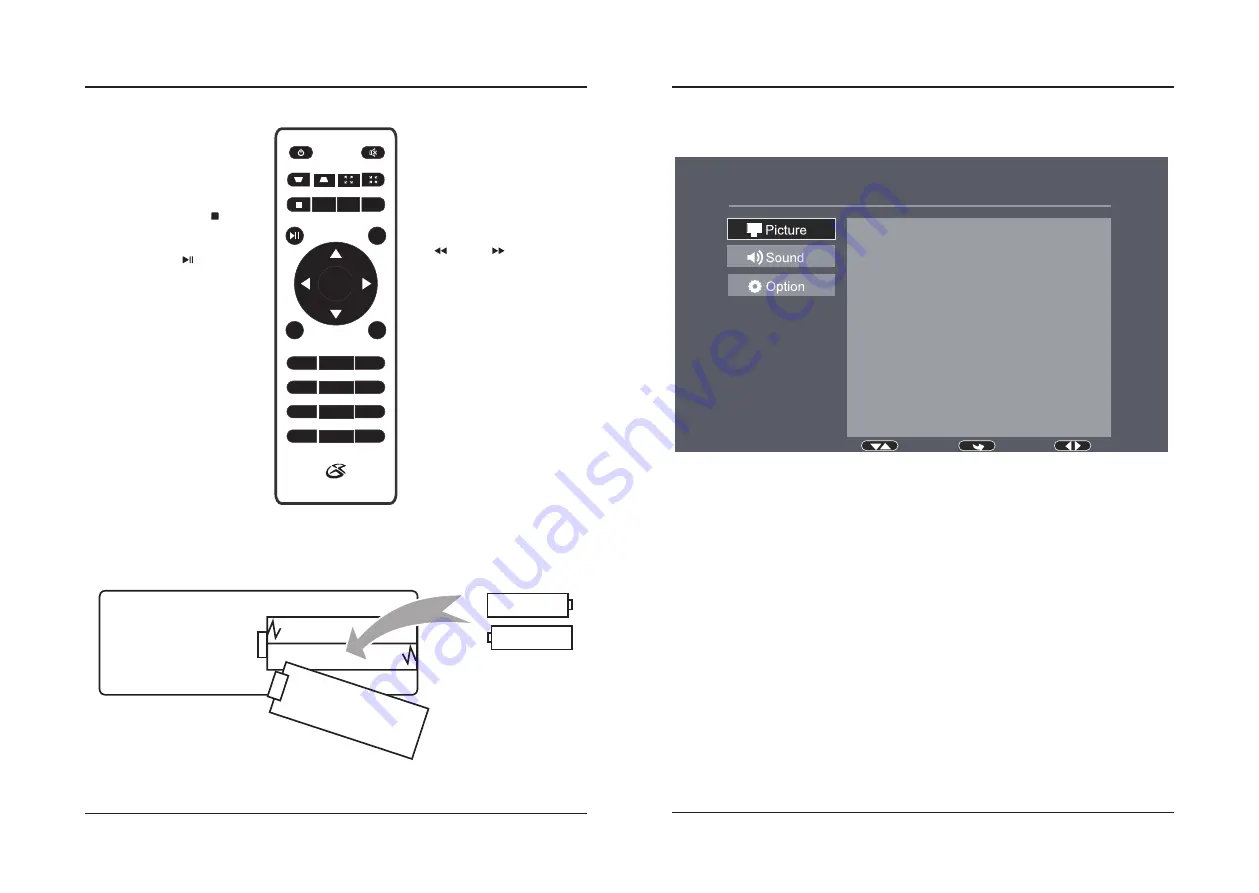
Select

Menu

Adjust

Picture Mode               Standard                               

Contrast                       50

Brightness                    50

Color                             50

Sharpness                    50

Tint                                50

Color Temperature        Medium

Aspect Ratio                 Auto

Noise Reduction           Middle

1.  Picture Mode

Select Vivid, User (custom), Soft, or Standard.

2.  Contrast, Brightness, Color, etc.

Set Picture Mode to "User" to adjust these settings.

3.  Color Temperature

Select Warm, Cool, or Medium.

4.  Aspect Ratio

Select 16:9, 4:3, or Auto.

5.  Noise Reduction

Select Off, Low, Middle, High or Default.

Change projector settings by pressing the Menu button and selecting the options you want to change.

Note:

 Not all settings are user adjustable.

Picture Menu

Menu Options

Functions

Remote

Power

Press to power ON. 

Press to power OFF.

Keystone Adjustment

Adjust image corners to reduce image 

distortion.

   Stop

Press to stop playback.

Flip

Press to flip display image 180°.

 Play/Pause

Press to play or pause an individual 

chapter or track. 

Arrows/OK

Press to navigate and confirm selections in 

Settings and other menu(s). 

Menu

Press to access projector Settings.

GoTo

Press to enter specific chapter or track. 

Mute

Press to mute volume.

Digital Zoom 

Press to zoom display image in or out.

Vol + / Vol −

Press to adjust audio level. 

Source

Press to select media source  

(AV, HDMI 1, HDMI 2, MEDIA).

 Back / Fwd 

Press to search through an individual 

chapter or track.

Exit

Press to exit menu(s).

Zoom/Wide

Press to adjust the aspect ratio of video 

(Auto/16:9/ 4:3)

Go To/Number Keypad

Press to enter specific chapter or track 

numbers. Press Play when ready.

OK

1

2

3

4

5

6

7

8

9

0

SOURCE

GOTO

ZOOM/WIDE

MENU

FLIP

VOL –

VOL +

EXIT

AAA / UM4

AAA / UM4

BATTERY DOOR

Batteries 

Requires 2 AAA batteries (not included).

Summary of Contents for PJ770B

Page 1: ...210 145 80...

Page 2: ...Mini Rechargeable Projector With Bluetooth User s Guide for Model PJ770B v2716 01 For the most up to date version of this User s Guide go to www gpx com...

Page 3: ...eavy or otherwise on the projector This product meets and complies with all Federal regulations See projector enclosure for related safety markings No user serviceable parts inside do not attempt to o...

Page 4: ...included 3 5mm to 3 x RCA audio video cable AC DC power adapter User s Guide Overview Features 5 Includes 5 Projector Features Inputs 6 Projector Setup Charging the Battery 8 Image Adjustment 8 Removi...

Page 5: ...ors 14 Keystone Adjustment 15 Focus Adjustment 14 13 12 11 3 2 8 9 10 1 5 7 6 4 Power Press to power on the projector Press to power OFF Note Please make sure Main Power Switch is ON Exit Return Press...

Page 6: ...CATOR WILL FLASH WHEN THE BATTERY IS LOW PLEASE RECHARGE Image Adjustment Keystone Adjustment For Keystone Correction press the OK 1 2 3 4 5 6 7 8 9 SOURCE MENU FLIP VOL VOL EXIT buttons on the remote...

Page 7: ...ent For best results place the projector in a dark room or other dimly lit area The projector will display a screen size from 30 to 150 Adjust the projector angle and distance to best suit your needs...

Page 8: ...B Supports AVI MOV file formats 1 Load a USB drive into the USB Port 2 Set the Source to Media Player then use the Arrow buttons to select C Drive or D Drive C Drive is the SD card D Drive is the USB...

Page 9: ...right portion of the Main Menu screen and sound played from the projector will be heard through the Bluetooth receiver After initial pairing the projector and the Bluetooth speakers will stay paired...

Page 10: ...t image corners to reduce image distortion Stop Press to stop playback Flip Press to flip display image 180 Play Pause Press to play or pause an individual chapter or track Arrows OK Press to navigate...

Page 11: ...4 Panel Flip Rotate Select to change projection mode Front Rear ceiling Front ceiling Rear 5 Keystone Correction Select to adjust image corners to reduce image distortion 0 22 6 Digital Zoom Select t...

Page 12: ...y cause undesired operation Changes or modifications not expressly approved by the party responsible for compliance could void the user s authority to operate the equipment NOTE This equipment has bee...

Reviews: