GHC SERIES
OM-04386
PAGE B-3
INSTALLATION
To flush the pump, use an approved solvent com
patible with the liquid being pumped.
Make cer
tain that the solvent will not attack pump com
ponents, particularly seals and gaskets.
PUMP INSTALLATION
Pump dimensions are shown in the separate
Pump Specification Bulletin.
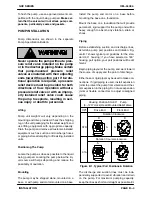
Never operate the pump without a pres
sure relief valve installed on the pump
or in the discharge piping. Make certain
that pump‐mounted pressure relief
valves are installed with their adjusting
ends toward the suction port. If bi‐rota
tional operation is required, a pressure
relief device must be provided for both
directions of flow. Operation without a
pressure relief valve or with an improp
erly installed relief valve could cause
the pump to explode, resulting in seri
ous injury or death to personnel.
Lifting
Pump unit weights will vary depending on the
mounting and drive provided. Check the shipping
tag on the unit packaging for the actual weight, and
use lifting equipment with appropriate capacity.
Drain the pump and remove all customer‐installed
equipment such as suction and discharge hoses
or piping before attempting to lift existing, installed
units.
Positioning The Pump
Locate the pump as close as possible to the liquid
being pumped. Locating the pump below the liq
uid source will help self‐priming and reduce the
possibility of cavitation.
Mounting
The pump may be shipped alone, mounted on a
base, or with pump and motor mounted on a base.
Install the pump and motor on a base before
mounting the base on a foundation.
Mount the base on a foundation that will provide
permanent, rigid support for the pump, and will be
heavy enough to absorb any vibration, strain or
shock.
Piping
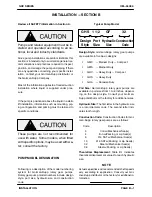
Before establishing suction and discharge lines,
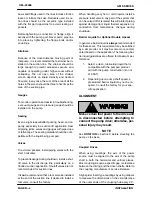
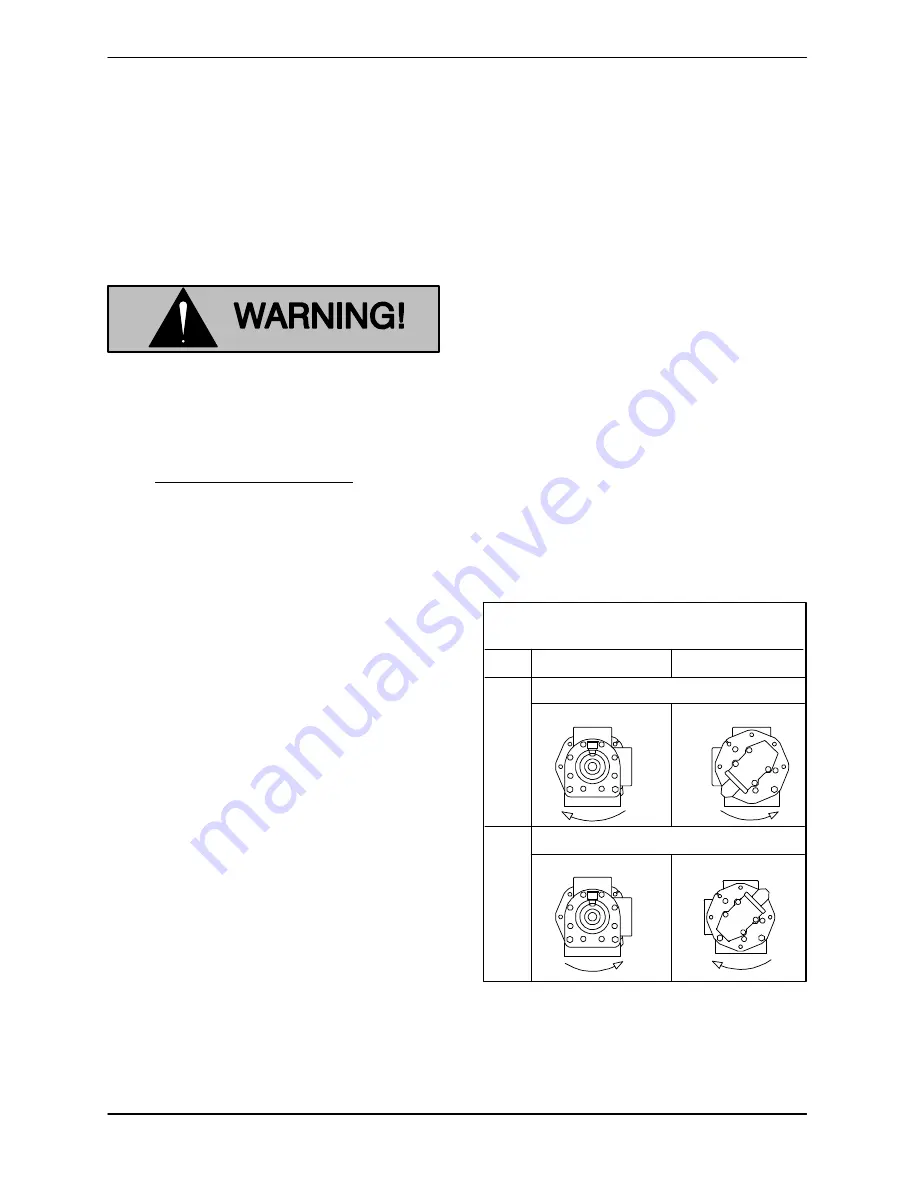
determine pump port positions and rotation. Fig
ure B‐1 shows typical port positions for the stan
dard 90
housing; if you have selected a 180
housing port option, your port positions will be dif
ferent.
Begin piping layout at the pump, and work toward
the source of supply and the point of discharge.
Either hose or rigid pipe may be used to make con
nections. If rigid piping is used, install expansion
joints to protect the pump from vibration and ther
mal expansion in the piping. Do not use expansion
joints or flexible connectors to adjust misaligned
piping.
Housing Position Std. 90
Pump
(3-12 O'clock) Head Mounted Relief Valve
STD.
OPT.
Rotation Clockwise
Drive End
Rotation Counter‐clockwise
01A
D
S
S
Front End
S
D
D
D
S
Figure B‐1. Typical Port Positions & Rotation
The discharge and suction lines must be inde
pendently supported to avoid vibration and strain
on the pump. For maximum pumping capacity,
keep the lines as short and straight as possible. El


