5. Click
OK
. The icon should appear on the Device View window to
indicate the connection is established.
Note:
The default values of GV-AS Controller are: IP address
192.168.0.100
; username
admin
; password
admin
; Crypto key (3DES
code)
12345678
.
5
Setting Up GV-ASManager
This section covers how to add GV-AS Controller to GV-ASManager, set up
an access control schedule, and receive live view from GV-CR420 on
GV-ASManager.
Adding GV-AS Controller
1. On the menu bar of GV-ASManager, click
Setup
and select
Device
.
2. Click the
Add
icon on the top left corner.
3. Enter
ID
and
Name
of the Controller, select the
Type
of the Controller
and click
OK
.
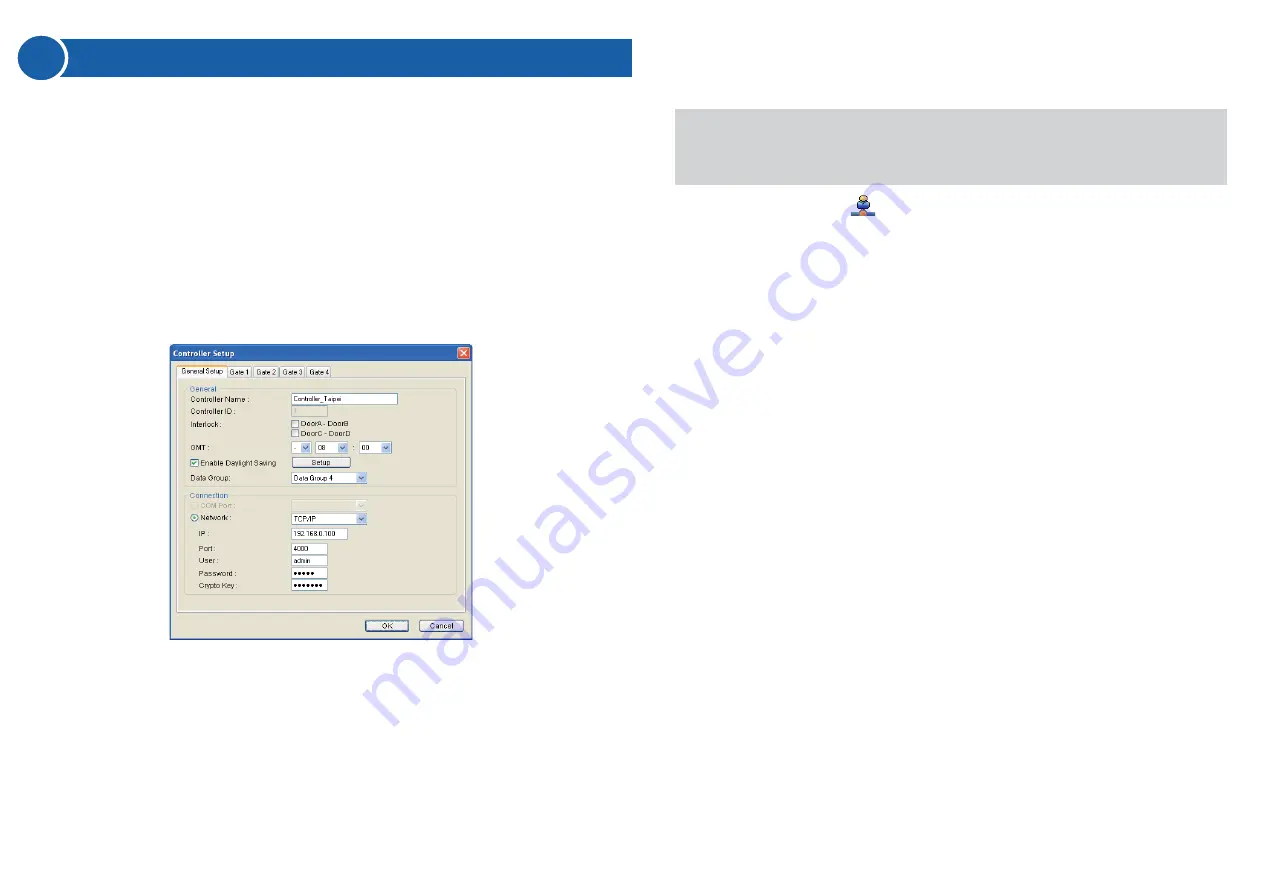
4. In Connection section, select the communication mode between the
GV-AS Controller and GV-ASManager.
●
For RS-485 connection, select
COM Port
that is used for
connection.
●
For network connection, select
Network
and select
TCP/IP
or
LocalDDNS
. Type the IP address, device name (if LocalDDNS is
selected), port number, login user, login password and Crypto key
(3DES code) of the GV-AS Controller.


