GeoVision GV-CR420 Quick Start Manual Download Page 10

4. Select 

Static IP address

. Type IP Address, Subnet Mask, 

Router/Gateway and Primary DNS. 

5. Click 

Apply

6.  To allow updating of images in Microsoft Internet Explorer, you must 

set your browser to allow ActiveX Controls and perform a one-time 
installation of GeoVision’s ActiveX component onto your computer.
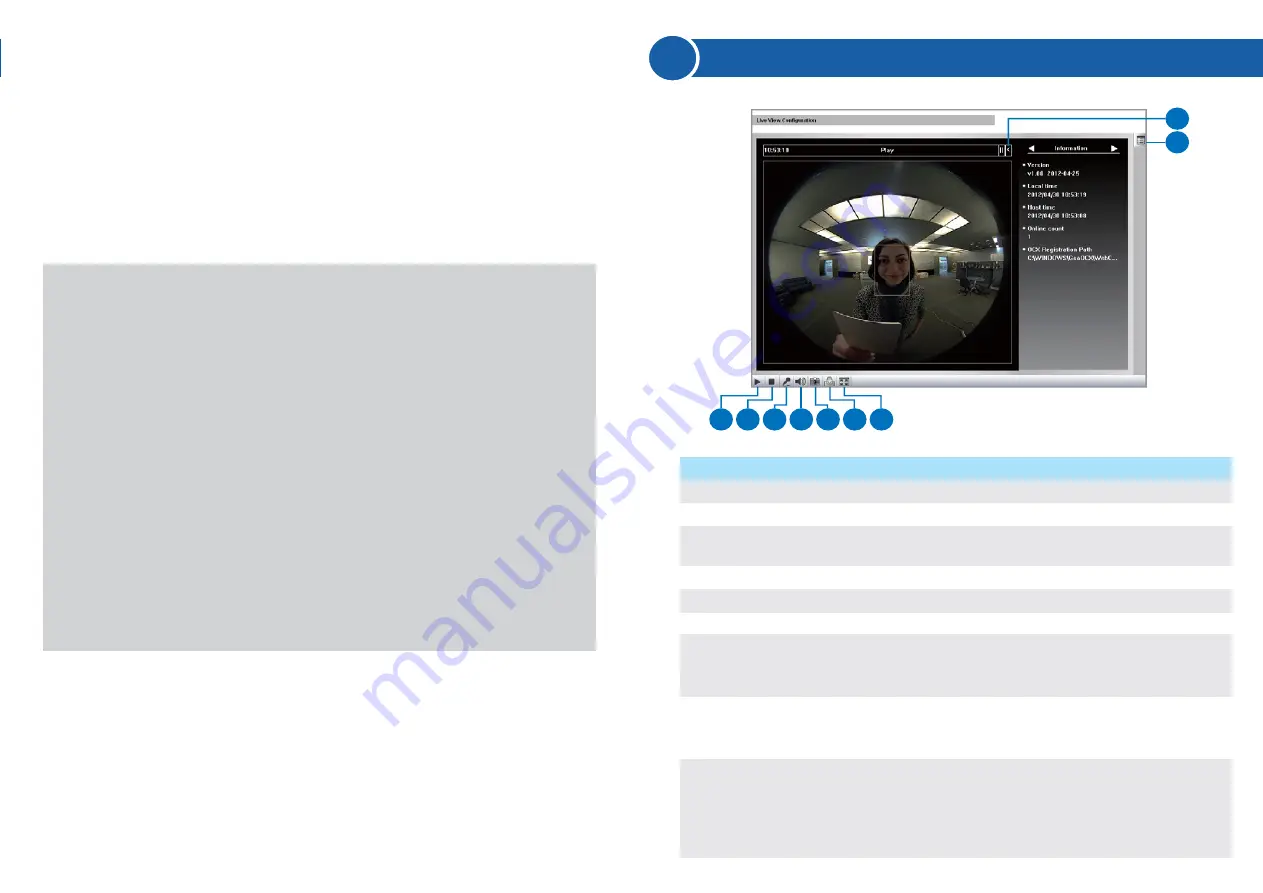
7

The Web Interface

IMPORTANT: 

 If 

Dynamic IP Address

 or 

PPPoE

 is enabled, you need to know 

which IP address the camera reader will get from the DHCP server 
or ISP to log in. If the camera reader is installed in a LAN, use the 
GV-IP Device Utility to look up its current dynamic IP address. See 

Checking the Dynamic IP Address

, Chapter 3, 

GV-Camera Reader 

User’s Manual

If the camera reader uses a public dynamic IP address via PPPoE, 
use the Dynamic DNS service to obtain a domain name linked to 
the camera reader’s changing IP address first. For dynamic DNS 
server settings, see 

Advanced TCP/IP

, Chapter 5, 

GV-Camera 

Reader User’s Manual

.

 If 

Dynamic IP Address

 or 

PPPoE

 is enabled and you cannot 

access the camera reader, you may have to reset it to factory 
default settings and perform the network settings again. Refer to 
section 9 in the Quick Start Guide to see how to restore to factory 
default settings.

1

2

3

4

5

6

7

8

9

No.

1
2
3

4
5
6
7

8

9

Name 
Play 
Stop 
Microphone

Speaker
Snapshot 
File Save 
Full Screen

Show System 
Menu

Control Panel

Function 
Plays live video. 
Stops playing video.
Talks to the surveillance area from the local 
computer. 
Listens to the audio around the camera.
Takes a snapshot of live video. 
Records live video to the local computer.   
Switches to full screen view. Right-click the image 
to have these options: 

Snapshot, Resolution, 

PIP, PAP, GPS

 and 

Google Maps

Brings up these functions: 

Alarm Notify, Video 

and Audio Configuration, Remote Config, 
Show Camera Name

 and 

Image Enhance

.

Shows camera information, video settings, audio 
data rate, images captured upon motion and GPS 
location of the camera reader. Also allows you to 
adjust image quality and install programs from the 
hard drive.

Summary of Contents for GV-CR420

Page 1: ...n the supplied software DVD 1 Introduction Welcome to the GV Camera Reader Quick Start Guide The quick start guide covers the basic installations and configurations of GV Camera Reader For the detaile...

Page 2: ...Face Mode by schedule and receiving card numbers through network connection are only supported in the following firmware versions Camera Reader Installation Height Building gate about 1 4 1 5 meters a...

Page 3: ...cables and wires 4 At the 2 dots drill a hole slightly smaller than the plastic screw anchors provided 5 Insert the 2 plastic screw anchors in the drilled holes 6 Place the mounting plate on the wall...

Page 4: ...CR420 to GV AS Controller a Connect a wire to the Wiegand pins of the GV CR420 and the other end to the Wiegand pins on the controller b Connect a wire to the GND pin of the camera reader in addition...

Page 5: ...ess the Web interface of the GV AS Controller b In the left menu click Extended Reader 2 Define the door associated with GV CR420 on the GV AS Controller a Access the Web interface of the GV AS Contro...

Page 6: ...e camera reader according to the firmware version of GV CR420 and the controller and use the drop down list to select the associated door For details on firmware version and corresponding methods of n...

Page 7: ...Manager Adding GV AS Controller 1 On the menu bar of GV ASManager click Setup and select Device 2 Click the Add icon on the top left corner 3 Enter ID and Name of the Controller select the Type of the...

Page 8: ...Access card required to be granted access default mode Release Mode Keep the door in an unlock status with the reader Card and PIN Code Mode For GV CR420 a card needs to be presented and a face needs...

Page 9: ...twork and then LAN to begin the network settings 6 Establishing Network Connection You can watch live view from the Camera Reader and monitor the access activities of the door at the same time When a...

Page 10: ...er 5 GV Camera Reader User s Manual If Dynamic IP Address or PPPoE is enabled and you cannot access the camera reader you may have to reset it to factory default settings and perform the network setti...

Page 11: ...periodically releases updated firmware on the website Follow the steps below to load the new firmware into the camera reader You can restore the camera reader to factory default settings using the Web...

Page 12: ...the power cable 3 Wait until the ready LED blinks twice to release the Load default button The process takes about 35 seconds Directly on the Camera Reader 9F No 246 Sec 1 Neihu Rd Neihu District Taip...

Reviews: