background image

4

Connecting to GV-AS Controllers

There are three ways to connect a camera reader to GV-AS Controllers: 

Wiegand

RS-485

 and 

network

. Below we use GV-AS400 Controller as an 

example.

7.  Place camera reader on the mounting plate and thread the cables 

through the rectangular hole.

8.  Secure the security screw on the bottom.

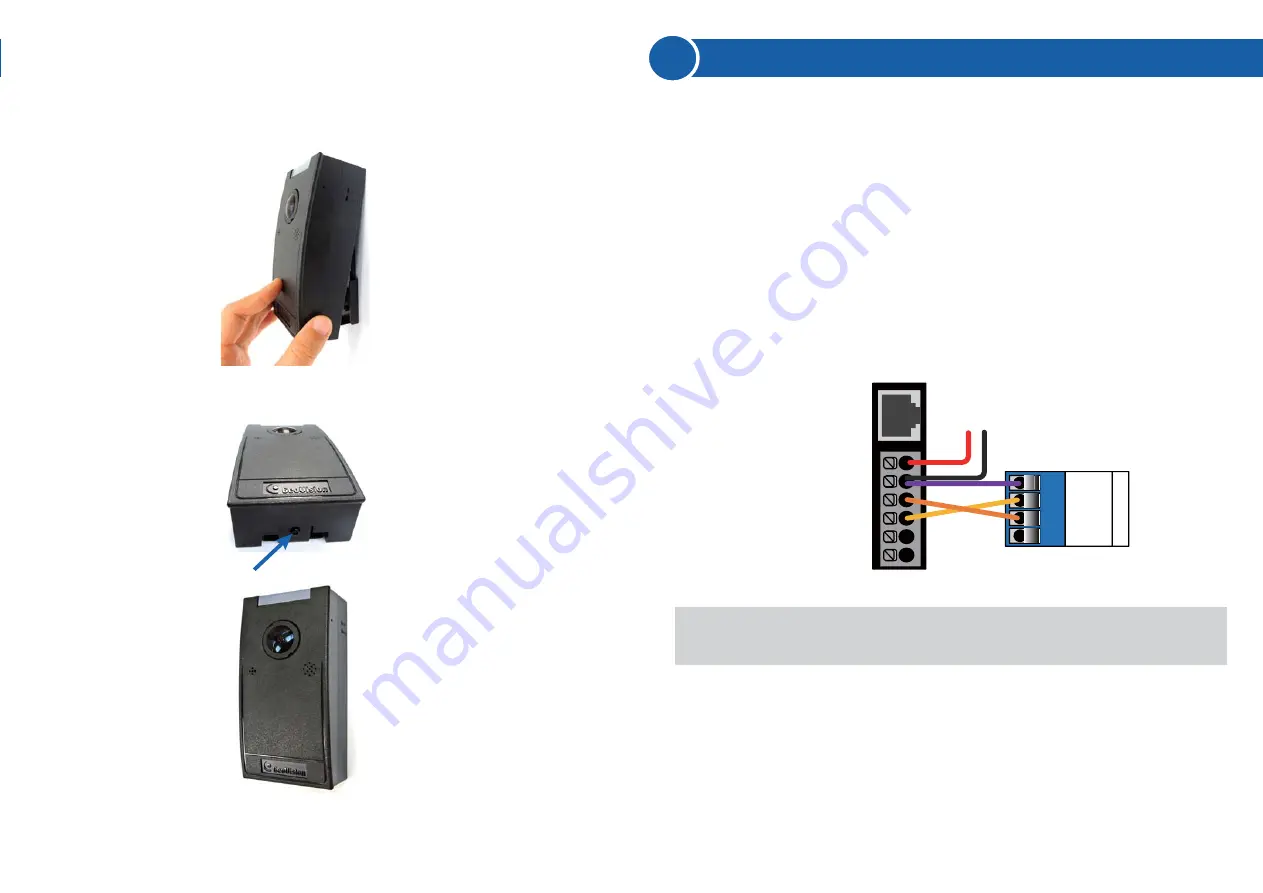
1.  Wire GV-CR420 to GV-AS Controller

a.  Connect a wire to the Wiegand pins of the GV-CR420 and the 

other end to the Wiegand pins on the controller.

b.  Connect a wire to the GND pin of the camera reader in addition to 

the existing black GND wire for power cable, and connect the 
other end to the GND pin on the controller.

Wiegand

Note: 

Each camera reader must be connected to a power adapter 

instead of using the power from GV-AS Controller.

GV-AS Controller

Camera Reader

GND
D0
D1
12V

Wiegand A

+12 V

GND

Wiegand D1
Wiegand D0

RS 485 -
RS 485+

Summary of Contents for GV-CR420

Page 1: ...n the supplied software DVD 1 Introduction Welcome to the GV Camera Reader Quick Start Guide The quick start guide covers the basic installations and configurations of GV Camera Reader For the detaile...

Page 2: ...Face Mode by schedule and receiving card numbers through network connection are only supported in the following firmware versions Camera Reader Installation Height Building gate about 1 4 1 5 meters a...

Page 3: ...cables and wires 4 At the 2 dots drill a hole slightly smaller than the plastic screw anchors provided 5 Insert the 2 plastic screw anchors in the drilled holes 6 Place the mounting plate on the wall...

Page 4: ...CR420 to GV AS Controller a Connect a wire to the Wiegand pins of the GV CR420 and the other end to the Wiegand pins on the controller b Connect a wire to the GND pin of the camera reader in addition...

Page 5: ...ess the Web interface of the GV AS Controller b In the left menu click Extended Reader 2 Define the door associated with GV CR420 on the GV AS Controller a Access the Web interface of the GV AS Contro...

Page 6: ...e camera reader according to the firmware version of GV CR420 and the controller and use the drop down list to select the associated door For details on firmware version and corresponding methods of n...

Page 7: ...Manager Adding GV AS Controller 1 On the menu bar of GV ASManager click Setup and select Device 2 Click the Add icon on the top left corner 3 Enter ID and Name of the Controller select the Type of the...

Page 8: ...Access card required to be granted access default mode Release Mode Keep the door in an unlock status with the reader Card and PIN Code Mode For GV CR420 a card needs to be presented and a face needs...

Page 9: ...twork and then LAN to begin the network settings 6 Establishing Network Connection You can watch live view from the Camera Reader and monitor the access activities of the door at the same time When a...

Page 10: ...er 5 GV Camera Reader User s Manual If Dynamic IP Address or PPPoE is enabled and you cannot access the camera reader you may have to reset it to factory default settings and perform the network setti...

Page 11: ...periodically releases updated firmware on the website Follow the steps below to load the new firmware into the camera reader You can restore the camera reader to factory default settings using the Web...

Page 12: ...the power cable 3 Wait until the ready LED blinks twice to release the Load default button The process takes about 35 seconds Directly on the Camera Reader 9F No 246 Sec 1 Neihu Rd Neihu District Taip...

Reviews: