background image

33

ASTON CONSOLE SERIES INSTALLATION MANUAL

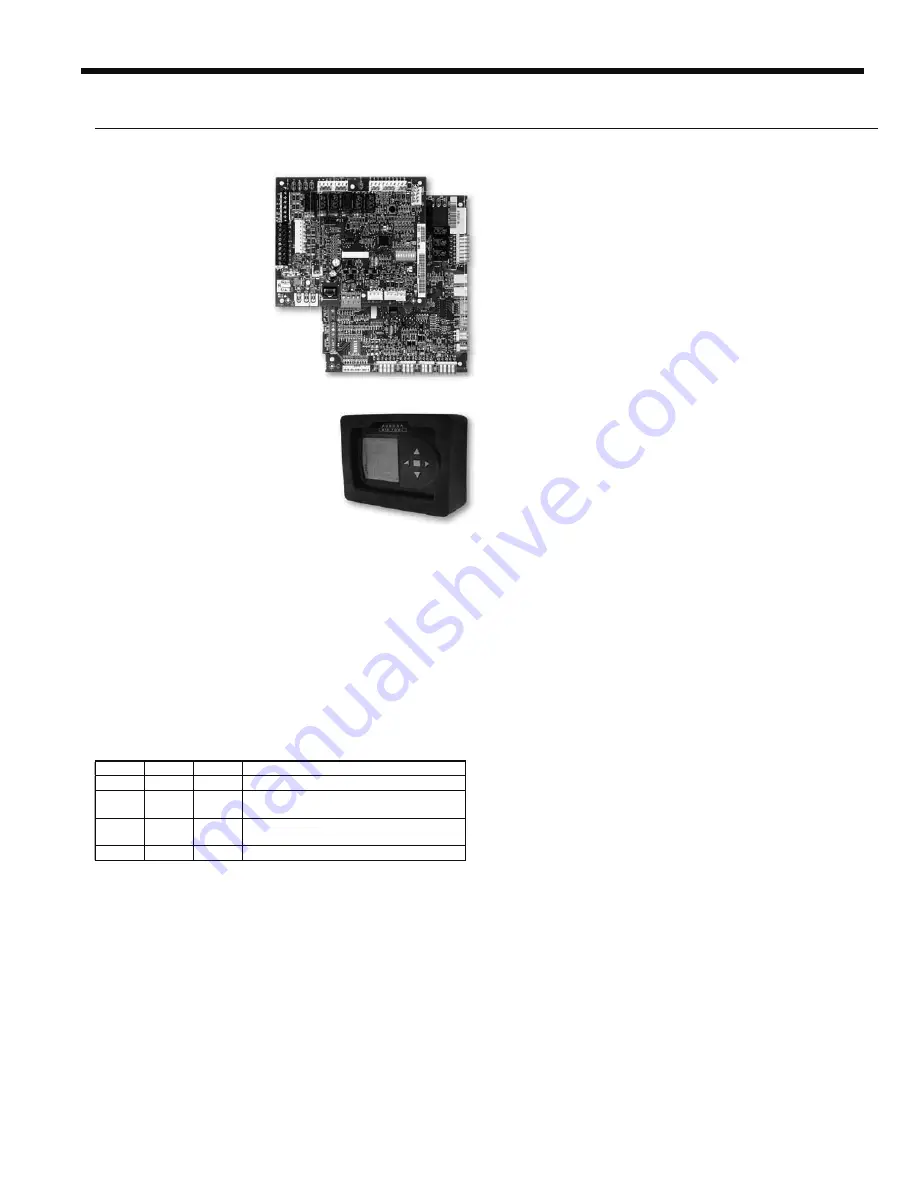
Aurora ‘Advanced’ Control Features

The Aurora ‘Advanced’ 

Control system expands on 

the capability of the Aurora 

‘Base’ Control (ABC) 

by adding the Aurora 

Expansion Board (AXB).

All of the preceding 

features of the Aurora 

‘Base’ Control are included. 

The following control 

description is of the 

additional features and 

capability of the Aurora 

advanced  control. 

It is highly recommended the 

installing/servicing contractor obtain 

an Aurora Interface and Diagnostic 

Tool (AID) and specialized training 

before attempting to install or service 

an Aurora ‘Advanced’ control system. 

The additional AXB features include the following:

AXB DIP Switch 

DIP 1 - ID

: This is the AXB ModBus ID and should always 

read On.

DIP 2 & 3 - Future Use

DIP 4 & 5 - Accessory Relay2

: A second, DIP configurable, 

accessory relay is provided that can be cycled with the 

compressor 1 or 2 , blower, or the Dehumidifier (DH) 

input. This is to complement the Accessory 1 Relay on 

the ABC board.

Position

DIP 4

DIP 5

Description

1

ON

ON

Cycles with Fan or ECM (or G)

2

OFF

ON

Cycles with CC1 first stage of compressor 

or compressor spd 6

3

ON

OFF

Cycles with CC2 second stage of 

compressor or compressor spd 7-12

4

OFF

OFF

Cycles with DH input from ABC board

Advanced Hot Water Generator Control 
(Domestic Hot Water Option)

In lieu of the ‘Base Hot Water Generator Control’, the 

Advanced features an AID Tool selectable temperature limit 

and microprocessor control of the process. This will maximize 

hot water generation and prevent undesirable energy use. An 

alert will occur when the hot water input temperature is at 

or above setpoint (100°F - 140°F) for 30 continuous seconds 

(130°F is the default setting). This alert will appear as an E15 

on the AID Tool and the hot water pump de-energizes. Hot 

water pump operations resume on the next compressor cycle 

or after 15 minutes of continuous compressor operation during 

the current thermostat demand cycle. Since compressor hot 

gas temperature is dependent on loop temperature in cooling 

mode, loop temperatures may be too low to allow proper 

heating of water. The control will monitor water and refrigerant 

temperatures to determine if conditions are satisfactory for 

heating water. LED1 (red LED) will flash code 15 when the 

DHW limit is reached and when conditions are not favorable 

for water heating. Error code 15 will also be displayed on the 

AID Tool in the fault screen. This flash code is a noncritical 

alert and does not necessarily indicate a problem.

Compressor Monitoring

The AXB includes two current transducers to monitor the 

compressor current and starting characteristics. Open 

circuits or welded contactor faults will be detected. A fault 

will produce an E10 code.

IntelliZone2 Zoning Compatibility 
(Optional IntelliZone2 Zoning)

A dedicated input to connect and communicate with the 

IntelliZone2 (IZ2) zoning system is provided on P7. The is a 

dedicated communication port using a proprietary ModBus 

protocol. An AXB can be added to other selected ABC-only 

systems as well. Then an advanced communicating IntelliZone2 

zoning system can be added to ABC-only systems. Consult the 

IntelliZone2 literature for more information. 

Variable Speed Pump

This input and output are provided to drive and monitor 

a variable speed pump. The VS pump output is a PWM 

signal to drive the variable speed pump. The minimum and 

maximum level are set using the AID Tool. 75% and 100% 

are the default settings respectively. The VS data input 

allows a separate PWM signal to return from the pump 

giving fault and performance information. Fault received 

from the variable speed pump will be displayed as E16.

Modulating Water Valve

This output is provided to drive a modulating water valve.  

Through advanced design the 0-10VDC valve can be 

driven directly from the VS pump output. The minimum 

and maximum level are set in the same way as the VS 

pump using the AID Tool. 75% and 100% are the default 

settings respectively.

Loop Pump Linking

This input and output are provided so that two units can be 

linked together with a common flow center. When either unit 

has a call for loop pump, both unit’s loop pump relays and 

variable speed pumps are energized. The flow center then can 

simply be wired to either unit. The output from one unit should 

be routed to the input of the other. If daisy chained up to 16 

heat pumps can be wired and linked together in this fashion.

Controls cont.

Summary of Contents for ASTON SERIES

Page 1: ...15 Installation Information Water Piping Connections Hot Water Connections Electrical Startup Procedures Troubleshooting Preventive Maintenance COMMERCIAL Water Source Geothermal Heat Pump R 410A Refr...

Page 2: ......

Page 3: ...ng 17 Open Loop Ground Water Systems 18 Electrical Connections 19 Electrical Data 20 Auxiliary Heat Ratings 21 Blower Performance 21 Wiring Schematics 22 27 Controls 28 Startup Notes 36 Startup Checkl...

Page 4: ...d Range 6 AlumiSealTM Standard Range 7 No Coating Extended Range 8 No Coating Standard Range Sound Kit A None B Blanket Auxiliary Electric Heat N None B 1 0kW 09 12 C 2 0kW 09 12 D 3 0kW 15 18 Motoriz...

Page 5: ...rom the packaging if necessary Units in question should also be internally inspected If any damage is noted the carrier should make the proper notation on the delivery receipt acknowledging the damage...

Page 6: ...1 3 3 49 1 11 8 4 3 cm 127 0 31 1 65 2 23 4 88 9 15 6 8 3 124 7 29 8 10 9 09 12 15 18 4 0 5 7 8 1 3 2 6 47 B3 0 193B 47 B3 0 193B 756B 3BC B 4 B 34B 3BC 23B 7 0 BE7AB 3FB3 232 B 0 0 19 2 4 B6 C B7 B...

Page 7: ...6 1 2 5 49 1 11 8 4 3 cm 127 0 32 0 73 9 23 4 88 9 15 6 6 4 124 7 29 8 10 9 09 12 15 18 3 D3 AB71 AB 7 4 0 93 B 0 2 3 13 0 93 3253 4 35 A A6 E 6 7 8 1 4 3 2 5 0 756B 3BC B 4 B 34B 3BC 23B 7 0 BE7AB 3F...

Page 8: ...15 6 6 1 124 7 30 5 10 9 in 55 0 12 6 29 1 9 2 35 0 6 1 2 5 54 1 11 8 4 3 cm 139 7 32 0 73 9 23 4 88 9 15 6 6 4 137 4 29 8 10 9 09 12 15 18 47 B3 0 193B 47 B3 0 193B 2 3 1 6 7 8 4 0 5 0 756B 3BC B 4 B...

Page 9: ...D32 4 1 7BG 0 B6 A723A 3 31B 71 63 B 23 0 7 3 3AA AE7B16 B7 4 B7 AE7B16 B7 0 19 B3 3 C7 32 4 2 3 7 AB B7 CBA723 7 2 3 B7 473 2 7 AB 32 E D B 53 B3 7 A 4F 3 B3 E AB B B7 A G B7 4CA32 4CA32 27A1 31B B7...

Page 10: ...3 25 65 65 2 19 83 50 4 1 64 4 2 12 03 30 6 0 66 1 7 2 75 7 0 5 5 14 0 DAMPER OPENING Models 09 12 BLOWER ACCESS PANEL COMPRESSOR ACCESS PANEL 42 88 108 9 34 0 86 4 1 5 3 8 1 5 3 8 4 32 11 0 8 88 22...

Page 11: ...D D3A B7 6 A3 97BA 1 23 A B3 2 7 1 31B7 47 B3 6 2G 0 F B7 3 31B 71 63 B B7 0 19 B3 3 C7 32 4 2 3 7 AB B7 CBA723 7 2 3 B7 473 2 7 AB 32 1 B 3 3 D3 4 113AA B 1 B 0 F 2 3 44 AE7B16 1 3AA 113AA 3 3 D32 4...

Page 12: ...PLATE COMPRESSOR ACCESS PANEL DAMPER OPENING 43 37 110 2 1 62 4 1 25 65 65 1 19 83 50 4 Models 09 12 8 88 22 6 34 0 86 4 1 50 3 8 1 50 3 8 4 32 11 0 42 88 108 9 BLOWER ACCESS PANEL COMPRESSOR ACCESS P...

Page 13: ...plate mounting height is increased by the thickness of the shims used Position backplate in desired equipment location To further reduce the operating sound level of the unit 1 8 inch thick rubber mat...

Page 14: ...to the units An air vent must be installed in the water distribution system The supply and return water piping should be run through the wall or floor penetration and terminate with a ball valve The...

Page 15: ...es should be installed on both the supply and return water lines of the unit Flow control valves should be installed on the water discharge line It is recommended that P T ports be installed on the su...

Page 16: ...cabinet repositioning pieces 1 2 and 3 into the locations directly opposite the original positions Secure by replacing mounting brackets Note Be sure that louvers on the grille assembly are facing th...

Page 17: ...protect the system from dirty water conditions Dirty water will result in system wide degradation of performance and solids may clog valves strainers flow regulators etc Additionally the heat exchange...

Page 18: ...tremely hard water the owner should be informed that the heat exchanger may require occasional flushing Units with cupronickel heat exchangers are recommended for open loop applications due to the inc...

Page 19: ...able 208 Volt Operation All Envision Series 208 230 units are factory wired for 230 volt operation For 208 volt operation the red and blue transformer wires must be switched Microprocessor Remote Ther...

Page 20: ...21 0 2 6 6 7 7 7 10 15 265 60 1 238 292 6 7 4 3 22 0 2 5 6 8 7 9 10 15 12 115 60 1 104 127 14 8 9 5 50 0 4 25 13 8 16 1 25 208 230 60 1 187 253 7 7 4 9 25 0 2 6 7 5 8 8 10 15 265 60 1 238 292 7 0 4 5...

Page 21: ...0 1 239 292 2000 2 50 7 55 10 1 12 6 20 15 18 3 kW 208 60 1 197 254 2454 2 45 11 80 14 3 17 8 30 230 60 1 197 254 3000 2 60 13 04 15 6 19 6 35 265 60 1 239 292 3000 2 50 11 32 13 8 17 3 30 Always refe...

Page 22: ...E 1 T ST CC Compressor Contactor HP High Pressure Switch LP Low Pressure Switch RV Reversing Valve Coil ST Entering Air Temperature Sensor RB Blower Relay Black Black Red 11 Black 12 Red 17 Red 19 Bla...

Page 23: ...Blue Wht 36 Blue Wht 35 White 34 Blue T6 FS Yellow 44 Yellow 44 Brown 43 Yellow 13 Page 1 Blue Tan 41 Blue 40 Blue 40 Brown 3 Tan 41 Brown 26 Green 00 Red 39 Gray 42 NOTE 3 NOTE 4 Violet 4 Violet 4 Vi...

Page 24: ...CCG CC2 HI CC2 LO CC2 G REVREV FP1 FP1 FP2 FP2 LPS LPS HPSHPS Aurora Base Control ABC K1 RV Relay K2 CC Relay K3 CC2 Relay K4 Fan Relay K5 Alarm Relay K6 Acc Relay F R C CC G Y1 C R ES LS P2 EH1 Y G G...

Page 25: ...t LED LED3 Red Status LED LED1 Green Normal Mode Control is Non Functional Test Mode Lockout Active Dehumidification Mode Reserved Reserved Load Shed ESD 1 second on and 1 second off Random Start Dela...

Page 26: ...ite Yellow Blue Red Black CFM P13 P4 SW1 P5 JW2 P9 LO O B Y2 W DH P8 P7 RS485 NET RS485 NET P6 RS485 EXP P3 SW2 On Future Use L Output Type CC Dual Single Acc Dip 5 Acc Dip 4 RV B O FP2 15 F 30 F FP1...

Page 27: ...Mode Lockout Active Dehumidification Mode Reserved Reserved Load Shed ESD 1 second on and 1 second off Random Start Delay Fast Flash OFF ON Slow Flash Fast Flash Flash Code 2 Flash Code 3 Flash Code 6...

Page 28: ...fan speed switch The temperature can be controlled by rotating the thermostat control knob The Fan Only setting provides constant fan operation In the Heat mode a call for heat by the thermostat clos...

Page 29: ...on and 1 second off Additionally when entering test mode LED1 red will flash the last lockout one time Test mode will automatically time out after 30 minutes Test mode can be exited by pressing and ho...

Page 30: ...e turned on The fault type identification display LED1 Red shall flash the fault code To reset lockout conditions with SW2 8 On thermostat inputs Y1 Y2 and W must be removed for at least 3 seconds To...

Page 31: ...er G The blower will start immediately upon receiving a thermostat G command If there are no other commands from the thermostat the ECM will run on G speed until the G command is removed Regardless of...

Page 32: ...gs The AID Tool simply plugs into the exterior of the cabinet in the AID Tool port ABC Control Board Layout Aurora Base Control LED Displays These three LEDs display the status configuration and fault...

Page 33: ...ntrol will monitor water and refrigerant temperatures to determine if conditions are satisfactory for heating water LED1 red LED will flash code 15 when the DHW limit is reached and when conditions ar...

Page 34: ...ensor Smoke CO Alarm Fault no lockout info only Switch output from Smoke CO sensor Dirty Filter Alarm no lockout info only Output from dirty filter sensor Home Automation 2 E24 HA2 With a closed dry c...

Page 35: ...ange will be noticed from normal cooling Dehumidification mode will be shown on the ABC and the communicating thermostats Fault LED LED1 Red Red Fault LED LED Flash Code Lockout Reset Remove Fault Con...

Page 36: ...lable in five models with equipment rated fuses to provide additional circuit protection The fuses are panel mounted to allow easy inspection and removal without removing the cover on the disconnect C...

Page 37: ...ing setpoint must be set below room temperature 3 Be sure that the compressor and water control valve or loop pump s are activated 4 Verify that the water flow rate is correct by measuring the pressur...

Page 38: ...g performance based on entering air temperatures of 80 F DB 67 F WB Heating performance based on entering air temperature of 70 F DB Operating Limits F C F C Air Limits Min Ambient Air 45 7 2 45 7 2 R...

Page 39: ...x 500 485 for water antifreeze x T Note DO NOT hook up pressure gauges unless there appears to be a performance problem Line Voltage Loop Open Unit Amp Draw Closed COAX SOURCE HEATING CYCLE ANALYSIS...

Page 40: ...F 09 1 2 1 0 0 9 0 8 0 7 0 6 1 8 2 3 2 2 2 0 1 9 1 8 2 5 3 8 3 7 3 5 3 3 3 1 12 1 5 0 9 0 8 0 7 0 6 0 5 2 3 1 7 1 5 1 4 1 3 1 1 3 5 3 0 2 7 2 5 2 4 2 2 15 2 0 1 7 1 6 1 5 1 4 1 3 3 0 3 3 3 2 3 0 2 9 2...

Page 41: ...ressure Note On open loop systems if the installation is in an area with a known high mineral content 125 PPM or greater in the water it is best to establish with the owner a periodic maintenance sche...

Page 42: ...iption Date By All Updated Nomenclature and Wiring Schematics ABC Controls 1 Sept 2015 MA All Obsoleted PSC Option Updated Nomenclature Updated Wiring Schematics 04 Mar 2015 MA All Updated with All Al...

Page 43: ......

Page 44: ...mps Size 0 75 1 5 Tons Document Type Installation Manual Part Number IM1010CGB Release Date 09 15 2015 The manufacturer has a policy of continual product research and development and reserves the righ...

Reviews: