Premium 1.56DOF/1.5HF6DOF Device Guide
1-3
2 I
NSTALLING THE
P
HANTOM
P
REMIUM
D
EVICE
Run Phantom Test to Verify Setup
e
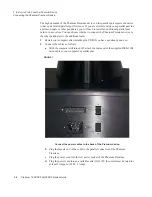
Leave the Gimbal and base motor switches in the "On" position for normal
operation. These switches can be used to cut off motor power for debugging
purposes.
3
Position the Phantom Premium device.
Run Phantom Test to Verify Setup
In this section you will run the Phantom Test application to confirm that the device is
properly connected and installed.
1
Select
Start>All Programs>Sensable>Phantom Test
.
2
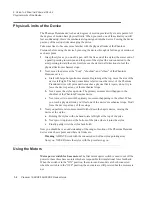
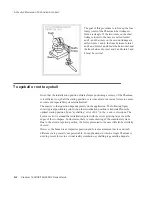
Put the Phantom in neutral position. Neutral position is described as when the 4 rotary
joints are lined up. See "Appendix D: Maximizing Positioning Accuracy" for more
information about position accuracy.
3
You can press the space bar on your keyboard to reset.
IMPORTANT
Geomagic uses only Parallel Port components that exceed the
IEEE
1284 EPP implementation recommendations. Geomagic is not
responsible for any damage that may result from using 3rd party
cables.
Summary of Contents for Geomagic Phantom Premium 1.56DOF
Page 1: ...Premium 1 56DOF 1 5HF6DOF Device Guide ...
Page 4: ...Premium 1 56DOF 1 5HF6DOF Device Guide ...
Page 6: ...ii Premium 1 56DOF 1 5HF6DOF Device Guide PREFACE ...
Page 20: ...A 2 Premium 1 56DOF 1 5HF6DOF Device Guide APPENDIX TROUBLESHOOTING ...
Page 22: ...B 2 Premium 1 56DOF 1 5HF6DOF Device Guide APPENDIX CUSTOMER SUPPORT ...
Page 28: ...D 4 Premium 1 56DOF 1 5HF6DOF Device Guide APPENDIX MAXIMIZING POSITIONING ACCURACY ...
Page 30: ...E 2 Premium 1 56DOF 1 5HF6DOF Device Guide APPENDIX CONFIGURING MULTIPLE DEVICES ...
Page 34: ...F 4 Premium 1 56DOF 1 5HF6DOF Device Guide APPENDIX INSTALLING REMOVING THE ENCODER GIMBAL ...
Page 36: ...G 2 Premium 1 56DOF 1 5HF6DOF Device Guide APPENDIX POWER SPECIFICATIONS ...
Page 40: ...H 4 Premium 1 56DOF 1 5HF6DOF Device Guide APPENDIX WORKING WITH PINCH END EFFECTORS ...
Page 42: ...I 2 Premium 1 56DOF 1 5HF6DOF Device Guide APPENDIX DEVICE SPECIFICATIONS ...


