


15
GS-COBRA
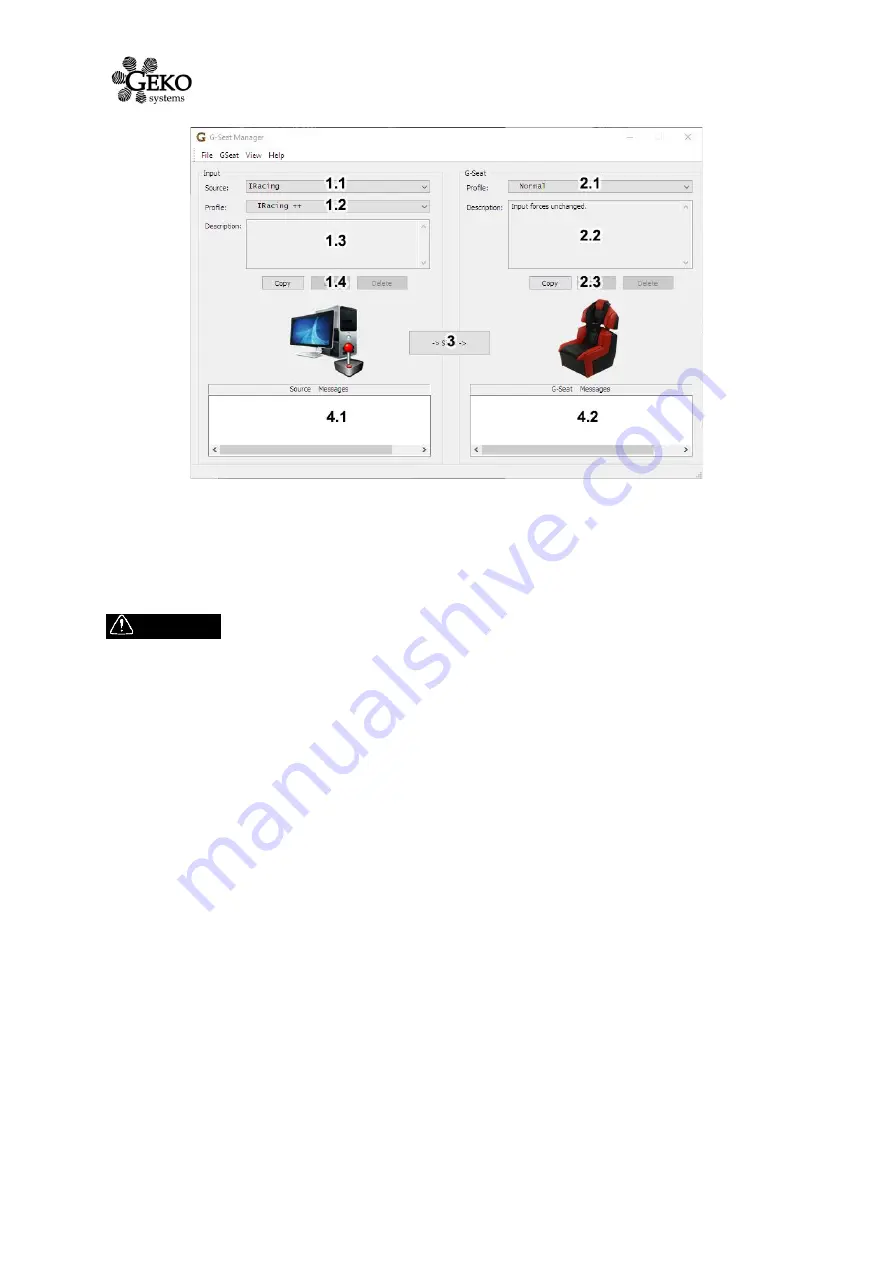
Figure 3: Main Window
This window regroups everything needed to quickly set and start the
GS-COBRA
.It is divided
in two columns: the input column on the left, and the GSeat column on the right. If you keep
the mouse over any control, a tooltip will appear with a quick explaination.
WARNING
Do not press the Start/Stop button 3 before attaching the harness.This
is covered in paragraph 5.4
5.3.1 Choose your source
You need to choose which game the GSeat Manager will retrieve information and build
forces from. This is done by selecting a game name in the list 1.1.
5.3.2 Choose input profile
Once you have chosen the source game, the list 1.2 allows you to choose a profile for this
game.
The GSeat Manager comes with several predefined input profiles, named from each game
(ex: r, r+ and r++).
The amount of ‘+’ defines how magnified the forces are. For example, if you want to drive a
road car in rFactor then you can choose the r++ profile to have strongly magnified
forces, but if you intend to drive a high-performance racing car the r+ or r is
better suited.
These profiles attempt to be as generic as possible to fit various vehicles, giving strong and
detailed forces.
These default profiles may be too strong or too weak for you
(the ideal
level of forceis different for everyone). You can easily adjust the overall force level by
selecting a different GSeat profile (see 5.3.3) or creating a custom one (see 6.6)..
You can of course create your own input profiles to better fit a vehicle (see 6.5).


