background image

18


8.4

 ‐ 

First


Time


Activation


Test


Two


Gate


Operation


Press


the


button


for


channel


2


on


the


remote


control


(black


button)


and


the


programming


systems


will


enter


into


“system


self


learning


mode”.


The


lamp


will


start


quick


flashing


and


the


motors


(one


by


one)


will


start


moving


through


the


following


steps:


Slave


Gate


will


Close


(actuator


extending)


Master


Gate


will


Close


(actuator


extending)


Master


Gate


will


Open


(actuator


retracting)


Slave


Gate


will


Open


(actuator


retracting)


Slave


Gate


will


Close


(actuator


extending)


Master


Gate


Will


Close


(actuator


extending).


Single


Gate


Operation


For


the


single


gate,


when


the


system


receives


a


signal


from


channel


2,


the


lamp


will


start


quick


flashing


but


the


system


will


execute


learning


motion


after


75


sec.


The


learning


mode


will


execute


as


the


following


step:


Master


Gate


Close


(actuator


extending)


Master


Gate


will


Open


(actuator


retracting)


Master


Gate


Will


Close


(actuator


extending)


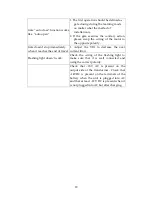
Verify


open


direction


If


the


gate


does


not


move


in


the


desired


direction,


then


you


will


need


to


reverse


the


motor


operating


direction.


No


matter


which


method


of


installation


is


used,


pull


to


open


or


push


to


open,


the


first


operation


should


be


defined


as


gate


closing


phase


during


the


procedure


for


learning.


If


the


system


executes


the


opposite


motion


during


the


learning


mode,


please


swap


the


wires


of


the


motor


to


the


correct


polarity.


Determine


if


Adjustment


is


Required


During


the


“system


learning


mode”,


there


are


two


situations


that


need


to


be


adjusted


for


using


the


VR1


(over


current


sensitivity


/


obstruction


sensor)


If


one


leaf


stops


before


arriving


at


the


end


of


travel.


If


one


leaf


stops


at


end


of


travel


but


the


other


leaf


is


not


moving


and


the


lamp


is


still


quick


flashing.


After


adjusting


the


VR1,


repeat


the


self–learning


system


from


the


beginning.


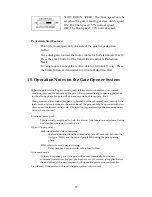
Important


During


the


“System


Self


Learning


Process”,


if


any


command


interrupts


the


leaf

ʹ

s


travel


(Transmitter


or


Push

button


or


other


abnormal


stop),


.the


“System


Self


Learning


Process”


will


not


be


successful


and


the


“System


Self


Learning


Process”


must


be


repeated


again


from


the


beginning.


In


case


of


the


absence


of


a


power


supply,


the


stored


learning


memory


will


be


lost


and


the


systems


should


execute


the


“System


Self


Learning


Process”


again.


Summary of Contents for YG-5602/1U/E

Page 1: ...YG 5602 1U E SWINGING GATE OPENER OWNER S MANUAL...

Page 2: ...1 2011 Gatekeeper Ltd P O Box 752 Lacey s Spring AL 35754 http www gatekeeperltd com...

Page 3: ...d 13 7 Stopper and Latch Installation 14 8 Electrical Installation 16 8 1 Connecting the AC Power 16 8 2 Wiring the Battery see Fig 7b 17 8 3 Wiring the Actuators 17 8 4 First Time Activation Test 18...

Page 4: ...3 THIS PAGE INTENTIONALLY LEFT BLANK...

Page 5: ...ke sure the battery inside the opener is charged fully before using Before installation the clutch should be unlocked The auto reverse function must be checked during installation to ensure that the g...

Page 6: ...ng code technology prevents thieves from guessing your remote code Manual key release design for emergency purposes Supports Keypad interface and Magnetic Loop Detectors simultaneously 3 Specification...

Page 7: ...ave not already done so wire a waterproof outlet near the gate following proper safety standards for your area If you are not experienced with this type of wiring or if your area requires it hire a pr...

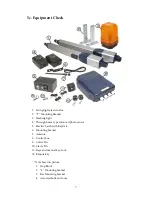
Page 8: ...Through beam type infra red photo sensor 5 Electric Latch with Keylock 6 Mounting bracket 7 Antenna 8 Control box 9 Cotter Pin 10 Clevis Pin 11 Keys and manual key lock 12 Remote key Not shown in pict...

Page 9: ...ator to your gate No Description Quantity Single Dual 1 Actuator 1 2 2 Nest Pin 1 2 3 Fastener Screw 1 2 4 L Mounting Bracket 2 4 5 Bar Mounting Bracket 1 2 6 Nut for Bolt 2 4 7 Bolt 2 4 8 Release Key...

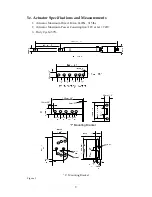
Page 10: ...ents 1 Actuator Maximum Direct Force 1400N 315 lbs 2 Actuator Maximum Power Consumption 12V at 6A 72W 3 Duty Cycle 50 30mm 1 2 T Mounting Bracket 150mm 5 9 20mm 78 20mm 78 20mm 78 20mm 78 8mm 31 15mm...

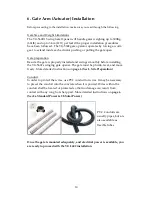
Page 11: ...moothly before installing the YG 5602 swinging gate opener The gate must be plumb level and move freely More detailed instructions on page 6 Sec 5 Site Preparation Conduit In order to protect the wire...

Page 12: ...ace of the mounting post and the opener is mounted on the face 90 degrees from it Below are schematics of both push to open and pull to open configurations A PULL TO OPEN INWARD Use this setup to make...

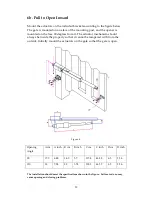
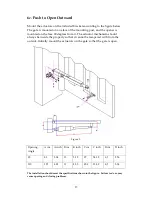
Page 13: ...hould always be inside the property so that it cannot be tampered with from the outside Initially mount the actuators on the gate so that the gate is open Figure 4 Opening Angle A cm A inch B cm B inc...

Page 14: ...m should always be inside the property so that it cannot be tampered with from the outside Initially mount the actuators on the gate so that the gate is open Figure 5 Opening Angle A cm A inch B cm B...

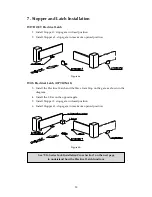
Page 15: ...ectrical Latch OPTIONAL 3 Install the Electrical Latch and the Slave Gate Stop on the gate as shown in the diagram 4 Install the L Bar on the opposite gate 5 Install Stopper 1 stops gate in closed pos...

Page 16: ...al Maintenance Regularly verify that the gate swings freely Add grease to the gate as directed by the manufacturer of the gate Check that wiring and other electrical parts are weather proof Keep opene...

Page 17: ...e the ground usually green to the terminal on the left Wire the hot usually black wire to the middle terminal Wire the neutral usually white wire to the terminal on the right Verify that all electrica...

Page 18: ...ing light Gate is waiting for auto close execution Lamp fixed light 7 sec without gate movement Gate is in a waiting mode since the photocell has been covered by obstacle during the gate closing or op...

Page 19: ...need to reverse the motor operating direction No matter which method of installation is used pull to open or push to open the first operation should be defined as gate closing phase during the proced...

Page 20: ...main button one black one on the left of the transmitter it will then be memorized up to 15 different transmitters can be memorized After the LED light is turned off the receiver module will go back t...

Page 21: ...entation for details The keypad device can be obtained through your dealer To find a dealer go to www gatekeeperltd com dealers 10 2 Loop detector A magnetic loop detector detects vehicles that are wi...

Page 22: ...photocell remove the short circuit wire between Terminals 14 and 15 Attach the normally closed wire to 14 and the other common normally closed wire to 15 COM Attach the 12VDC power for the photocell t...

Page 23: ...gate operation J4 11 use with 12 Keypad Pushbutton for the single gate operation J4 12 Logical and Power Ground for external devices J4 13 Positive Supply 12V DC J4 14 15 Photo sensor contacts must b...

Page 24: ...VDC Max current 3A J3 Terminal block 7 8 Connect to the flashing light 12VDC Max power 15W J4 Terminal block 13 ve 12 ve Connect to the external receiver board for the 12 V DC Positive and Gnd Negativ...

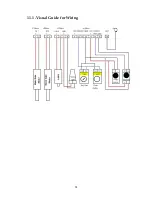
Page 25: ...24 11 1 Visual Guide for Wiring...

Page 26: ...hen an obstruction is placed in its path then the setting may be too high Start with just above the minimum value and tune it to use the minimum setting for which the gate will function WARNING Do not...

Page 27: ...ON Auto close On waiting time 12 seconds Cancel auto close function Move the fourth and fifth DIP switches to the off position in order to disable the auto close feature 14 Additional Features LIGHT...

Page 28: ...c If any command transmitter keypad or photocell or other abnormal case interrupts the leaf s motion before it moves to the end of travel the gate can only be operated with slow down speed for the res...

Page 29: ...to make sure that the battery and transformer J7 J8 is well connected The gate stopped during the operation opening or closing 1 Check to make sure that the Reset switch is on and that the reset swit...

Page 30: ...t stop immediately when it reaches the end of travel 1 Adjust the VR1 to decrease the over current limit Flashing light doesn t work Check the wiring of the flashing light to make sure that it is wel...

Page 31: ...implied Gatekeeper Ltd specifically disclaims any and all implied warranties of merchantability or fitness for a particular purpose It is the purchaser s sole and exclusive responsibility to determine...

Page 32: ...erltd com For updated versions of the manual see http www gatekeeperltd com For Additional Remotes Infrared Photo Cells or Parts please contact your dealer To locate a dealer please visit us at www ga...

Reviews: