background image

3

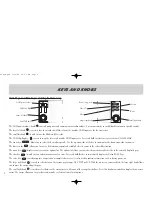
Bottom Row Keys

The NRST key (

N

) displays the nearest airports page.  Then, rotat-

ing the small right knob  (

a

) steps through the NRST pages.

The OBS key (

O

) is used to select manual or automatic sequencing

of waypoints.  Pressing the OBS key selects OBS mode, which will retain
the current “active to” waypoint as your navigation reference even after
passing the waypoint (i.e., prevents sequencing to the next waypoint).
Pressing the OBS key again will return to normal operation, with automat-
ic sequencing of waypoints. Whenever OBS mode is selected, you may set
the desired course to/from a waypoint using the OBS page, or an external
OBS selector on your HSI or CDI.

The message key (

M

) is used to view system messages and to alert

you to important warnings and requirements.

The flight plan key (

F

) allows you to create, edit, activate and invert

flight plans, as well as access approaches, departures and arrivals. A closest
point to flight plan feature is also available from the flight plan key.

The procedures key (

P

) allows you to select approaches, departures

and arrivals from your active flight plan. When using a flight plan, available
procedures for your departure and/or arrival airport are offered automati-
cally.  Otherwise, you may select the desired airport, then the desired pro-
cedure.

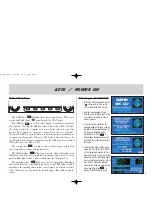
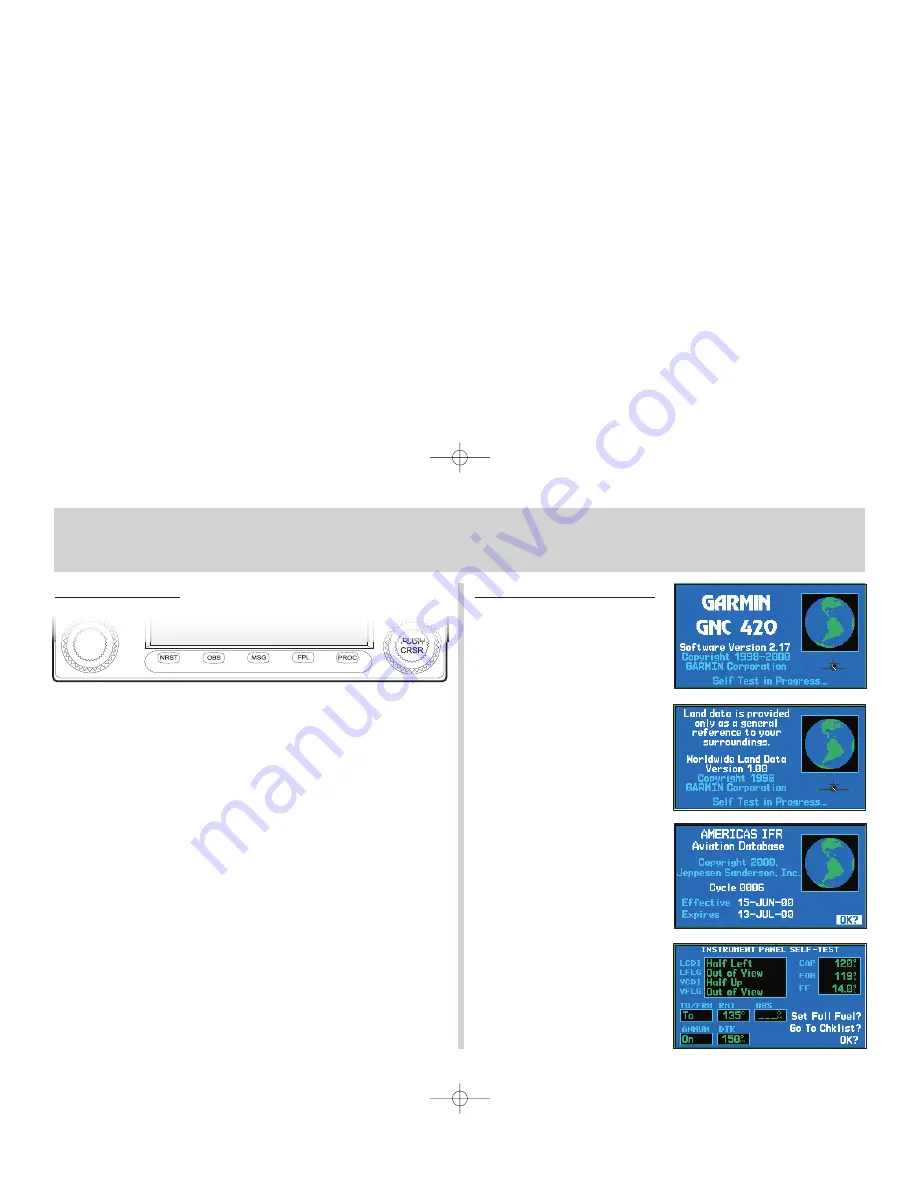
Powering on the GNC 420

1. Rotate the COM power/volume knob

(

k

) clockwise to turn the unit on 

and set the desired radio volume.

2. Awelcome page appears briefly,

folowed by the land data page, as the

unit conducts a self-test to ensure

proper operation.

3. Once the self-test concludes, the 

database page is displayed, showing

the effective and expiration dates of

the Jeppesen database on the

NavData

®

card.  Press 

E

to

acknowledge to database page and

proceed to the instrument panel self-

test page.

4. The instrument panel self-test page 

allows you to verify that the GNC 420 

is communicating properly with the in-

panel instruments. Compare on-screen

indications with the information depict-

ed on connected instruments, such as 

the CDI, HSI, RMI and/or external 

annunciators. Once you have verified 

proper operation, press 

E

to 

display the Satellite Status Page.

KEYS  /  Power On

420QR.qxd  9/12/00  10:27 AM  Page 3

Summary of Contents for GNC 420

Page 1: ...G N C 4 2 0 Q u i c k R e f e r e n c e 420QR qxd 9 12 00 10 27 AM Page 1...

Page 2: ...ist The options list allows you to make settings changes which relate to the currently displayed page The clear key c is used to erase information or cancel an entry Press and hold this key to immedia...

Page 3: ...cedures key P allows you to select approaches departures and arrivals from your active flight plan When using a flight plan available procedures for your departure and or arrival airport are offered a...

Page 4: ...f and large h left knobs to select the desired frequen cy The COM W flip flop key is used to activate the selected frequency Frequency Selection 1 Rotate the large left knob h to select the desired me...

Page 5: ...ght plan pages are selected by pressing the F key and using the small right knob a to select the desired page FPL Group Nearest Airport Nearest Intersection Nearest NDB Nearest VOR Nearest User Waypoi...

Page 6: ...ate the large right knob d to highlight the facility name second line or the city third line field 3 Use the small a and large d right knobs to enter the facility name or city location of the desired...

Page 7: ...ond line or the city third line field 4 Use the small a and large d right knobs to enter the facility name or city loca tion of the desired destination waypoint As you spell the facility name or city...

Page 8: ...he default NAV page displayed press the m key to display an options menu 2 Rotate the large right knob d to highlight the Change Fields option and press E to select this option 3 Use the large right k...

Page 9: ...e map page displayed press m to display an options menu 2 Rotate the large right knob d to highlight Data Fields Off and press E 3 To re display the data fields follow steps 1 and 2 but instead select...

Page 10: ...ight hand side of the screen will indicate which part of the list is cur rently being displayed Auto Tuning a Frequency from the NAVCOM Page 1 Highlight the desired frequency by scrolling through the...

Page 11: ...the selected airport 3 To view additional WPT pages for the selected airport including the airport runway and airport frequency pages press the small right knob r to remove the flashing cursor Rotate...

Page 12: ...Plan and press E To Stop Navigating a Flight Plan 1 Press F 2 Press m to display the flight plan options 3 Rotate the large right knob d to highlight Delete Flight Plan and press E Press E again to co...

Page 13: ...cat ing that GPS guidance on such approaches is strictly for monitoring only use the external navigation receivers and CDI or HSI for prima ry navigation To confirm this reminder highlight Yes and pre...

Page 14: ...ch Due to the variety of available approach procedures the specific steps required will vary according to the approach selected Keep the following general guidelines in mind while flying the approach...

Page 15: ...tomatic waypoint sequencing For course reversals way point sequencing is suspended for one trip around the holding pattern only after which it will return to automatic waypoint sequencing The CDI will...

Page 16: ...Street Olathe KS 66062 GARMIN Europe LTD Unit 5 The Quadrangle Abbey Park Industrial Estate Romsey SO51 9AQ U K GARMIN Asia Corp No 68 Jangshu 2nd Road Shijr Taipei County Taiwan Website Address www g...

Reviews: