7
EN
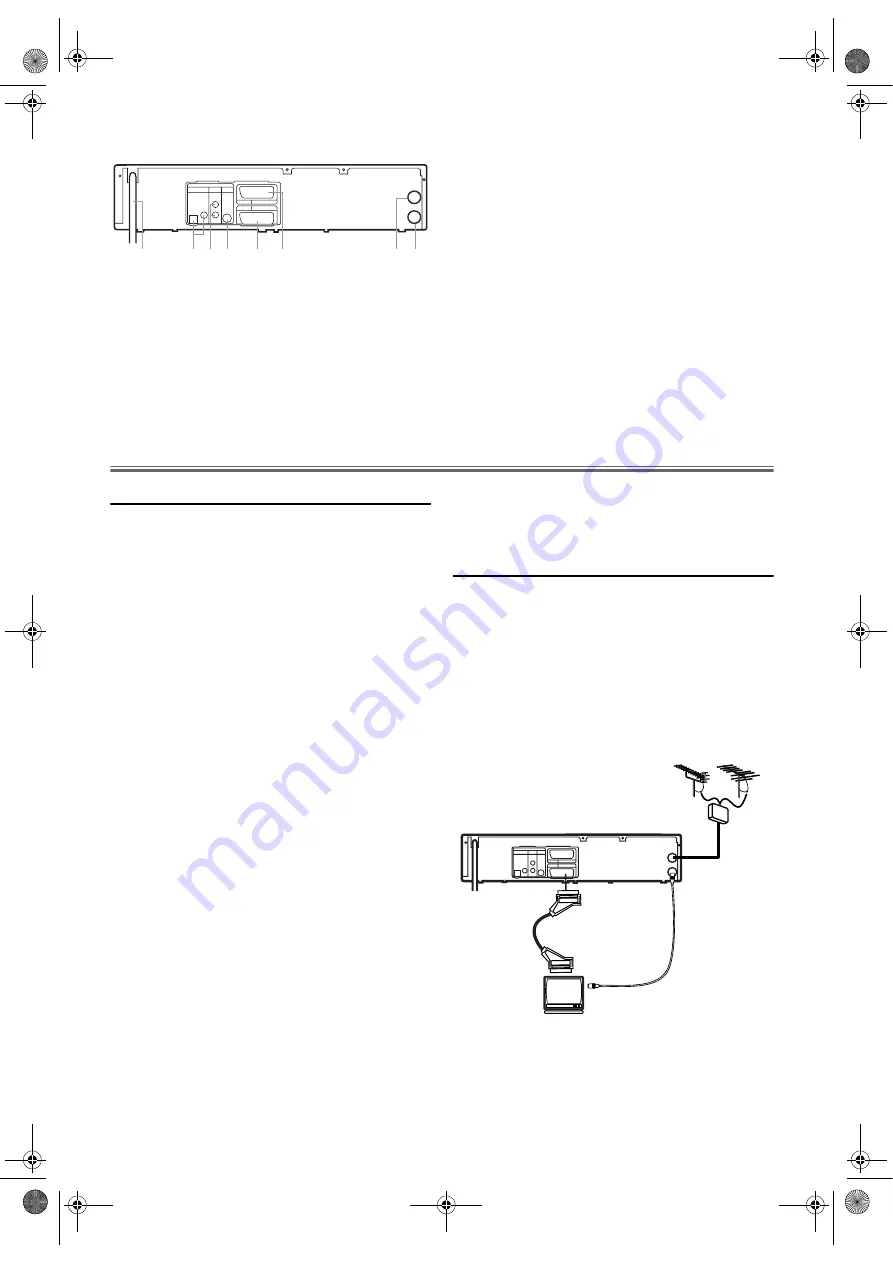
Rear View
1.
Power Cord
Connect to a standard AC outlet
2.
DIGITAL AUDIO OUT (OPTICAL, COAXIAL ) jacks (DVD
only)
Connect to an amplifier with digital input jacks such as
Dolby Digital decoder, DTS decoder, etc.. Use a
commercially available optical or coaxial cable.
3.
ANALOG AUDIO OUT jacks (DVD only)
Connect to the audio input jacks of your TV or stereo
system. Use commercially available audio cables.
4.
S-VIDEO OUT jack (DVD only)
Connect to the S-VIDEO input jack on your TV. Use a
commercially available S-VIDEO cable.
5.
AV1(TV) jack
Connect to the scart jack on your TV. Use the supplied
scart cable.
6.
AV2(DECODER) jack (VCR only)
Connect a scart cable from another VCR, camcoder, or
an audio/video source.
7.
AERIAL jack
Connect to an antenna or cable.
8.
RF OUT jack
Connect to the antenna in jack of your TV, cable box or
direct broadcast system. Use the supplied RF cable.
CAUTION: Do not touch the inner pins of the
jacks on the rear panel.
Electrostatic discharge may cause
permanent damage to the unit.
Setting up Your DVD/VCR
Before Connecting
• Please refer to the instruction books of your TV, DVD/
VCR, Stereo System or other devices as necessary to make
the best connections.
• Make one of the following connections, depending on the
capabilities of your existing equipment.
The following guidelines are options for the best picture and
sound quality available on your DVD/VCR.
Picture
1)
Use SCART Output (DVD/VCR(AV1 TV)) for best
picture quality (for DVD and VCR features).
2)
Use S-Video Output for the better picture quality (for
DVD features only).
3)
If your TV only has a RF-style (Antenna IN or 75 ohm)
input, use the RF OUT for connection and set your TV
to channel 22 ~ 69 with the same channel for DVD/VCR
is set (for DVD and VCR features).
Note: •
When your TV conforms to RGB input signal, the
Euro AV (scart) connection ensures you the best
picture and audio quality. However if your TV does
not conform to RGB input signal, the S-VIDEO
OUT and analog AUDIO OUT connection is better.
(for DVD features only)
Sound
1)
Use SCART Output (DVD/VCR(AV1 TV)) for best
sound quality (for DVD and VCR features).
2)
Digital audio connections provide the clearest sound.
Connect the DVD/VCR’s DIGITAL AUDIO OUT
(either COAXIAL or OPTICAL) to your amplifier or
receiver (for DVD features only).
3)
If digital connections are not possible, connect the DVD/
VCR’s ANALOG AUDIO OUT(Left and Right) to your
amplifier, receiver, stereo or TV (for DVD features only).
WARNING!
• Never make or change connections with the power
switched on.
• Connect the DVD/VCR directly to your TV, instead of eg.
a VCR, to avoid distortion because DVD video discs are
copy protected.
• Do not connect the ANALOG AUDIO OUT of DVD/
VCR to PHONO IN of your amplifier or receiver.
• If you use the Euro audio/video cable, it is not necessary to
connect the analog audio cables.
Connecting to a TV
1)
Disconnect the antenna or cable from your TV.
2)
Connect that antenna or cable to the AERIAL jack of this
unit.
3)
Connect the RF OUT jack of this unit to the antenna in
jack of your TV. Use the supplied RF cable.
4)
Connect the AV1 (TV) scart jack of this unit to the scart
input jack of your TV. Use the supplied scart cable.
5)
Plug in the TV and this unit.
Note: •
The TV must be connected to this unit through AV1
(TV) jack. A connection to AV2 (DECODER) jack
will not function correctly.
RF OUT
AERIAL
VCR
AV2 (DECODER)
DVD/VCR
AV1 (TV)
L
R
DVD
OPTICAL COAXIAL
DIGITAL
AUDIO OUT
ANALOG
AUDIO OUT
S-VIDEO
OUT
1
2
3 4
5
6
7
8
RF OUT
AERIAL
VCR
AV2 (DECODER)
DVD/VCR
AV1 (TV)
L
R
DVD
OPTICAL COAXIAL
DIGITAL
AUDIO OUT
ANALOG
AUDIO OUT
S-VIDEO
OUT
VHF/UHF
MIXER
UHF
VHF
to aerial socket
RF cable
(supplied)
scart cable
(supplied)
(TV)
to 21-pin
scart jack
FUN_ H97L2BD(EN).fm Page 7 Tuesday, July 27, 2004 6:06 PM


