6. SpO
2
Monitoring
22
Applying the OxiMax
®
MAX-P/ MAX-A/ MAX-AL sensor
This Nellcor
®
adhesive sensor, model MAX-P/ MAX-A/ MAX-AL, is indicated
for continuous noninvasive arterial oxygen saturation and pulse rate monitoring
and can be reused on the same patient as long as the adhesive tape attaches
without slippage.
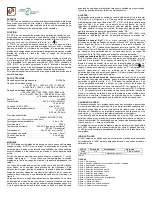
1. Remove the plastic backing from the MAX-P/MAX-A/MAX-AL and locate
the transparent windows (a) on the adhesive side. Windows cover optical
components (Figure (1)).
The index finger is the preferred MAX-P/MAX-A/MAX-AL location.
Alternatively, apply the sensor to the small thumb, smaller finger, or big toe.
N O T E
When selecting the sensor site, priority should be given to an extremity free
of an arterial catheter, blood pressure cuff, or intravascular infusion line.
2. Orient the MAX-P/MAX-A/MAX-AL so that the dashed line in the middle of
the sensor is centered on the tip of the finger/toe (Figure (2)). Wrap the
adhesive flaps around the digit. Note that the cable must be positioned on
the top of the hand or foot.
3. Fold the cable end over the top of the finger/toe so that the windows are
directly opposite to each other. Wrap the adhesive securely around both
sides of the digit (Figure (3)).
4. Connect the MAX-P/MAX-A/MAX-AL into the LX-7230N. Verify proper
operation as described in the operation manual.
(1)
(2)
(3)
N O T E
If the sensor does not track the pulse reliably, it may be incorrectly
positioned – or the sensor site may be too thick, thin, or deeply pigmented,
or otherwise deeply colored (for example, as a result of externally applied
coloring such as nail polish, dye, or pigmented cream) to permit appropriate
light transmission. If any of these situations occurs, reposition the sensor or
choose an alternate Nellcor sensor to use on a different site.
Summary of Contents for LX-7230N
Page 22: ...1 General Description 2 Blank Page ...
Page 28: ...3 Preparation 8 Blank Page ...
Page 36: ...5 Respiration Monitoring 16 Blank Page ...
Page 66: ...7 Measurement 46 Blank Page ...
Page 72: ...8 Operation 52 Blank Page ...
Page 78: ...10 Changing the Transmitter Channel and Group ID 58 Blank Page ...
Page 84: ...11 Troubleshooting 64 Blank Page ...
Page 92: ...14 Standard and Optional Accessories 72 Blank Page ...


