TX1310 M1
Upgrade and Maintenance Manual
157
Processor
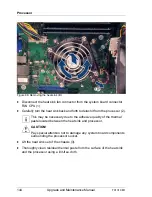
Figure 102: Installing the heat sink (B)
Ê
Fasten the four captive screws on the heat sink in a crossover pattern (screw
torque: 0.6 Nm, not applicable for the Japanese market) (1-4).
Ê
Connect the heat sink fan connector to system board connector FAN CPU
(5).
11.2.8 Concluding steps
Ê
"Installing the side cover" on page 53
Ê
"Connecting the server to the mains" on page 54
Ê
If applicable,
"Updating or recovering the system board BIOS" on page 68
Ê
"Switching on the server" on page 55
Ê
"Enabling BitLocker functionality" on page 74
Summary of Contents for PRIMERGY TX1310 M1
Page 6: ...Upgrade and Maintenance Manual TX1310 M1 Version history ...
Page 18: ...18 Upgrade and Maintenance Manual TX1310 M1 Introduction ...
Page 38: ...38 Upgrade and Maintenance Manual TX1310 M1 Important information ...
Page 132: ...132 Upgrade and Maintenance Manual TX1310 M1 Expansion cards and backup units ...
Page 220: ...220 Upgrade and Maintenance Manual TX1310 M1 Cables ...


