background image

173


Identities and Password Management 

On the 

Manage Passwords

 interface of the 

Vault Management

 tab of the OmniPass Control Center, 

there is a pull-down selection box labeled, 

Identity

. This field lets you choose which identity you are 

managing passwords for. When you select an identity here, only those password protected dialogs that are 
associated with that identity are shown. You can perform all the functions explained in “Password 
Management” on page 171.

Configuring OmniPass

This section gives an overview of both the Export/Import function and the OmniPass Control Center. 

Exporting and Importing Users 

Using OmniPass Control Center, you can export and import users in and out of OmniPass. The export 
process backs up all remembered sites, credentials, and enrolled fingerprints for an OmniPass user. All 
OmniPass data for a user is backed up to a single encrypted database file. During the import process, the 
Windows login of the exported user is required. If the proper credentials cannot be supplied, the user 
profile will not be imported

.

Y

OU


CANNOT


IMPORT


A


USER


INTO

 O

MNI

P

ASS


IF


THERE


ALREADY


IS


A


USER


WITH


THE


SAME


NAME


ENROLLED


IN

 O

MNI

P

ASS

Y

OU


SHOULD


PERIODICALLY


EXPORT


YOUR


USER


PROFILE


AND


STORE


IT


IN


A


SAFE


PLACE

. I

F


ANYTHING


HAPPENS


TO


YOUR


SYSTEM

YOU


CAN


IMPORT


YOUR

 O

MNI

P

ASS


PROFILE


TO


A


NEW


SYSTEM


AND


HAVE


ALL


YOUR


REMEMBERED


SETTINGS


AND


FINGERPRINTS


INSTANTLY

.

D

ON

'

T


FORGET


THE

 W

INDOWS


LOGIN


CREDENTIALS


WHEN


EXPORTING

. W

HEN


YOU


EXAMINE


THE


IMPORTATION

YOU


ARE


PROMPTED


FOR


AUTHENTICATION

. T

HE


CREDENTIALS


THAT


WILL


ALLOW


A


USER


PROFILE


TO


BE


IMPORTED


ARE


THE

 W

INDOWS


LOGIN


CREDENTIALS


OF


THE


EXPORTED


USER

T

HEY


ARE


THE


CREDENTIALS


THAT


HAD


TO


BE


SUBMITTED


WHEN


THE


USER


PROFILE


WAS


EXPORTED

. Y

OU


WILL


NEED

 U

SER

 N

AME

, P

ASSWORD

AND

 D

OMAIN

.

Summary of Contents for Lifebook S710

Page 1: ... User s Guide Learn how to use your Fujitsu LifeBook S710 notebook Guide d utilisation Découvrez comment utiliser votre ordinateur portable Fujitsu LifeBook S710 ...

Page 2: ...User s Guide Learn how to use your Fujitsu LIFEBOOK S710 notebook ...

Page 3: ...ies The ExpressCard word mark and logo are owned by the Personal Computer Memory Card International Association PCMCIA and any use of such marks by Fujitsu America Incorporated is under license Bluetooth is a trademark of Bluetooth SIG Inc USA Adobe Acrobat and Acrobat Reader are either a registered trademarks or trademarks of Adobe Systems Inc in the United States and or other countries Google an...

Page 4: ...lated without prior written consent of Fujitsu No part of this publication may be stored or transmitted in any electronic form without the written consent of Fujitsu FPC58 2815 01 WARNING HANDLING THE CORD ON THIS PRODUCT WILL EXPOSE YOU TO LEAD A CHEMICAL KNOWN TO THE STATE OF CALIFORNIA TO CAUSE BIRTH DEFECTS OR OTHER REPRODUCTIVE HARM WASH HANDS AFTER HANDLING DECLARATION OF CONFORMITY accordin...

Page 5: ...hey may explode Check with local codes for possible special disposal instructions To reduce the risk of fire use only No 26 AWG or larger UL Listed or CSA Certified Telecommunication Line Cord For TV tuner use To protect from overvoltages and transients on the Cable Distribution System make sure that the outer shield of the coaxial cable is connected to earth grounded at the building premise as cl...

Page 6: ...ronment by recycling old batteries at no cost to you RBRC has drop off points at tens of thousands of locations throughout the United States and Canada To find the location nearest you go to www RBRC org or call 1 800 822 8837 If there are no convenient RBRC locations near you you can also go to the EIA Consumer Education Initiative website http EIAE org and search for a convenient disposal locati...

Page 7: ...11 Locating the Controls and Connectors 12 Top Components 13 Left Side Panel Components 15 Right Side Panel Components 17 Back Panel Components 19 Bottom Components 20 Status Indicator Panel 22 Power Indicator 22 Battery Charge Indicator 23 Battery Level Indicators 23 Hard Drive Optical Drive Access Indicator 24 NumLk CapsLock ScrLk Indicators 24 ...

Page 8: ... Volume Control 32 Controlling the Volume 32 Flexible Bay Devices 33 Removing and Installing Modular Devices 33 LIFEBOOK Security Application Panel 35 Setting up Your LIFEBOOK Security Panel 35 Passwords 36 Operating Your LIFEBOOK Security Application Panel 37 Precautions 38 Uninstalling the Security Panel Application 39 Launching Applications with the Security Application Panel 41 ...

Page 9: ...47 Closing the Display Panel 47 Starting Your LIFEBOOK Notebook 48 Power On 48 Boot Sequence 49 Hard Disk Drive Passwords 49 BIOS Setup Utility 49 Booting the System 51 Starting Windows the first time 51 Registering Your LIFEBOOK notebook with Fujitsu 52 Installing Click Me 53 Fujitsu Driver Update Utility 54 Power Management 55 Power Suspend Resume Button 55 Sleep Mode 56 Hibernate Feature 57 Win...

Page 10: ...e Tray Release 68 Using the Media Player Software 69 Using Media Player on Battery Power 69 Memory Stick Secure Digital Cards 71 Installing Memory Stick SD Cards 72 Removing a Memory Stick SD Card 72 ExpressCards Smart Cards 73 Inserting ExpressCards 73 Removing ExpressCards 74 Smart Card Reader 75 Memory Upgrade Module 76 Installing Memory Upgrade Modules 76 Removing a Memory Upgrade Module 77 Ch...

Page 11: ...4 Specific Problems 85 Power On Self Test Messages 96 Modem Result Codes 100 Restoring Your Pre installed Software 101 Re installing Individual Drivers and Applications 101 Restoring the Operating System for Windows 102 Automatically Downloading Driver Updates 105 Chapter 5 Care and Maintenance Caring for your LIFEBOOK Notebook 107 Cleaning your LIFEBOOK notebook 109 Cleaning the dust filter 110 S...

Page 12: ...ory 117 Video 117 Audio 118 Mass Storage Device Options 118 Features 118 Device Ports 119 Keyboard 120 Power 121 Dimensions and Weight 121 Environmental Requirements 122 Popular Accessories 122 Pre Installed Software 122 Learning About Your Software 123 Glossary Regulatory Glossary 126 Regulatory Information 141 ...

Page 13: ... the WLAN Device 152 Deactivation Using the Wireless On Off Switch 153 Activating the WLAN Device 153 Configuring the Wireless LAN 154 Troubleshooting the WLAN 156 WLAN Specifications 158 Using the Bluetooth Device 160 Appendix B Fingerprint Sensor Device Introducing the Fingerprint Sensor Device 162 Getting Started 163 Installing OmniPass 163 User Enrollment 166 Using OmniPass 168 Configuring Omn...

Page 14: ...rosoft Windows XP Professional operating system pre installed This manual explains how to operate your LIFEBOOK notebook s hardware and built in system software Conventions Used in the Guide Keyboard and on screen keys appear in brackets Example Fn F1 ESC ENTER and CTRL Pages with additional information about a specific topic are cross referenced within the text For example See Installation Proced...

Page 15: ...stest possible solution Product name Product configuration number Product serial number Purchase date Conditions under which the problem occurred Any error messages that have occurred Type of device connected if any THIS CAUTION ICON HIGHLIGHTS INFORMATION THAT IS IMPORTANT TO THE SAFE OPERATION OF YOUR COMPUTER OR TO THE INTEGRITY OF YOUR FILES PLEASE READ ALL CAUTION INFORMATION CAREFULLY THIS W...

Page 16: ...w shopfujitsu com Limited Warranty Your LIFEBOOK notebook is backed by a Fujitsu International Limited Warranty Check the service kit that came with your notebook for the Limited Warranty period and terms and conditions YOU MUST HAVE AN ACTIVE INTERNET CONNECTION TO USE THE ONLINE URL LINKS ...

Page 17: ...erview This section describes the components of your Fujitsu LIFEBOOK S710 notebook We strongly recommend that you read it before using your notebook even if you are already familiar with notebook computers Figure 1 Fujitsu LIFEBOOK S710 notebook ...

Page 18: ...K Security Touchpad Pointing Device Power Suspend Application Panel Resume Button Memory Stick On Off Switch Wireless LAN Bluetooth Stereo Speaker Optional Quick Point Cursor Control Built in Web Camera Built in Microphone Built in Microphone Headphone Jack Microphone Jack SD Card Slot IEEE1394 Jack Status Indicator Panel Fingerprint Recognition Sensor ...

Page 19: ...re security and one touch application launch capability See LIFEBOOK Security Application Panel on page 35 Power Suspend Resume Button The Power Suspend Resume button allows you to suspend notebook activity without powering off resume your notebook from sleep mode and power on your notebook when it has been shut down from Windows See Power Suspend Resume Button on page 48 Stereo Speakers The built...

Page 20: ...turn on and off the optional WLAN and Bluetooth devices Switching the device off when not in use will help to extend battery life See Activating the WLAN Device on page 153 Memory Stick SD Card Slot The Memory Stick SD card slot allows you to install a Memory Stick or a Secure Digital SD card for data storage This architecture allows you to transfer data from a variety of different digital devices...

Page 21: ...his allows you to attach a DisplayPort cable DisplayPort cables are primarily used to connect a computer with a monitor or home theater system ExpressCard Slot The ExpressCard slot allows you to install an ExpressCard See ExpressCards Smart Cards on page 73 DC Power Jack The DC power jack allows you to plug in the AC adapter to power your LIFEBOOK notebook and charge the internal Lithium ion batte...

Page 22: ...83 USB 2 0 Ports The USB 2 0 ports allow you to connect Universal Serial Bus devices USB 2 0 transfers data at up to 480 Mbps and is backward compatible with USB 1 1 devices which transfer data at up to 12 Mbps See Universal Serial Bus Ports on page 81 TO PROTECT YOUR NOTEBOOK FROM DAMAGE AND TO OPTIMIZE PERFORMANCE BE SURE TO KEEP ALL AIR VENTS UNOBSTRUCTED CLEAN AND CLEAR OF DEBRIS THIS MAY REQU...

Page 23: ...ations of the S710 notebook have an optional internal modem The modem RJ 11 telephone jack is for attaching a telephone line to the internal multinational 56K modem See Optional Modem RJ 11 Telephone Jack on page 79 Anti Theft Lock Slot Flexible Bay Flexible Bay Release Latch Eject Button USB 2 0 Port Smart Card Slot Optional Modem RJ 11 Jack Emergency Tray Release THE INTERNAL MODEM IS NOT INTEND...

Page 24: ... not available to the system USB 2 0 Ports USB 2 0 ports allow you to connect Universal Serial Bus devices USB 2 0 transfers data at up to 480 Mbps and is backward compatible with USB 1 1 devices which transfer data at up to 12 Mbps See Universal Serial Bus Ports on page 81 Anti theft Lock Slot The anti theft lock slot allows you to attach an optional physical lock down device Eject Button The Eje...

Page 25: ...components Gigabit LAN RJ 45 Jack The internal LAN RJ 45 jack is used for an internal Gigabit 10Base T 100Base Tx 1000Base T Ethernet LAN connection See Internal LAN RJ 45 Jack on page 80 Anti theft Lock Slot The anti theft lock slot allows you to attach an optional physical lock down device Gigabit LAN RJ 45 Jack Anti Theft Lock Slot ...

Page 26: ...nchronous Dynamic RAM DDR3 SDRAM The memory upgrade compartment allows you to expand the system memory capacity of your notebook thus improving overall performance See Memory Upgrade Module on page 76 Under normal circumstances it should not be necessary to open this compartment Memory Upgrade Lithium ion Battery Bay Port Replicator Connector Battery Bay Lock Air Vents various locations Battery Ba...

Page 27: ...ithium ion Battery on page 60 Dust Filter Cover The dust filter cover provides access to the embedded dust filter which is used to help prevent dust and dirt from entering your system See Cleaning the dust filter on page 110 Air Vents The air vents allow air to circulate through the system to cool down the components TO PROTECT YOUR NOTEBOOK FROM DAMAGE AND TO OPTIMIZE SYSTEM PERFORMANCE BE SURE T...

Page 28: ...ttery 2 Indicator Optical Battery1 Indicator Hard Drive Indicator Power Indicator The Power indicator symbol states whether your system is operational It has several different states each of which tells you the mode your notebook is in Steady On This means that there is power to your LIFEBOOK notebook and that it is ready for use Flashing This means that your notebook is in sleep mode Steady Off T...

Page 29: ...tery pack as follows Green solid Battery is between 51 and 100 charged Orange solid Battery is between 13 and 50 charged Red solid Battery is 12 or less charged Orange blinking Blinks during battery status measurement 4 seconds after battery is installed Red blinking There is a problem with the battery Off There is no battery installed If the battery pack is installed while the power is turned off...

Page 30: ...umLk indicator shows that the integral keyboard is set in ten key numeric keypad mode CapsLock Indicator The CapsLock indicator shows that your keyboard is set to type in all capital letters ScrLk Indicator The ScrLk indicator shows that your scroll lock is active Batteries subjected to shocks vibration or extreme temperatures can be permanently damaged A shorted battery is damaged and must be rep...

Page 31: ...d Your notebook allows certain keys to serve dual purposes both as standard characters and as numeric and mathematical keys The ability to toggle between the standard character and numerical keys is controlled through the NumLk key Cursor keys Your keyboard contains four arrow keys for moving the cursor or insertion point to the right left up or down within windows applications and documents Fn Ke...

Page 32: ...dicate their secondary functions Windows Keys Your LIFEBOOK notebook has two Windows keys consisting of a Start key and an Application key The Start key displays the Start menu This button functions the same as your onscreen Start menu button The Application key functions the same as your right mouse button and displays shortcut menus for the selected item Please refer to your Windows documentatio...

Page 33: ...F7 repeatedly while holding Fn will increase the brightness of the display Fn F8 Pressing F8 repeatedly while holding Fn will decrease the volume of your LIFEBOOK notebook Fn F9 Pressing F9 repeatedly while holding Fn will increase the volume of your LIFEBOOK notebook Fn F10 Pressing F10 while holding Fn allows you to change your selection of where to send your display video Each time you press th...

Page 34: ... and a fingerprint scroll sensor The cursor control works the same as a mouse and moves the cursor around the display It only requires light pressure with the tip of your finger The left and right buttons function the same as mouse buttons The fingerprint scroll sensor can be used either for fingerprint security or for scrolling through pages without having to use the scroll bars Left Button Right...

Page 35: ...e Entering the BIOS Setup Utility on page 50 Clicking means pushing and releasing a button To left click move the cursor to the item you wish to select press the left button once and then immediately release it To right click move the mouse cursor to the item you wish to select press the right button once and then immediately release it You also have the option to perform the clicking operation by...

Page 36: ...tem you wish to move making sure to leave your finger on the pad after the final tap Next move the object to its new location by moving your finger across the Touchpad and then release your finger Using the fingerprint scroll sensor allows you to navigate through a document quickly without using the window s scroll bars This is particularly useful when you are navigating through on line pages To u...

Page 37: ...use ball does and moves the cursor around the display It only requires light pressure to move the more pressure you use the faster the cursor will move The left and right buttons that are located at the top of the Touchpad are designed for use with the Quick Point control and they function in the same manner as the lower buttons When used with the Quick Point button the middle Touchpad button allo...

Page 38: ...n F3 procedure Volume can be controlled by many volume controls that are set within individual applications Certain external audio devices you might connect to your system may have hardware volume controls Each source discussed above puts an upper limit on the volume level that must then be followed by the other sources We recommend that you experiment with the various volume controls to discover ...

Page 39: ...that can be used to power your LIFEBOOK notebook when an adapter is not connected Modular second hard disk drive This allows you to store additional data and applications Weight saver This is used to fill the bay when no device is needed Removing and Installing Modular Devices There are two ways to remove and install modular devices in the Flexible Bay Cold swapping swapping devices while your LIF...

Page 40: ...MATTER MAY ACCUMULATE INSIDE THE NOTEBOOK BE CAREFUL WHEN ALIGNING AND SEATING DEVICES IN THE BAY IF THE FIT IS INCORRECT YOU MAY DAMAGE THE BAY OR THE DEVICE IF THE DEVICE DOES NOT MOVE EASILY IN THE BAY REMOVE IT AND CHECK FOR DIRT OR FOREIGN OBJECTS IT WILL REQUIRE A FIRM PUSH TO LATCH THE DEVICE IN PLACE 1 Close any open files 2 Shut down your LIFEBOOK notebook 3 Pull out the Flexible Bay rele...

Page 41: ...de using the buttons on the Security Application Panel After entering a correct password your notebook resumes system operation Setting up Your LIFEBOOK Security Panel When you receive your LIFEBOOK notebook the security panel application is pre installed without any passwords The following sections provide detailed information on your security panel and how to set change or remove passwords Numbe...

Page 42: ...ng 2 and 3 at the same time Pushing 1 2 and 4 at the same time Pushing 1 2 3 and 4 at the same time The following are valid passwords The numbers within braces are button strokes using more than one button 2 3 1 enter 4 enter 1 3 2 3 4 1 4 2 enter Setting Passwords When shipped from the factory no passwords are set You have a choice of having no password or setting supervisor and user passwords Yo...

Page 43: ...ssword 4 Follow instructions to set the user password Operating Your LIFEBOOK Security Application Panel The security lock feature is in effect both when the system resumes from Off or sleep state You will need to enter the user password right after pressing the Suspend Resume button Your system will not boot or resume from Sleep without entering your supervisor user password From Off State 1 Turn...

Page 44: ...d Resume button then enter a correct password Precautions Opening and Closing the Cover Closing the cover automatically places the notebook into sleep mode Opening the cover does not automatically place the notebook into normal operation Instead you must enter the proper security password after pushing the Power Suspend Resume button This setting can be changed in the Power Options Control Panel L...

Page 45: ...ked to confirm select Yes Removing Security Panel Application with Passwords Still Active Using this feature will not allow any changes to the password Depending upon your operating system the procedures differ slightly as noted below ALWAYS POWER OFF THE COMPUTER BEFORE TRANSPORTING AND OR PACKAGING IT AFTER SHUTTING DOWN THE SYSTEM WAIT UNTIL THE STATUS LED PANEL INDICATES POWER OFF CONDITION I ...

Page 46: ...r supervisor and user security applications are contained in those folders 1 Go to the Utilities SAP Vista Supervisor folder on the CD and double click the SetupS exe file The Installing Security Panel Application window will appear Follow the instructions on the screen 2 Go to the Utilities SAP Vista folder on the CD and double click the Setup exe file The Installing Security Panel Application wi...

Page 47: ... the Panel to best suit your needs we have provided the Application Panel Setup utility that quickly and easily helps you make the most of this valuable feature To configure your LIFEBOOK Application Panel with Application Panel Setup 1 Click on Start Settings Control Panel Application Panel or Button in Windows Vista 2 The Application Panel Setup or Button Setting in Windows Vista utility will ap...

Page 48: ... have finished with Application Panel Setup click OK and the new settings will take effect You can reconfigure your LIFEBOOK Application Panel as often as you like Deactivating and Activating the LIFEBOOK Application Panel To deactivate the LIFEBOOK Application Panel follow these easy steps Note that in Windows Vista systems the application panel is automatically activated 1 Click on Start 2 Click...

Page 49: ...itsu LIFEBOOK notebook has three possible power sources a primary Lithium ion battery an AC adapter or an optional Auto Airline adapter Connecting the Power Adapters The AC adapter or optional Auto Airline adapter provides power for operating your notebook and charging the batteries DC Power Jack AC Adapter ...

Page 50: ...lighter of an automobile with the ignition key in the On or Access OR 3 Plug the Auto Airline adapter into the DC power jack on an airplane seat Switching from AC Adapter Power or the Auto Airline Adapter to Battery Power 1 Be sure that you have at least one charged battery installed 2 Remove the AC adapter or the Auto Airline adapter THE LITHIUM ION BATTERY IS NOT CHARGED UPON PURCHASE INITIALLY ...

Page 51: ...tains a display panel that is backlit for easier viewing in bright environments and maintains top resolution through the use of active matrix technology Opening the Display Panel 1 Lift the display backwards being careful not to touch the screen until it is at a comfortable viewing angle ...

Page 52: ...ptions utility open the Control Panel and double click on the Power Options icon Select Adjust the display brightness in the left panel then drag the brightness bars to the desired level Note that the settings you make via this utility become permanent until you decide to change them again Windows 7 To change the brightness using the Power Options utility open the Control Panel and select one of t...

Page 53: ... until it is flush with the body of your LIFEBOOK notebook n WHEN USING AC POWER YOUR BRIGHTNESS SETTING IS SET TO ITS HIGHEST LEVEL BY DEFAULT WHEN USING BATTERY POWER YOUR BRIGHTNESS SETTING IS SET TO APPROXIMATELY MID LEVEL BY DEFAULT n THE HIGHER THE BRIGHTNESS LEVEL THE MORE POWER THE NOTEBOOK WILL CONSUME AND THE FASTER YOUR BATTERIES WILL DISCHARGE FOR MAXIMUM BATTERY LIFE MAKE SURE THAT TH...

Page 54: ...ault is found your LIFEBOOK notebook will emit an audio warning and or an error message will be displayed See Power On Self Test Messages on page 96 Depending on the nature of the problem you may be able to continue by starting the operating system or by entering the BIOS setup utility and revising the settings After satisfactory completion of the POST your notebook will load your operating system...

Page 55: ...uted when You turn on the power to your LIFEBOOK notebook You restart your notebook from the Windows Shut Down dialog box The software initiates a system restart such as when you install a new application Hard Disk Drive Passwords To provide additional security for your data you can assign passwords to your hard disk drive This feature is managed in the system BIOS Setup Utility See BIOS Setup Uti...

Page 56: ...gs Using the TrustedCore Menu When the Fujitsu logo appears on the screen press the Enter key or click on the left mouse or touchpad button the TrustedCore Menu will appear The TrustedCore Menu provides shortcuts to the following menus and information screens BIOS Setup Diagnostic Screen Boot Menu Patent Information System Information Continue Booting Clicking on any of the fields will invoke the ...

Page 57: ...reements EULAs 2 You will be prompted to enter your User Name and Password and you will be given a chance to select an icon for your account 3 The next screen asks for a Computer Name and allows you to choose a desktop background THE FIRST TIME YOU INITIALIZE YOUR WINDOWS SYSTEM THE SCREEN WILL BE BLANK FOR APPROXIMATELY TWO MINUTES THIS IS NORMAL AFTER INITIALIZATION A SET UP WINDOWS DIALOG BOX W...

Page 58: ... you initialize your Windows Vista system the screen will be blank for approximately two minutes This is normal During this period do not disconnect the power supply press any buttons or use any peripheral devices such as mouse keyboard or remote control Registering Windows Vista with Microsoft 1 After Windows has booted up for the first time the Control Panel Welcome Center will appear If the Reg...

Page 59: ...indows XP Systems The first time you boot up your system you will see an icon called Click Me in the Start menu We highly recommend that you install the ClickMe utility the first time you boot up When you click the Click Me icon your system will automatically create the related icons in the system tray in the bottom right of the screen These icons provide links to utilities that you will frequentl...

Page 60: ... called the Fujitsu Driver Update FDU utility With FDU you can choose to automatically or manually go to the Fujitsu site to check for new updates for your system For more information about the FDU utility refer to Automatically Downloading Driver Updates on page 105 ...

Page 61: ...s with all mobile battery powered computers there is a trade off between performance and power savings Power Suspend Resume Button When your notebook is active the Power Suspend Resume button can be used to manually put the notebook into Sleep mode Push the Power Suspend Resume button when the notebook is active but not actively accessing anything and immediately release the button You will hear t...

Page 62: ...NOTEBOOK IS IN SLEEP MODE THOUGH NOT AS FAST AS WHEN FULLY OPERATIONAL DISABLING THE POWER SUSPEND RESUME BUTTON PREVENTS IT FROM BEING USED TO PUT THE NOTEBOOK INTO SLEEP OR HIBERNATION SAVE TO DISK MODE THE BUTTON RESUME FUNCTION CANNOT BE DISABLED THE SLEEP OR HIBERNATION SAVE TO DISK MODE SHOULD NOT BE USED WITH CERTAIN PC CARDS CHECK YOUR PC CARD DOCUMENTATION FOR MORE INFORMATION WHEN PC CAR...

Page 63: ... XP The default settings are not enabled To enable or disable the Hibernation feature follow these steps 1 From the Start menu select Settings and then select Control Panel 2 From the Control Panel select Power Options 3 Select the Hibernate tab Select the box to enable or disable this feature then click OK Windows Power Management The Power Options icon located in the Windows Control Panel allows...

Page 64: ...nd turn off power in the proper sequence to avoid errors The proper sequence is Windows 7 1 Click the Start button and then move the mouse over the Shut down button at the bottom right of the menu 2 Click the Shut down button Windows Vista 1 Click the Start button and then move the mouse over the small arrow at the bottom right of the menu 2 Select Shut Down from the list TURNING OFF YOUR LIFEBOOK...

Page 65: ... AFTER SHUTTING DOWN THE SYSTEM WAIT UNTIL THE STATUS LED PANEL INDICATES POWER OFF CONDITION I E NO LIGHTS ARE ILLUMINATED IT IS POSSIBLE THAT THE UNIT MAY NOT AUTOMATICALLY GO TO POWER OFF OR HIBERNATE MODE WHEN YOU CLOSE THE LID THIS SITUATION MAY OCCUR DUE TO PRE OS BOOT PASSWORD SECURITY SETTINGS OR SOME OTHER APPLICATION RUNNING ON THE COMPUTER ATTEMPTING TO TRANSPORT THE COMPUTER WHILE POWE...

Page 66: ...xtreme temperatures not only reduce charging efficiency but can also cause battery deterioration The Charging icon on the Status Indicator panel will flash when you try to charge a battery that is outside its operating temperature range See Battery Charge Indicator on page 23 When using a high current device such as a modem Multi Format DVD Writer CD ROM drive DVD CD RW combo drive or the hard dri...

Page 67: ...f while the adapter is charging the battery See Power Management on page 55 for more information on Sleep mode and shutdown procedure ACTUAL BATTERY LIFE WILL VARY BASED ON SCREEN BRIGHTNESS APPLICATIONS USED FEATURES POWER MANAGEMENT SETTINGS BATTERY CONDITION AND OTHER CUSTOMER PREFERENCES OPTICAL DRIVE OR HARD DRIVE USAGE MAY ALSO HAVE A SIGNIFICANT IMPACT ON BATTERY LIFE THE BATTERY CHARGING C...

Page 68: ...ed promptly the Power indicator will stop flashing and go out meaning that you have lost the data that was not stored Once you provide power you can continue to use your notebook while an adapter is charging the battery Shorted Batteries The Status Indicator panel uses a symbol inside the battery outline of the Battery Level indicator to display the operating level available in that battery If thi...

Page 69: ...ttery ready to install 2 Shut down your notebook and disconnect the AC adapter 3 While pushing the battery bay release lock away from the battery pack slide the battery release latch to the left This will release the battery and expose a bright orange lift point to lift the battery out of the bay 4 Insert a new battery into the bay and press it down so that the latches click into place 5 Plug in t...

Page 70: ...s 3 and 4 in Cold Swapping Batteries BE SURE TO PLUG IN AN AC ADAPTER PRIOR TO REMOVING THE BATTERY THERE IS NO BRIDGE BATTERY PRESENT TO SUPPORT THE SYSTEM WHILE THE BATTERY IS BEING REPLACED IF YOU DO NOT USE AN AC ADAPTER YOU WILL LOSE ANY UNSAVED FILES IF THE LITHIUM ION BATTERY CONNECTOR IS NOT FULLY SEATED YOU MAY NOT BE ABLE TO USE YOUR NOTEBOOK OR CHARGE YOUR BATTERY ...

Page 71: ... to once DVD RW discs can be written to over and over DVD R and DVD RW discs can be played on most standard players CD R and CD RW discs hold up to 640 MB of data A CD R disc can only be written to once CD RW discs can be written to over and over The Dual Layer Multi Format DVD Writer allows you to access movies software and audio DVD CDs as well as to read and write to CD R CD RW DVD R DVD R DVD ...

Page 72: ...aced in the tray 3 Place the media into the tray label side up with the hole in the center of the disc Snap the disc onto the raised circle in the center of the tray 4 Gently push the holder tray back in until you hear a click Figure 16 DO NOT OPERATE YOUR OPTICAL DRIVE UNLESS YOUR LIFEBOOK NOTEBOOK IS SITTING ON A FLAT SURFACE USING A DRIVE WHEN THE SYSTEM IS NOT LEVEL MAY DAMAGE THE DRIVE OR PRE...

Page 73: ...FFERENT REGION CODES ARE RECORDED ON VIDEO DVD TITLES FOR PUBLICATION IN DIFFERENT AREAS OF THE WORLD IF THE REGIONAL CODE OF THE DVD PLAYER DOES NOT MATCH THE CODES ON THE TITLES THEN PLAYBACK IS IMPOSSIBLE YOU CAN CHANGE THE REGION CODE ON THE DVD PLAYER USING THE PROPERTIES MENU OF THE DVD SOFTWARE NOTE HOWEVER THAT YOU CAN ONLY CHANGE THE REGION CODE UP TO FOUR TIMES AFTER THE FOURTH CHANGE TH...

Page 74: ... Carefully remove the media disc from the holder tray 4 Gently push the holder tray back in until you hear a click Emergency Optical Drive Tray Release If for some reason the eject button fails you can open the media tray with a paper clip or similar tool inserted into the eject hole in the right side of the front of the tray Straighten one side of a paper clip and push it gently into the hole The...

Page 75: ...ic point or the button to return to the opening screen 3 To fast forward the movie click the button to forward to a specific portion of the movie or the button to jump to the ending credits 4 To stop the movie click the button Exiting the Media Player Click the located in the upper right corner of the title bar Using Media Player on Battery Power Since optical drives consume a lot of power your ov...

Page 76: ...TERY LIFE MANY MOVIE RUN TIMES ARE LONGER THAN YOUR SYSTEM CAN SUPPORT ON A SINGLE BATTERY IF YOU ARE WATCHING A DVD MOVIE ON BATTERY POWER YOU MAY NEED TO SWAP IN AN ADDITIONAL CHARGED BATTERY OR ATTACH AC POWER DURING THE MOVIE TO VIEW IT IN ITS ENTIRETY AN ADDITIONAL FULLY CHARGED BATTERY IS HIGHLY RECOMMENDED IF YOU WILL BE WATCHING DVD MOVIES ON BATTERY POWER IF YOU DON T HAVE AN ADDITIONAL B...

Page 77: ...to retain data Memory Stick is a flash memory technology that allows you to record transfer and share digital content such as digital pictures movies music voice and computer data and applications Secure Digital SD Cards are very similar to Memory Sticks Like Memory Sticks SD Cards allow portable storage among a variety of devices such as cell phones GPS systems digital cameras and PDAs SD Cards t...

Page 78: ... into the slot until it is seated in the connector Removing a Memory Stick SD Card To remove a Memory Stick or SD Card follow these easy steps Gently push the Memory Stick or SD Card into the slot then firmly pull it from the slot INSTALLING OR REMOVING A MEMORY STICK OR SD CARD DURING YOUR LIFEBOOK NOTEBOOK S SHUTDOWN OR BOOTUP PROCESS MAY DAMAGE THE CARD AND OR YOUR LIFEBOOK NOTEBOOK DO NOT INSE...

Page 79: ...r further information refer to the instructions supplied with your card s ExpressCard Slot Inserting ExpressCards There are two different width ExpressCards 34 mm and 54 mm The connector inside the slot is located on the left hand side of the slot If you insert a 34 mm card be sure to align it with the left side of the slot when inserting it Express Cards are inserted in the Express Card slot as s...

Page 80: ...MOVING AN EXPRESSCARD DURING YOUR LIFEBOOK NOTEBOOK S SHUTDOWN OR BOOTUP PROCESS MAY DAMAGE THE CARD AND OR YOUR LIFEBOOK NOTEBOOK DO NOT INSERT AN EXPRESSCARD INTO A SLOT IF THERE IS WATER OR ANY OTHER SUBSTANCE ON THE CARD AS YOU MAY PERMANENTLY DAMAGE THE CARD YOUR LIFEBOOK NOTEBOOK OR BOTH YOU MAY BE REQUIRED TO LOG ON AS AN ADMINISTRATOR OR MEMBER OF THE ADMINISTRATOR S GROUP TO COMPLETE THIS...

Page 81: ...hip The chip can hold a variety of information and provides you with many possible options such as allowing you to make secure purchases pay for phone calls store security information and provide personal identification and information In order to use the Smart Card Reader you must purchase optional Smart Card third party software Figure 21 Smart Card Slot Dedicated Smart Card slot ...

Page 82: ...y upgrade module with the part side up Align the connector edge of the memory upgrade module with the connector slot in the compartment DO NOT REMOVE ANY SCREWS FROM THE MEMORY UPGRADE MODULE COMPARTMENT EXCEPT THE ONES SPECIFICALLY SHOWN IN THE DIRECTIONS FOR INSTALLING AND REMOVING THE MEMORY UPGRADE MODULE THE MEMORY UPGRADE MODULE CAN BE SEVERELY DAMAGED BY ELECTROSTATIC DISCHARGE ESD TO MINIM...

Page 83: ... Memory Upgrade Module 1 Perform steps 1 through 4 of Installing a Memory Upgrade Module 2 Pull the clips sideways away from each side of the memory upgrade module at the same time Figure 22 Opening Memory Compartment Figure 23 Installing a 2nd Memory Module 2 2 1 Retaining Clip Alignment Key THE MEMORY UPGRADE MODULE IS NOT SOMETHING YOU ROUTINELY REMOVE FROM YOUR NOTEBOOK ONCE IT IS INSTALLED YO...

Page 84: ...clicking Start Control Panel System and Maintenance System The amount of memory is displayed next to Memory RAM The actual memory size and what is displayed may vary This is possible if your system is configured with a graphics controller which dynamically allocates system memory to accelerate graphics performance 3 While holding the clips out remove the module from the slot by lifting it up and p...

Page 85: ...e following volume controls click on Phone and click OK 5 Uncheck the Mute box under Phone Balance Windows Vista and Windows 7 1 Select Start Control Panel 2 For Windows Vista select Classic View in the left pane for Windows 7 select either Large or Small icons in the View by field Optional Modem RJ 11 Telephone Jack The optional modem RJ 11 telephone jack is used for an internal modem To connect ...

Page 86: ...TANDARD ITS MAXIMUM SPEED OF 53000BPS IS THE HIGHEST ALLOWED BY FCC AND ITS ACTUAL CONNECTION RATE DEPENDS ON THE LINE CONDITIONS THE MAXIMUM SPEED IS 33600BPS AT UPLOAD THE INTERNAL MODEM ON ALL LIFEBOOK NOTEBOOKS FROM FUJITSU ARE CERTIFIED FOR USE IN THE UNITED STATES AND CANADA THE MODEM MAY BE CERTIFIED IN OTHER COUNTRIES Internal LAN RJ 45 Jack The internal LAN RJ 45 jack is used for a Gigabi...

Page 87: ...hese steps 1 Align the connector with the port opening 2 Push the connector into the port until it is seated Figure 27 Connecting a USB Device MICROSOFT WINDOWS VISTA USERS ONLY WHEN ATTACHING A USB DEVICE DO ONE OF THE FOLLOWING BE SURE TO ATTACH THE DEVICE BEFORE TURNING ON YOUR SYSTEM OR WAIT FOR APPROXIMATELY THREE MINUTES AFTER THE SYSTEM BOOTS UP BEFORE ATTACHING THE USB DEVICE IF YOU PREFER...

Page 88: ...s you to connect an external monitor or LCD projector In order to connect an external video device follow these easy steps 1 Align the connector with the port opening 2 Push the connector into the port until it is seated 3 Tighten the two hold down screws located on each end of the connector PRESSING THE FN F10 KEYS ALLOWS YOU TO CHANGE YOUR SELECTION OF WHERE TO SEND YOUR DISPLAY VIDEO EACH TIME ...

Page 89: ...e instructions that came with your port replicator E SATA External Serial Advanced Technology Attachment is an external version of SATA which connects your computer to the hard drive E SATA is ideal for backing up large files on an external hard drive To connect an E SATA device 1 Align the connector with the port opening 2 Push the connector into the port until it is seated Figure 28 E SATA Conne...

Page 90: ...ff your LIFEBOOK notebook 2 Make sure the AC adapter is plugged into your notebook and to an active AC power source 3 Make sure that any card installed in the PC Card slot is seated properly You can also remove the card from the slot thus eliminating it as a possible cause of failure 4 Make sure that any devices connected to the external connectors are plugged in properly You can also disconnect s...

Page 91: ...ges that have occurred Type of device connected if any See the Configuration Label on the bottom of your notebook for configuration and serial numbers Specific Problems Using the Troubleshooting Table When you have problems with your LIFEBOOK try to find the symptoms under the Problem column of the troubleshooting table for the feature giving you difficulty You will find a description of common ca...

Page 92: ...e volume control on your notebook and operating system Use the Fn F9 key combination on your keyboard Pressing F9 repeatedly while holding Fn will increase the volume The software volume control is set too low Manually adjusting the volume i e keyboard hot keys should dynamically adjust the volume of the operating see above If that doesn t work adjust the sound volume control settings in your soft...

Page 93: ... that the drive is properly seated Incorrect DVD Player or no DVD Player software is installed Install DVD Player software See Media Player Software on page 66 for more information Wrong drive designator was used for the disc in the application Verify the drive designator used by the application is the same as the one used by the operating system When the operating sys tem is booted from a DVD CD ...

Page 94: ...he operating system is booted from a CD drive designations are automatically adjusted Security is set so your operating system can not be started without a password Verify your password and security settings Keyboard or Mouse Problems The built in keyboard does not seem to work The notebook has gone into Sleep mode Push the Power Suspend Resume button An application has locked out the key board Tr...

Page 95: ...ssages See Power On Self Test Messages on page 96 Modem Problems Messages about modem operation Modem messages are generated by the modem application being used See your application software documentation for additional infor mation USB Device Problems You have installed a USB device Your LIFEBOOK notebook does not recog nize the device or the device does not seem to work properly The device is no...

Page 96: ...OK to complete the process ExpressCard Problems A card inserted in the ExpressCard slot does not work or is locking up the system The card is not properly installed Remove and re install the card See ExpressCards Smart Cards on page 73 The card may have been installed while an application was running so your notebook is not aware of its installation Close the application and restart your notebook ...

Page 97: ...e lighter Move the AC cord to a different outlet check for a line switch or tripped circuit breaker for the AC outlet If you are using an auto airline adapter in a car make sure the ignition switch is in the On or Accessories position The power adapter AC or auto airline is faulty Try a different Power adapter or install a charged optional second battery Your LIFEBOOK notebook turns off all by its...

Page 98: ...d replace or remove any batteries that are shorted See Status Indicator Panel on page 22 The batteries seem to discharge too quickly The power savings fea tures may be disabled Check the Power Options menu settings and adjust according to your operating needs You are running an application that uses a lot of power due to fre quent drive access WLAN or Bluetooth device Use both the primary battery ...

Page 99: ...pplication panel Check the Status Indicator Panel for presence of the Security icon If it is visible enter your password See Status Indicator Panel on page 22 An error message is dis played on the screen during the notebook boot sequence Power On Self Test POST has detected a problem See the POST messages to determine the meaning and severity of the problem Not all messages are errors some are sim...

Page 100: ... using it The notebook has gone into Video timeout Sleep mode or Save to Disk mode because you have not used it for a period of time Press any button on the keyboard or move the mouse to restore operation If that fails push the Power Suspend Resume button Check your power management settings or close your applica tions and go to the Power Savings menu of the setup utility to adjust the timeout val...

Page 101: ... properly installed Reinstall your device See External Video Port on page 82 Your operating system is not setup with the correct software driver Check your device and operating system documentation and acti vate the proper driver You have connected an external monitor and it does not come on Your external monitor is not compatible with your LIFEBOOK note book See your monitor documentation and the...

Page 102: ...nded memory not working or not configured properly If you installed a memory upgrade module verify that it is properly installed If it is properly installed you may want to check your Windows setup to be sure it is not using unavailable memory until you can contact your support representative nnnn Extended RAM Passed Where nnnn is the amount of memory in kilobytes successfully tested Failing Bits ...

Page 103: ... use an external keyboard until then Contact your support representative Keyboard error Keyboard not working You may have to replace your keyboard or keyboard controller but may be able to use an external keyboard until then Contact your support representative Keyboard error nn BIOS discovered a stuck key and displays the scan code for the stuck key You may have to replace your keyboard but may be...

Page 104: ...ailure was caused by incorrect values and they are not corrected the next boot will likely fail also If using the default settings does not allow you to complete a successful boot sequence you should turn off the power and contact your support representative Real time clock error Real time clock fails BIOS test May require board repair Contact your support representative Shadow RAM Failed at offse...

Page 105: ...If you continue to operate you risk corrupting your data Contact your support representative for repairs nnnn System RAM Passed Where nnnn is the amount of system memory in kilobytes successfully tested System timer error The timer test failed The main clock that operates the computer is faulty Requires repair of system board Contact your support representative for repairs UMB upper limit segment ...

Page 106: ...ftware The standard long form result codes may in some cases be displayed on your screen to keep you informed of the actions of your modem The operating system and application software may suppress display of the result codes Examples of result codes are OK NO CARRIER NO DIALTONE CONNECT 53000 Connection complete at 53 000 bps ERROR FAX RING This means an incoming call BUSY NO ANSWER When using th...

Page 107: ...an be used to selectively re install drivers and or applications that may have been un installed or corrupted To re install drivers and or applications 1 Boot up the system and insert the DAR CD after Windows has started A Fujitsu Installer screen is displayed after the CD is inserted 2 After reading the License Agreement click I agree 3 A window will appear containing a list of applications drive...

Page 108: ...iscs that were bundled with the system when you purchased it The Hard Disk Data Delete utility on this disc is used to delete all data on your hard disk and prevent it from being reused Do not use the Hard Disk Data Delete utility unless you are absolutely certain that you want to erase your entire hard disk including all partitions The Partition Creation utility allows you to create a new D parti...

Page 109: ...logo appears on the screen The TrustedCore Menu will appear and the Recovery and Utility option will appear in the menu Running Recovery and Utility from hard disk 1 Cursor down to Recovery and Utility and press the Enter key 2 While the files are being loaded from the disc a progress bar will appear at the bottom of the screen 3 When the System Recovery Options dialog opens select a new keyboard ...

Page 110: ...s tool is designed for use by IT professionals It is not likely you will need to use this tool When you select devices from the Diagnosis window then click Execute several tests are performed on the selected components Recovery tab The Recovery tab contains the Start Recovery tool Note that the recovery process erases all data from the C drive If you decide to use the recovery tool be sure to back...

Page 111: ...pdates Your system has a convenient tool called the Fujitsu Driver Update FDU utility With FDU you can choose to automatically or manually go to the Fujitsu site to check for new updates for your system The FDU icon should appear in the system tray at the bottom right of your screen roll the cursor over the icons to find the correct one If the icon does not appear in the system tray go to Start Al...

Page 112: ... regular basis approximately every 3 days Show update history Brings up a screen that displays a history of updates that have been made via the FDU About Fujitsu Driver Update Displays the FDU version number and copyright information Fujitsu Driver Update Readme Displays the FDU readme ...

Page 113: ... DISCHARGE STATIC ELECTRICITY BUILT UP IN YOUR BODY BE SURE TO POWER DOWN YOUR SYSTEM BEFORE ADDING OR REMOVING SYSTEM COMPONENTS EVEN IF THE SYSTEM IS IN HIBERNATE OR SLEEP STATES DATA COULD BE LOST OR MEMORY COULD BE DAMAGED IF POWER IS STILL AVAILABLE TO THE SYSTEM WHEN INSTALLING OR REMOVING A MEMORY MODULE HOLD IT BY THE EDGE SO AS NOT TO TOUCH ANY CONTACTS OR CHIPS BE CAREFUL NOT TO TOUCH AN...

Page 114: ...ccidentally spill liquid on your LIFEBOOK notebook 1 Turn it off 2 Position it so that the liquid can run out 3 Let it dry out for 24 hours or longer if needed 4 If your notebook will not boot after it has dried out call your support representative Do not use your Fujitsu LIFEBOOK notebook in a wet environment near a bathtub swimming pool Always use the AC adapter and batteries that are approved f...

Page 115: ...cases Cleaning guidelines using recommended off the shelf cleaners Computer exterior computer keyboard To clean the exterior and keyboard use one of the following off the shelf products Office Depot 154 616 Notebook Cleaning Kit Meridrew Enterprises Klear_Screen Wipes 3M CL563 Cleaner Wipes Note After cleaning with one of these products gently polish with a dry soft lint free cloth until the solut...

Page 116: ... TO THE COMPUTER ALWAYS REFER TO THE CLEANER MANUFACTURER S GUIDELINES AND MATERIAL SAFETY DATA SHEETS FOR PROPER HANDLING AND USE OF THE PRODUCTS NEVER USE AMMONIA ACIDIC OR ALKALINE CLEANERS OR ORGANIC CHEMICALS SUCH AS PAINT THINNER ACETONE PROPYL OR ISOPROPYL ALCOHOL OR KEROSENE IT MAY DAMAGE SURFACE FINISHES AND THE COATING OF THE LCD SCREEN NEVER USE COMPRESSED AIR FOR CLEANING STYLISTIC AND...

Page 117: ...cation Temperatures should remain between 13ºF 25ºC and 140ºF 60ºC 1 Turn off your computer and disconnect the AC adapter 2 Close the display panel and turn the system upside down 3 Remove the dust filter by pressing the ridged edge towards the filter and lifting it out Figure 29 4 Carefully clean the dust filter and the air cooling duct 5 Put back the dust filter by inserting the end without latc...

Page 118: ...AIT UNTIL THE STATUS LED PANEL INDICATES POWER OFF CONDITION I E NO LIGHTS ARE ILLUMINATED IT IS POSSIBLE THAT THE UNIT MAY NOT AUTOMATICALLY GO TO POWER OFF OR HIBERNATE MODE WHEN YOU CLOSE THE LID THIS SITUATION MAY OCCUR DUE TO PRE OS BOOT PASSWORD SECURITY SETTINGS OR SOME OTHER APPLICATION RUNNING ON THE COMPUTER ATTEMPTING TO TRANSPORT THE COMPUTER WHILE POWER IS ON MAY DAMAGE THE NOTEBOOK D...

Page 119: ... mix with coins keys or other metal objects Doing so may cause an explosion or fire Do not drop puncture disassemble mutilate or incinerate the battery Recharge batteries only as described in this manual and only in ventilated areas Do not leave batteries in hot locations for more than a day or two Heat can shorten the battery life Do not leave a battery in storage for longer than 6 months without...

Page 120: ...face Wipe the moisture off with a clean soft lint free cloth and let it dry at room temperature DO NOT use a hair dryer or heater to dry media discs If a disc is dirty use only a DVD CD cleaner or wipe it with a clean soft lint free cloth starting from the inner edge and wiping to the outer edge Caring for your Optical Drive Your optical drive is durable but you must treat it with care Please pay ...

Page 121: ...ific information but you should pay attention to the following points To keep out dust and dirt store cards in their protective sleeves when they are not installed in your LIFEBOOK notebook Avoid prolonged exposure to direct sunlight or excessive heat Keep the cards dry Do not flex or bend the cards and do not place heavy objects on top of them Do not force cards into the slot Avoid dropping cards...

Page 122: ...on Label The configuration label located on the bottom of your notebook contains specific information regarding the options you ve chosen for your notebook Following is an example configuration label A79xxxxxxxxxxx S710 14WXGA i5 520M W7HP DL S MULTI 1GB 160G MDM LAN WLAN No Part No FPC0xxxxxxxxxxxxx Hard Drive Configuration ID Part Number Processor Model Screen Size Memory Communications Media Dr...

Page 123: ...nding upon system configuration Video Built in color flat panel TFT active matrix LCD display with backlight and simultaneous display capability Video Color and Resolution 14 TFT HD Display Internal Resolution 1366 x 768 pixel resolution 16M colors External Resolution 1600 x 1200 pixel resolution 16M colors Simultaneous Resolution 1280 x 768 pixel resolution 16M colors Video RAM Intel HD Graphics ...

Page 124: ...e bottom of the system Media Player Depending upon the configuration of your system the following drive may be installed Dual Layer Multi Format DVD Writer Read 24x CD ROM 24x CD R 8x DVD ROM 5x DVD RAM 8x DVD R 4x DVD RW 8x DVD R 4x DVD RW Write 24x CD R 10x CD RW 5x DVD RAM 8x DVD R 4x DVD RW 4x DVD RW 8x DVD R 2 4x DVD R DL 2x DVD R DL Features Integrated Pointing Device Touchpad pointing devic...

Page 125: ... Theft Prevention Lock Lock slot for use with security restraint systems Device Ports On the LIFEBOOK notebook ExpressCard slot Memory Stick SD Card slot One 15 pin D SUB connector for VGA external monitor see Display specifications Three USB 2 0 Universal Serial Bus connectors for input output devices IEEE1394 Jack E SATA Port DiplayPort connector One DC In connector One modular modem RJ 11 conne...

Page 126: ...A port One LAN RJ 45 connector One DC in connector One headphone line out jack One power suspend resume button Keyboard Built in keyboard with all functions of 101 key PS 2 compatible keyboards Total number of keys 84 Function keys F1 through F12 Feature extension key Fn Two Windows keys one Start key one Application key Key pitch 19 mm Key stroke 2 7 mm Built in Touchpad pointing device with left...

Page 127: ...0 W to the LIFEBOOK notebook including an AC cable Power Management Conforms to ACPI Advanced Configuration and Power Interface Dimensions and Weight Overall Dimensions 13 39 w x 9 65 d x 1 38 1 46 h 340 mm x 245 mm x 35 37 mm Weight Approximately 5 1 lbs 2 31 kg with battery and optical drive Environmental Requirements Temperature Operating 41 to 95 F 5 to 35 C Non operating 5 to 140 F 15 to 60 C...

Page 128: ...e trial Roxio Easy Media Creator on select models Cyberlink MakeDisc Windows 7 models only Cyberlink PowerDirector Cyberlink PowerDVD Cyberlink YouCam Google Picasa Google ToolBar OmniPass Fingerprint application Fujitsu Driver Update utility Microsoft Media Player 10 Windows XP and Vista only Depending upon the configuration of your system one of the following packages will be installed Microsoft...

Page 129: ...cceptance of software license agreement After 60 days you will need to purchase a subscription from Symantec to download latest virus spyware and spam definitions Roxio Easy Media Creator Easy Media Creator lets you burn CDs and organize edit and share digital photos music data and videos CyberLink MakeDisc CyberLink MakeDisc allows you to create movie DVD VCDs music VCDs and other discs containin...

Page 130: ...ite to check for new updates for your system See Automatically Downloading Driver Updates on page 105 Microsoft software Depending upon your system configuration your system is pre installed with either Microsoft Starter 2010 and Microsoft Windows Live Essentials or Microsoft Office Ready with Office Assistant as described below Microsoft Office Starter 2010 32 bit Microsoft Office Starter 2010 in...

Page 131: ...Web and mobile devices Microsoft Office Ready with Office Assistant With Office Ready PCs it s now even easier to take advantage of Microsoft Office 2007 The full versions of Microsoft Office Basic Small Business and Professional 2007 are already preinstalled on your PC so there s nothing to install and all Office Ready PCs give you the option to activate a 60 day trial of Microsoft Office Profess...

Page 132: ...hich has a transistor or similar device for every pixel on the screen Ad Hoc Mode Ad Hoc Mode refers to a wireless network architecture where wireless network connectivity between multiple computers is established without a central wireless network device typically known as Access Points Connectivity is accomplished using only client devices in a peer to peer fashion For details refer to on Ad Hoc...

Page 133: ... BIOS is transferred to the installed operating system to provide it with information on the configuration and status of the hardware Bit An abbreviation for binary digit A single piece of information which is either a one 1 or a zero 0 bps An abbreviation for bits per second Used to describe data transfer rates Boot To start up a computer and load its operating system from disk ROM or other media...

Page 134: ...802 11b g 11 channels 22 MHz wide channels CMOS RAM Complementary metal oxide semiconductor random access memory This is a technology for manufacturing random access memory which requires very low levels of power to operate COM Port Abbreviation for communication port This is your serial interface connection Command An instruction which you give your operating system Example run a particular appli...

Page 135: ... and the receiver is called a DHCP client DIMM Dual in line memory module Disk A spinning platter of magnetic data storage media If the platter is very stiff it is a hard drive if it is highly flexible it is a floppy disk if it is a floppy disk in a hard housing with a shutter it is commonly called a diskette Disk Drive The hardware which spins the disk and has the heads and control circuitry for ...

Page 136: ...g system commands to external devices into the exact form required by a specific brand and model of device in order to produce the desired results from that particular equipment DVMT Dynamic Video Memory Technology A video memory architecture that increases the efficiency of the motherboard by using innovative memory utilization and direct AGP ECP Extended Capability Port A set of standards for hi...

Page 137: ...One billion bytes Hard drive A spinning platter of magnetic data storage media where the platter is very stiff I O Input Output Data entering and leaving your notebook in electronic form I O Port The connector and associated control circuits for data entering and leaving your notebook in electronic form IDE Intelligent Drive Electronics A type of control interface for a hard drive which is inside ...

Page 138: ...address of the destination The format of an IP address is a 32 bit numeric address written as four numbers separated by periods Each number can be zero to 255 For example 1 160 10 240 could be an IP address In an isolated network you can assign IP addresses at random as long as each one is unique However connecting a private network to the Internet requires using registered IP addresses called Int...

Page 139: ...KB Kilobyte One thousand bytes LAN Local Area Network An interconnection of computers and peripherals within a single limited geographic location which can pass programs and data amongst themselves LCD Liquid Crystal Display A type of display which makes images by controlling the orientation of crystals in a crystalline liquid Lithium ion Battery A type of rechargeable battery which has a high pow...

Page 140: ...t frames are sent and received based on this address MB Megabyte One million bytes Megahertz 1 000 000 cycles per second Memory A repository for data and applications which is readily accessible to your LIFEBOOK notebook s CPU MHz Megahertz MIDI Musical Instrument Digital Interface A standard communication protocol for exchange of information between computers and sound producers such as synthesiz...

Page 141: ...uping is performed with Network name SSID In order to improve security the network key is set allowing no communication unless Network name SSID coincides with the network key NTSC National TV Standards Commission The standard for TV broadcast and reception for the USA Open system authentication Null authentication method specified in the 802 11 standard that performs no authentication checks on a...

Page 142: ...your display screen The more pixels per area the clearer your image will appear POST Power On Self Test A program which is part of the BIOS which checks the configuration and operating condition of your hardware whenever power is applied to your notebook Status and error messages may be displayed before the operating system is loaded If the self test detects failures that are so serious that opera...

Page 143: ...d to it RAM Module A printed circuit card with memory and associated circuitry which allows the user to add additional memory to the computer without special tools Reset The act of reloading the operating system A reset erases all information stored in RAM Restart See Reset Resume To proceed after interruption In your notebook this refers to returning to active operation after having been in one o...

Page 144: ...ecipher the key SSID Service Set Identifier a 32 character unique identifier attached to the header of packets sent over a WLAN that acts as a password when a mobile device tries to connect to the BSS The SSID differentiates one WLAN from another so all access points and all devices attempting to connect to a specific WLAN must use the same SSID A device will not be permitted to join the BSS unles...

Page 145: ...e frequency which synchronizes the operation of the system and is counted to provide time of day and date TCP IP Transmission Control Protocol Internet Protocol A standard Internet protocol that is most widely used TFT Thin Film Transistor A technology for flat display panels which uses a thin film matrix of transistors to control each pixel of the display screen individually UL Underwriters Labor...

Page 146: ...idelity Identifies that the product has passed the interoperability test supplied by the WECA Wireless Ethernet Compatibility Alliance which guarantees the interoperability of wireless IEEE 802 11 LAN products For more information on the Wi Fi standard go to the WECA Web site at www wirelessethernet com WLAN Wireless Local Area Network A wireless interconnection of computers and peripherals within...

Page 147: ... may cause harmful interference to radio communications However there is no guarantee that interference will not occur in a particular installation If this equipment does cause harmful interference to radio or television reception which can be determined by turning the equipment off and on the user is encouraged to try to correct the interference by one or more of the following measures Reorient o...

Page 148: ...xcessive RENs on a telephone may result in the devices not ringing in response to an incoming call In most but not all areas the sum of RENs should not exceed five 5 0 To be certain of the number of devices that may be connected to a line as determined by the total RENs contact the local telephone company If this equipment causes harm to the telephone network the telephone company will notify you ...

Page 149: ...ending the message and the telephone number of the sending machine or such business other entity or individual DOC INDUSTRY CANADA NOTICES Notice to Users of Radios and Television This Class B digital apparatus meets all requirements of Canadian Interference Causing Equipment Regulations CET appareil numérique de la class B respecte toutes les exigence du Réglement sur le matérial brouilleur du Ca...

Page 150: ...Industrie Canada applicables au matériel terminal Cette conformité est confirmée par le numéro d enregistrement Le sigle IC placé devant le numéro d enregistrement signifie que l enregistrement s est effectué conformément à une déclaration de conformité et indique que les spécifications techniques d Industrie Canada ont été respectées Il n implique pas qu Industrie Canada a approuvé le matériel Av...

Page 151: ...e maximal de terminaux qui peuvent être raccordés à une interface téléphonique La terminaison d une interface peut consister en une combinaison quelconque de dispositifs à la seule condition que la somme d indices d équivalence de la sonnerie de tous les dispositifs n excède pas 5 POUR ASSURER LA SÉCURITÉ LES UTILISATEURS DOIVENT VÉRIFIER QUE LA PRISE DE TERRE DU SERVICE D ÉLECTRICITÉ LES LIGNES T...

Page 152: ...nterference risk to other devices or services is perceived or identified as harmful In cases in which the policy regarding use of Wireless LAN devices in specific environments is not clear e g airports hospitals chemical oil gas industrial plants private buildings obtain authorization to use these devices prior to operating the equipment Regulatory Information Disclaimers Installation and use of t...

Page 153: ... in a residential installation This equipment generates uses and can radiate radio frequency energy If not installed and used in accordance with the instructions it may cause harmful interference to radio communications However there is no guarantee that interference will not occur in a particular installation If this equipment does cause harmful interference to radio or television reception which...

Page 154: ...ications not expressly authorized by Fujitsu America Incorporated may invalidate the user s right to operate this equipment Canadian Notice The device for the 5150 5250 MHz band is only for indoor usage to reduce the potential for harmful interference to co channel mobile satellite systems The maximum antenna gain of 6 dBi permitted for devices in the 5250 5350 MHz 5470 5725 MHz and 5725 5825 MHz ...

Page 155: ... of the mobile computer The WLAN device operates in license free RF bands eliminating the need to procure an FCC operating license The WLAN operates in the 2 4GHz Industrial Scientific and Medical ISM RF band and the lower middle and upper bands of the 5GHz Unlicensed National Information Infrastructure UNII bands The WLAN device is capable of four operating modes IEEE802 11a IEEE802 11b IEEE802 1...

Page 156: ...Access Point s Connectivity is accomplished using only client devices in a peer to peer fashion That is why Ad Hoc networks are also known as peer to peer networks Ad Hoc networks are an easy and inexpensive method for establishing network connectivity between multiple computers Ad Hoc mode requires that the SSID network authentication and encryption key settings are identically configured on all ...

Page 157: ...o the WLAN in order to access services devices and computers e g file servers printers databases The WLAN device is an optional device that may come pre installed in your mobile computer Under normal circumstances it should not be necessary for you to remove or re install it The Operating System that your mobile computer comes with has been pre configured to support the WLAN device Figure A 2 Acce...

Page 158: ...hat transmit in the 2 4 GHz range may interfere with operation of WLAN devices in IEEE802 11b g n modes Symptoms of interference include reduced throughput intermittent disconnects and many frame errors It is HIGHLY recommended that these interfering devices be powered off to ensure proper operation of the WLAN device Deactivating Disconnecting the WLAN Device Deactivation of the WLAN device may b...

Page 159: ...ITCH WILL POWER OFF BOTH THE OPTIONAL WIRELESS LAN AND BLUETOOTH DEVICES AT THE SAME TIME TO ENABLE OR DISABLE EITHER ONE OF THE DEVICES INDIVIDUALLY PERFORM THE FOLLOWING STEPS WINDOWS VISTA WINDOWS 7 1 Slide the Wireless LAN Bluetooth on off switch to On position 2 Right click on the Bluetooth icon in the system tray to enable disable the Bluetooth radio WINDOWS XP 1 Slide the Wireless LAN Bluet...

Page 160: ... the Network and Sharing Center icon Windows 7 If the Control Panel is not in icon view select either Large or Small icons from the View by dropdown list Click the Network and Sharing Center icon 3 Select Connect to a network in the left panel 4 Select one of the listed networks then click Connect 5 Follow the directions that appear 6 In the event you require assistance go to the Network and Shari...

Page 161: ...r an infrastructure network select Manually create a network profile For ad hoc network select Choose from a list of Internet service providers 7 Enter any required information It may be necessary to consult with your network administrator for some of the information 8 In the event you require assistance go to Start Help and Support Networking and the Web Select the main topic in which you are int...

Page 162: ...k key to the same values as those of the access point Set the Network Authentication value identically to that of the Access Point Please consult your network administrator for this value if necessary Weak received signal strength and or link quality Ad hoc connection Retry connection after shortening the distance to the destination computer or removing any obstacles for better sight Access Point ...

Page 163: ...rk authentication has failed Re check your Network Authentication Encryption and Security settings Incorrectly configured security settings such as an incorrectly typed WEP key a mis configured LEAP username or an incorrectly chosen authentication method will cause the LAN device to associate but not authenticate to the wireless network Incorrectly configured network settings Recheck the configura...

Page 164: ...t 30 m 11 Mbps 300 ft 91 m 1 Mbps 802 11g 100 ft 30 m 54 Mbps 300 ft 91 m 1 Mbps 802 11n Estimated double the operating distance of 802 11g and 802 11a in their respective frequencies Number of channels 802 11a 8 independent channels 802 11b g 11 channels 3 non overlapping channels 802 11n 2 4 GHz 3 non overlapping channels when Channel Bonding is not used 2 non overlapping channels when Channel B...

Page 165: ...ove will increase or decrease depending on factors such as number of walls reflective material or interference from external RF sources Encryption with network key WEP is performed using the above number of bits however users can set 40 bits 104 bits after subtracting the fixed length of 24 bits Depending on practical environments the allowable number of computers to be connected may be decreased ...

Page 166: ...assist you in learning about operation of the Bluetooth device To access the Help file click Start All Programs and click on Bluetooth then select User s Guide For additional information about Bluetooth Technology visit the Bluetooth Web site at www bluetooth com THE WIRELESS LAN BLUETOOTH ON OFF SWITCH WILL POWER OFF BOTH THE OPTIONAL WIRELESS LAN AND BLUETOOTH DEVICES AT THE SAME TIME TO ENABLE ...

Page 167: ...nsmitter Canadian Notice To prevent radio interference to the licensed service this device is intended to be operated indoors and away from windows to provide maximum shielding Equipment or its transmit antenna that is installed outdoors is subject to licensing Warranty Users are not authorized to modify this product Any modifications invalidate the warranty This equipment may not be modified alte...

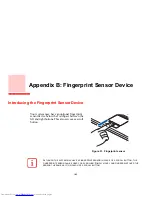
Page 168: ...evice below the Touchpad between the left and right buttons This also serves as a scroll button Figure 31 Fingerprint sensor ALTHOUGH THE SYSTEM MAY HAVE A FINGERPRINT SENSOR IN PLACE OF A SCROLL BUTTON THE FINGERPRINT SENSOR CAN BE USED FOR SCROLLING SIMPLY MOVE YOUR FINGERPRINT OVER THE SENSOR THE SAME AS YOU WOULD USE A SCROLL BUTTON ...

Page 169: ... a secure authentication system for restricting access to your computer applications web sites and other password protected resources OmniPass presents a convenient graphical user interface through which you can securely manage passwords users and multiple identities for each user Getting Started This section guides you through the preparation of your system for the OmniPass fingerprint recognitio...

Page 170: ...ion to which you would like OmniPass installed It is recommended that you NOT install OmniPass in the root directory e g C 3 Once OmniPass has completed installation you will be prompted to restart you system Once your system has rebooted you will be able to use OmniPass If you choose not to restart immediately after installation OmniPass will not be available for use until the next reboot The ins...

Page 171: ...Pass application from your system 1 Click Start on the Windows taskbar Select Settings and then Control Panel 2 Double click Add Remove Programs 3 Select OmniPass and then click Change Remove 4 Follow the directions to uninstall the OmniPass application 5 Once OmniPass has finished uninstalling reboot your system when prompted BEFORE YOU UNINSTALL THE SOFTWARE DECRYPT ALL OMNIPASS ENCRYPTED FILES ...

Page 172: ... Password Now whenever he returns to that site OmniPass will prompt him to supply access credentials John enters his OmniPass user credentials John_01 and freq14 at the OmniPass authentication prompt and he is allowed into his webmail account He can do this with as many web sites or password protected resources he likes and he will gain access to all those sites with his OmniPass user credentials ...

Page 173: ...dio Tips on at least Prompt with system beeps only until you get accustomed to how OmniPass operates Click Next to proceed with user enrollment You will then see a Congratulations screen indicating your completion of user enrollment 5 Click Done to exit the OmniPass Enrollment Wizard You will be asked if you d like to log in to OmniPass with your newly enrolled user click Yes Enrolling a Fingerpri...

Page 174: ...w a green fingerprint in the capture window and the text Verification Successful under the capture window Using OmniPass You are now ready to begin using OmniPass Used regularly OmniPass will streamline your authentications Password Replacement You will often use the password replacement function When you go to a restricted access website e g your bank your web based email online auction or paymen...

Page 175: ...rd or fingerprint Go to a site that requires a login username and password but do not log in yet At the site login prompt enter your username and password in the prompted fields but do not enter the site do not hit Enter Submit OK or Login Right click the OmniPass system tray icon and select Remember Password from the submenu The Windows arrow cursor will change to a golden key OmniPass cursor Cli...

Page 176: ...Click Finish to complete the remember password procedure The site location the credentials to access the site and the OmniPass authentication settings for the site are now stored in the OmniPass secure database The OmniPass authentication settings Settings for this Password Site can always be changed in Vault Management Logging in to a Remembered Site Whether or not OmniPass prompts you to authent...

Page 177: ...ired resource under Password Protected Dialog and clicking Unmask Values Should a password be reset or an account expire you can remove stored credentials from OmniPass Highlight the desired resource under Password Protected Dialog and click Delete Page You will be prompted to confirm the password deletion The two check boxes in Manage Passwords govern whether OmniPass prompts you to authenticate ...

Page 178: ...te Identity Click Apply To set the default identity highlight the identity you want as default and click Set as Default click Apply to ensure the settings are saved If you log in to OmniPass with a fingerprint device you will automatically be logged in to the default identity for that OmniPass user You can choose the identity with which you are logging in if you login using master password Choosin...

Page 179: ...ints for an OmniPass user All OmniPass data for a user is backed up to a single encrypted database file During the import process the Windows login of the exported user is required If the proper credentials cannot be supplied the user profile will not be imported YOU CANNOT IMPORT A USER INTO OMNIPASS IF THERE ALREADY IS A USER WITH THE SAME NAME ENROLLED IN OMNIPASS YOU SHOULD PERIODICALLY EXPORT...

Page 180: ...orted are the Windows login credentials of the exported user They are the credentials that had to be submitted when the user profile was exported You will need User Name Password and Domain If you don t remember the value for Domain in a PC or SOHO environment Domain should be your computer name OmniPass will notify you if the user was successfully imported Things to Know Regarding Import Export A...

Page 181: ...niPass icon User Management The User Management tab has two major interfaces Add Remove User and Import Export User Import Export User functionality is documented in Exporting and Importing Users on page 173 Add Remove User functionality is straightforward If you click Adds a new user to OmniPass you will start the OmniPass Enrollment Wizard The Enrollment Wizard is documented in User Enrollment o...

Page 182: ...tions you can specify how your OmniPass Logon is tied to your Windows Logon The first option Automatically log on to OmniPass as the current user will do just as it says during Windows login you will be logged on to OmniPass using your Windows login credentials If the user logging into Windows was never enrolled into OmniPass upon login no one will be logged on to OmniPass This setting is appropri...

Page 183: ... double click Accounts Limit local account use of blank passwords to console login only This setting should be set to Disabled Dialog appears after OmniPass authentication during Windows Logon After installing OmniPass on your system you can choose to logon to Windows using OmniPass You authenticate with OmniPass via master password or an enrolled security device and OmniPass logs you into Windows...

Page 184: ...ator 23 lithium ion battery 60 low 62 problems 91 92 recharging 61 replacing 63 shorted 62 Sleep mode 62 BIOS guide 50 setup utility 49 Bluetooth 160 Built in Speakers 86 87 C CapsLock 24 Click Me 53 Clicking 29 Cold swapping 34 63 Configuration Label 116 Controls and Connectors 12 Conventions Used in the Guide 8 Cursor 28 Cursor Keys 26 D DC Output Cable 44 DC Power Jack 44 Device Ports 79 119 DI...

Page 185: ...t 168 remembering a password 169 uninstalling OmniPass 165 user enrollment 166 using OmniPass 168 Flexible Bay 18 33 cold swapping 34 devices 33 eject lever 18 installing 33 Modular Multi Format DVD Writer 65 removing 33 Fujitsu Contact Information 9 Fujitsu Driver Update utility 54 105 124 Fujitsu LIFEBOOK storing 110 traveling 112 Function Key F10 27 F3 26 F4 27 F6 27 F7 27 F8 27 32 F9 27 32 FN ...

Page 186: ...ng 72 Microphone Jack 14 82 Modem 17 problems 89 Modem Jack 79 Modem Result Codes 100 Modular Devices 33 installing 33 removing 33 Mouse problems 88 N NumLk 24 O Optical Drive 65 P PC Card slot 15 PC Cards removing 74 Pointing Device See Touchpad 28 Port Replicator connector 21 problems 88 Power AC adapter 43 Auto Airline adapter 43 failure 90 91 indicator 22 management 55 off 58 on 48 problems 92...

Page 187: ...roprocessor 117 Power 121 Video 117 Status Indicator Panel 14 22 Stereo Speakers 14 T Touchpad 28 buttons 28 controls 30 Touchpad Pointing Device 14 Troubleshooting 84 U Universal Serial Bus Ports 81 Unpacking 11 USB 81 89 problems 89 USB 2 0 Ports 14 18 19 V Volume control 32 W Warranty 10 Windows keys 26 Application key 26 Start keys 26 Windows Vista configuring the WLAN 154 Windows XP configuri...

Page 188: ... Découvrez comment utiliser votre ordinateur portable Fujitsu LifeBook S710 Guide d utilisation ...

Page 189: ...logo ExpressCard appartiennent à l association PCMCIA Personal Computer Memory Card International Association et toute utilisation de ces marques par la société Fujitsu Computer Systems est faite sous licence Bluetooth est une marque de commerce de Bluetooth SIG Inc USA Adobe Acrobat et Acrobat Reader sont desmarques déposées ou des marques de commerce de lasociété Adobe Systems Inc aux États Unis...

Page 190: ... consentement préalable de Fujitsu Aucune partie de cette publication ne peut être enregistrée ou transmise électroniquement sans le consentement écrit de Fujitsu AVERTISSEMENT LA MANIPULATION DU CORDON DE CE PRODUIT VOUS EXPOSE AU PLOMB UNE SUBSTANCE CHIMIQUE QUI SELON L ÉTAT DE CALIFORNIE PEUT CAUSER DES ANOMALIES CONGÉNITALES OU D AUTRES PROBLÈMES DE REPRODUCTION LAVEZ VOUS LES MAINS APRÈS CHAQ...

Page 191: ...nstructions spéciales d élimination Pour réduire les risques d incendie utilisez uniquement un cordond alimentation pour télécommunications de grosseur26 AWG ou plus avec homologation UL ou CSA Si l appareil est utilisé à titre de récepteur de télévision si vous utilisez un système de câblodistribution protégez vous contre les surtensions et les transitoires en vous assurant que la gaine extérieur...

Page 192: ...ux États Unis et au Cana da Pour trouver le lieu de collecte leplus proche de chez vous visitez www RBRC org ou appelez au 1 800 822 8837 Si aucun des lieux proposés par la RBRC ne vous convient vous pouvez en chercher un autre en visitant le site Internet de la Consumer Education Initiative Initiative pour l éducation des consommateurs de l EIA Electronic Industries Alliance à http EIAE org Rappe...

Page 193: ...mplacement des commandes et des connecteurs 12 Composants supérieurs 13 Composants sur le côté gauche de l ordinateur 15 Composants sur le côté droit de l ordinateur 17 Composants de la face arrière 20 Composants sous l ordinateur 21 Tableau de voyants d état 23 Voyant d alimentation 23 Voyant de charge de batterie 24 Voyants de niveau de charge 24 Voyant d accès au disque dur lecteur optique 25 ...

Page 194: ...me 33 Réglage du volume 33 Périphériques pour le compartiment multifonction 34 Retirer et installer des périphériques modulaires 35 Tableau de sécurité et d applications LifeBook 37 Configuration de votre tableau de sécurité LifeBook 37 Mots de passe 38 Utilisation du tableau de sécurité et d applications de votre LifeBook 40 Mises en garde 41 Désinstallation de l application Tableau de sécurité 4...

Page 195: ...tre ordinateur portable LifeBook 52 Mise sous tension 52 Procédure d amorçage 53 Mots de passe d accès au disque dur 53 Utilitaire de configuration du BIOS 54 Démarrage du système 55 Premier démarrage de Windows 56 Enregistrement de votre ordinateur LifeBook chez Fujitsu 57 Installation de Click Me 57 Utilitaire de mise à jour des pilotes Fujitsu Driver Update 58 Gestion de l alimentation 59 Bouto...

Page 196: ...e 77 Cartes mémoire MemoryStick Secure Digital 79 Installation d une carte Memory Stick ou SD 80 Retrait d une carte Memory Stick SD 80 Cartes ExpressCards Smart Card 81 Installation d une carte ExpressCard 82 Retrait d une carte ExpressCard 83 Lecteur de carte Smart Card Carte intelligente 83 Module de mémoire additionnelle 84 Installation des modules de mémoire additionnelle 84 Retrait d un modu...

Page 197: ...tion du système d exploitation pour les systèmes Windows 116 Téléchargement automatique des mises à jour de pilotes 119 Chapitre 5 Entretien Entretien de votre ordinateur portable LifeBook 121 Nettoyage de votre ordinateur portable LifeBook 123 Nettoyage du filtre anti poussière 125 Rangement de votre ordinateur portable LifeBook 127 Voyager avec votre ordinateur portable LifeBook 127 Batteries 12...

Page 198: ...exe A Guide d utilisation de la carte de réseau local sans fil Renseignements sur la réglementation de la FCC 162 Remarques et déclarations réglementaires 162 Avant d utiliser la carte réseau sans fil en option 165 Cartes réseau sans fil présentées dans ce document 165 Caractéristiques de la carte réseau sans fil 165 Modes de réseau sans fil compatibles avec cette carte 166 Remarques concernant le...

Page 199: ...fil 174 Utilisation de Bluetooth 176 Annexe B Capteur d empreintes digitales Présentation du capteur d empreintes digitales 178 Première mise en marche 180 Installation d OmniPass 180 Enregistrement des utilisateurs 182 Utilisation d OmniPass 186 Configuration d OmniPass 191 Centre de contrôle OmniPass 194 Dépannage 196 Index 198 ...

Page 200: ...rofessionnel ou Microsoft Windows XP Professionnel pré installé Ce manuel présente le mode d emploi de l ordinateur portable LifeBook et de ses logiciels intégrés Conventions utilisées dans ce guide Les touches du clavier et à l écran apparaissent entre crochets Exemple Fn F1 Échap Entrée et Ctrl Le texte contient plusieurs renvoisvers des pages contenant des inform ations supplémentaires sur un s...

Page 201: ...idement possible Nom du produit Numéro de configuration du produit Numéro de série du produit Date d achat Conditions dans lesquelles le problème est survenu Texte des messages d erreur reçus Types de périphériques connectés si applicable L ICÔNE DE MISE EN GARDE MET EN ÉVIDENCE DES INFORMATIONS IMPORTANTES POUR L UTILISATION SÉCURITAIRE DE VOTRE ORDINATEUR OU POUR L INTÉGRITÉ DE VOS FICHIERS VEUI...

Page 202: ...limitée Votre ordinateur portable LifeBook est accompagné d une garantie limitée internationale de Fujitsu Pour connaître les conditions générales et la durée de votre garantie limitée consultez la pochette de service livrée avec votre ordinateur POUR UTILISER LES HYPERLIENS VOUS DEVEZ AVOIR UNE CONNEXION INTERNET ACTIVE ...

Page 203: ... décrit les composants de l ordinateur portable LifeBook S710 de Fujitsu Nous vous suggérons de la lire avant de commencer à utiliser l ordinateur même si vous avez déjà utilisé des ordinateurs de ce type Figure 1 Ordinateur portable Fujitsu LifeBook S710 Aperçu général ...

Page 204: ...Prise micro Prise IEEE1394 Tableau de voyants d état Capteur d empreintes digitales Microphone intégré Microphone intégré Caméra intégré et d applications LifeBook veille reprise Pavé tactile TouchPad sans fil Bluetooth pour réseau local marche arrêt Memory Stick SD Quick Point en option Haut parleur stéréo Tableau de voyants d état Figure 2 Ordinateur portable LifeBook avec écran ouvert ...

Page 205: ... ordinateur est équipé d un écran à cristaux liquides couleur avec rétro éclairage permettant d afficher des textes et des images Tableau de sécurité et d applications LifeBook Le tableau de sécurité et d application de l ordinateur LifeBook assure une sécurité matérielle et permet de lancer des applications au toucher d un seul bouton Voir Tableau de sécurité et d applications LifeBook en page 37...

Page 206: ...elier votre ordinateur LifeBook à un périphérique IEEE 1394 notamment un caméscope numérique Commutateur marche arrêt pour réseau local sans fil Bluetooth Ce commutateur permet de mettre sous et hors tension les dispositifs LAN sans fil et Bluetooth en option Pour prolonger la longévité de la batterie éteignez ces périphériques entre les utilisations Voir Activation de la carte réseau sans fil en ...

Page 207: ...permet de connecter un moniteur externe ou un projecteur ACL Voir Port vidéo externe en page 92 Prise de port d affichage Ceci vous permet de connecter un câble de port d affichage Les câbles de port d affichage servent principalement à connecter un ordinateur à un moniteur ou un dispositif de cinéma à domicile Fente pour carte ExpressCard Permet d installer une carte ExpressCard Voir Cartes Expre...

Page 208: ...SB 2 0 vous permettent deconnecter des périphériques USB La norme USB 2 0 transfère des données à un débit théorique de 480Mbit s Elle est rétrocompatible avec les périphériques USB 1 1 dont le débit atteint 12 Mbit s Voir Ports USB en page 90 POUR PROTÉGER VOTRE ORDINATEUR DES DOMMAGES ET OPTIMISER SES PERFORMANCES GARDEZ TOUJOURS LES GRILLES DE VENTILATION DÉGAGÉES PROPRES ET SANS DÉBRIS IL EST ...

Page 209: ...sants sur le côté droit de l ordinateur Voici une courte description des composants se trouvant sur le côté droit de votre ordinateur LifeBook Fente pour carte Smart Card Votre LifeBook est doté d un lecteur de cartes intelligentes aussi appelées cartes à puce ou Smart Card Ces cartes ressemblent à des cartes de crédit mais elles contiennent une puce électronique Pour pouvoir utiliser le lecteur d...

Page 210: ...les modèles pourvus du compartiment multifonction à lecture optique Il permet d ouvrir le plateau lorsque qu aucune alimentation n est amenée au système Ports USB 2 0 Les ports USB 2 0 vous permettent deconnecter des périphériques USB La norme USB 2 0 transfère des données à un débit théorique de 480Mbit s Elle est rétrocompatible avec les périphériques USB 1 1 dont le débit atteint 12 Mbit s Voir...

Page 211: ...sitif antivol disponible en option Bouton d éjection Ce bouton est utilisé pourouvrir le plateau des modèles pourvus du compartiment multifonction à lecture optique Loquet de dégagement du compartiment multifonction Permet de dégager le périphérique qui se trouve dans le compartiment multifonction ...

Page 212: ...omposants se trouvant à l arrière de votre ordinateur LifeBook Prise de réseau local Gigabit RJ 45 Cette prise est utilisée pour uneconnexion Gigabit Ethernet 10Base T 100Base Tx 1000Base T interne Voir Prise de réseau local RJ 45 interne en page 90 Prise de réseau local Gigabit RJ 45 Cette prise est utilisée pour une connexion Gigabit Ethernet 10Base T 100Base Tx 1000Base T in ...

Page 213: ...ous l ordinateur Voici une courte description des composants se trouvant sous votre ordinateur LifeBook Compartiment de mémoire additionnelle Votre ordinateur est équipé en usine d une mémoire vive synchrone dynamique de type 3 à double débit et à haute vitesse SDRAM DDR3 Le compartiment de mémoire permet d augmenter la capacité de mémoire système de votre ordinateur pour en améliorer les performa...

Page 214: ...oir Batterie au lithium ion en page 65 Couvercle du filtre anti poussière Le couvercle du filtre anti pou ssière permet d empêcher à la poussière et à la saleté depénétrer à l intérieur de votre ordinateur Voir Nettoyage du filtre anti poussière en page 125 Grilles de ventilation Les grilles permettent à l air de circuler dans le système afin de refroidir les composants POUR PROTÉGER VOTRE ORDINAT...

Page 215: ...votre ordinateur LifeBook Fujitsu Ces symboles vousrenseignent sur le fonctionnement des composants correspondants Voyant d alimentation Le voyant d alimentation indique si le système est opé rationnel Ses différents états possibles indiquent le mode de fonctionnement actuel de l ordinateur Allumé en continu l ordinateur portable LifeBook est sous tension et prêt à être utilisé Clignotant l ordina...

Page 216: ...rt continu batterie chargée entre 51 et 100 de sa capacité maximale Orange continu batterie chargée entre 13 et 50 de sa capacité maximale Rouge continu Batterie chargée à 12 ou moins de sa capacité maximale Orange clignotant Le clignotement indique qu une mesure de chargement est en cours 4 secondes après l installation de la batterie Rouge clignotant Problème au niveau de la batterie Éteint Aucu...

Page 217: ...avier intégré est en mode de pavé numérique à dix touches Voyant Verr maj Le voyant Verr maj indique que le clavier inscrit les lettres en majuscules Voyant Verr défil Le voyant Verr défil indique si le verrouillage du défilement est actif 25 Les batteries soumises aux chocs aux vibrations ou aux températures extrêmes risquent de subir des dégâts permanents Si une batterie est court circuitée elle...

Page 218: ...4 touches Ce clavier exécute toutes les fonctions d un clavier à 101 touches y compris les touches Windows et diverses touches de fonction spéciales Cette section décrit les touches suivantes Pavé numérique Certaines touches de votre ordinateurportable remplissent une double fonction servant à la fois de caractère standard et de touche numérique ou mathématique Pour passer du caractère standard à ...

Page 219: ...ir des chiffres de 0 à 9 exécuter des additions des soustractions des multiplications et des divisions ainsi que saisir des décimales en vous servant des touches de fonction désignées du pavé numérique Les fonctions secondaires des touches du pavé numérique sont indiquées sur leur face avant Touches Windows Votre ordinateur portable LifeBook comporte deux touches Windows soit une touche Démarrer e...

Page 220: ...aramètre Manual Setting Configuration manuelle est sélectionné dans le BIOS Voir Utilitaire de configuration du BIOS en page 54 Fn F6 Gardez la touche Fn enfoncée et appuyez plusieurs fois sur F6 pour diminuer la luminosité de l écran Fn F7 Gardez la touche Fn enfoncée et appuyez plusieurs fois sur F7 pour augmenter la luminosité de l écran Fn F8 Gardez la touche Fn enfoncée et appuyez plusieurs f...

Page 221: ...nateur portable Fujitsu LifeBook il permet de contrôler le curseur pour sélectionner des éléments Le TouchPad comprend une commande de curseur un bouton gauche un bouton droit et un bouton de défilement La commande de curseur fonctionne de la même façon qu une souris pour faire déplacer le curseur à l écran Elle fonctionne avec une légère pression du bout du doigt Les boutons gauche droit fonction...

Page 222: ...ant une fois le pavé tactile avec délicatesse CERTAINS ORDINATEURS LIFEBOOK S710 SONT DOTÉS D UN BOUTON QUICK POINT EN OPTION PERMETTANT DE CONTRÔLER LE CURSEUR POUR PLUS D INFORMATIONS VOIR COMMANDE QUICK POINT EN OPTION EN PAGE 32 POUR EN SAVOIR PLUS SUR LE CAPTEUR D EMPREINTES DIGITALES CONSULTEZ PRÉSENTATION DU CAPTEUR D EMPREINTES DIGITALES EN PAGE 178 UNE SOURIS EXTERNE PEUT ÊTRE CONNECTÉE A...

Page 223: ...suite enfoncez et tenez le bouton gauche tout en déplaçant l élément à son nouvel emplacement puis relâchez Vous pouvez également glisser un élément avec le pavé tactile TouchPad Premièrement placez le curseur sur l élément que vous désirez déplacer et frappez légèrement le pavé tactile TouchPad à deux reprises en faisant attention de laisser le doigt sur lepavé après la dernière frappe Ensuite gl...

Page 224: ...page 178 Commande Quick Point en option Si ce dispositif en option est disponible sur votre ordinateur le clavier comportera unbouton de commande de curseur en son centre dans sa partie inférieure Il est à peu près de la même taille et de la même forme que la gomme à effacer d un crayon La commande du curseur remplit les mêmes fonctions qu une boule de souris et permet de déplacer le pointeur dans...

Page 225: ...yez de nouveau sur Fn F3 Le volume peut aussi être régléavec les commandes de volume propos ées par diverses applications Certains périphériques audio pouvant être connectés à votre système sont dotés de commandes de volume Chaque commande de volume ci dessus impose une limite supérieure s appliquant aux autres commandes Nous vous recommandons d essayer les dif férentes commandes pour découvrir le...

Page 226: ...nt multifonction Graveur de DVD multiformat double c ouche Ce lecteur vous permet delire des films des logiciels et des DVD CD audio ainsi que d enregistrer des DVD des CD et des DVD RAM Batterie au lithium ion modulaire Cette batterie rechargeable peut être utilisée pour alimenter votre ordinateur LifeBook lorsqu aucun adaptateur n y est connecté Disque dur secondaire modulaire Ce disque dur vous...

Page 227: ...necter Éjecter en toute sécurité de votre zone de notification LE COMPARTIMENT MULTIFONCTION NE DOIT JAMAIS ÊTRE VIDE LORSQUE L ORDINATEUR EST EN MARCHE SI VOUS LA LAISSEZ VIDE DE LA POUSSIÈRE ET DES CORPS ÉTRANGERS PEUVENT S INFILTRER DANS L ORDINATEUR FAITES ATTENTION LORSQUE VOUS ALIGNEZ ET ENFONCEZ UN PÉRIPHÉRIQUE DANS LA BAIE SI VOUS NE PROCÉDEZ PAS CORRECTEMENT VOUS RISQUEZ D ENDOMMAGER LA B...

Page 228: ...nant rallumer votre ordinateur en toute sécurité Vous pourrez ensuite accéder au périphérique et l utiliser normalement Compartiment multifonction Retrait Installation d un périphérique de dans le Compartiment multifonction Loquet d ouverture Votre ordinateur LifeBook détectera automatiquement le nouveau périphérique et l activera lors du démarrage du système Une lettre dedésignation du périphériq...

Page 229: ...ue le système est en marche Si le système de sécuritéest activé il exige au dé marrage ou à la reprise de l ordinateur du mode sommeil l entrée d un mot de passe à l aidedes boutons du tableau de sécurité etd application Après l entrée d un mot de passe valide le système reprend son fonctionnement Configuration de votre tableau de sécurité LifeBook Lorsque vous recevez votre portable LifeBook l ap...

Page 230: ...utefois les portables LifeBook individuels utilisés dans un environnement de groupe ne devraient pas utiliser un mot de passe commun Un mot de passe comprend de un à cinq caractères suivis de la touche Entrée Une frappe valide peut faire intervenir un seul bouton ou jusqu à quatre boutons simultanément Voici des exemples de frappes valides Bouton 4 enfoncé seul Boutons 2 et 3 enfoncés en même temp...

Page 231: ...su Security Panel Application Supervisor FJSECS EXE puis appuyez sur Entrée 5 Suivez les instructions affichées à l écran pour définir le mot de passe de superviseur Définition du mot de passe d utilisateur 1 Allez au menu Démarrer 2 Sélectionnez Tous les programmes 3 Cliquez sur Application Tableau de sécurité puis sur Définir le mot de passe d utilisateur 4 Suivez les instructions pour définir l...

Page 232: ...alimentation veille reprise 2 Lorsque l indicateur de sécurité clignote entrez le mot de passe puis appuyez sur le bouton Entrée 3 Le portable devrait reprendre son fonctionnement normal Entrée d un mot de passe incorrect Après trois échecs successifs d entrée d un mot de passe de superviseur ou d utilisateur le système émet des bips pendant environ une minute Si le mot de passe entré durant cet i...

Page 233: ...int après une minute Pour revenir au fonctionnement normal branchez d abord une source d alimentation au portable Vous pouvez alors le déverrouiller ÉTEIGNEZ TOUJOURS VOTRE ORDINATEUR AVANT DE LE TRANSPORTER ET OU DE L EMBALLER APRÈS AVOIR ÉTEINT LE SYSTÈME ATTENDEZ QUE LE PANNEAU DE VOYANTS D ÉTAT INDIQUE BIEN LE STATUT HORS TENSION C EST À DIRE QU AUCUN VOYANT N EST ALLUMÉ IL EST POSSIBLE QUE L ...

Page 234: ...Définition des mots de pa sse mais sélectionnez cette fois l option Supprimer ensuite entrez le mot de passe actuel puis cliquez sur le bouton Suivant Répondez Oui à la demande de confirmation Suppression de l application Tableau de sécurité avec des mots de passe encore actifs L utilisation de cette fonction ne permettra aucune modification du mot de passe Selon la configuration de votre système ...

Page 235: ...cliquez sur le fichier SetupS exe La fenêtre d installation du Tableau de sécurité s affiche Suivez les directives fournies à l écran 2 Sur le disque ouvrez le dossier Utilitaires Tableau de sécurité et d applications Utilisateur et double cliquez sur le fichier setup exe La fenêtre d installation du tableau de sécurité apparaît Suivez les directives fournies à l écran Les mots de passe de supervi...

Page 236: ...est utilisé à titre de démarreur d applications le tableau d applications LifeBook est d une très grande souplesse vous offrant un vaste choix d options L utilitaire de configuration du tableau d applications permet de configurer rapidement et aisément le tableau selon vos besoins afin d en tirer le maximum Pour configurer le tableau d applications avec l utilitaire Configuration du tableau d appl...

Page 237: ...bouton cliquez sur l onglet correspondant au bouton à reconfigurer par exemple Soutien Cliquez sur Enregistrement de l application à partir du menu Démarrer cliquez sur l application voulue dans la liste puis sur suivant Dans la fenêtre qui suit vous pouvez demander au système d émettre un son quand le programme sélectionné démarre Cliquez sur Suivant puis sur Terminer Le bouton est dorénavant con...

Page 238: ... Cliquez sur Programmes 3 Cliquez sur Tableau d applications LifeBook 4 Cliquez alors sur Arrêter le tableau d applications Pour le réactivez exécutez la même procédure sauf qu à l étape 4 vous devez plutôt cliquer sur Redémarrer le tableau d applications CHAQUE FOIS QUE VOUS DÉMARREZ WINDOWS LE TABLEAU D APPLICATIONS LIFEBOOK EST AUTOMATIQUEMENT ACTIVÉ MÊME SI VOUS L AVIEZ DÉSACTIVÉ AVANT D ARRÊT...

Page 239: ...tre ordinateur portable LifeBook Fujitsu peut utiliser trois sources d alimentation différentes une batterie au lithium ion principale un adaptateur secteur et un adaptateur auto avion Connexion des adaptateurs d alimentation L adaptateur secteur et l adaptateur auto avion disponible en option permettent tous deux de faire fonctionner votre ordinateur portable et de charger les batteries ...

Page 240: ...placez le contact d allumage sur la position Marche ou Accessoires OU 3 Branchez l adaptateur auto avion sur la prise d alimentation c c de votre siège d avion Passer d une alimentation sur adaptateur secteur ou auto avion à une alimentation sur batterie 1 Assurez vous qu au moins une batterie chargée est installée dans votre ordinateur 2 Débranchez l adaptateur secteur ou l adaptateur auto avion ...

Page 241: ...ne lecture facile dans les environnements à forte luminosité Cet écran offre également une excellente résolution grâce à une technologie de matrice active Ouverture de l écran 1 Soulevez l écran et inclinez le légèrement vers l arrière jusqu à une position confortable en faisant attention de ne pas toucher à la surface d affichage ...

Page 242: ...r cette combinaison de touches pour augmenter la luminosité de votre écran Utilisation des Options d alimentation Windows Vista Pour changer la luminosité avec cette option ouvrez le Panneau de configuration et double cliquez sur l icône Options d alimentation Dans le panneau de gauche sélectionnez Ajuster la luminosité d affichage puis faites glisser les barres de luminosité jusqu au niveau souha...

Page 243: ... l icôneCentre de mobilité Windows Faites glisser la barre de luminosité d affichage jusqu au niveau souhaité Fermeture de l écran 1 Saisissez le bord de votre écran et abaissez le vers l avant jusqu à ce qu il soit appuyé contre le boîtier principal de votre ordinateur LifeBook LORSQUE VOUS EMPLOYEZ UNE ALIMENTATION SECTEUR L ÉCRAN UTILISE PAR DÉFAUT LE NIVEAU DE LUMINOSITÉ LE PLUS ÉLEVÉ LORSQUE ...

Page 244: ...rdinateur LifeBook ce dernier exécute un auto test de mise sous tension pour vérifier les composants interneset la configuration Siune anomalie est découverte votre ordinateur LifeBook émet un avertissement audio et affiche un message d erreur Voir Messages de l auto diagnostic de mise sous tension en page 109 Selon la nature du problème vous pourrez poursuivre le démarrage du système d exploitati...

Page 245: ...eur portable LifeBook Vous redémarrez l ordinateur à partir de la boîte de dialogue Windows d arrêt du système Un logiciel déclenche un redéma rrage du système par exemple lorsque vous installez une nouvelle application Mots de passe d accès au disque dur Pour mieux sécuriser vos données vouspouvez créer des mots de passe contrôlant l accès au disque dur Cette fonction est gérée par l utilitaire d...

Page 246: ... BIOS procédez de la manière suivante ou servez vous du menu TrustedCore tel que décrit à la section suivante 1 Allumez ou redémarrez votre ordinateur portable LifeBook 2 Pour accéder à l utilitaire appuyez sur la touche F2 lorsque le logo Fujitsu apparaît à l écran Le menu principal de l utilitaire de configuration du BIOS s affichera avec les paramètres courants 3 Avec la TOUCHE FLÉCHÉE À DROITE...

Page 247: ...ort Assistance en ligne sélectionnez Users Guides Guides d utilisation Sélectionnez votre produit sa série et son modèle puis cliquez sur Go Sous l onglet Manuals Manuels sélectionnez BIOS Guide Guide du BIOS Démarrage du système Il est fortement recommandé de ne pas installer depériphérique externe et de ne pas insérer de DVD CD dans votre lecteur avant que la procédure de démarrage soit entièrem...

Page 248: ... écran suivant 6 Vous verrez ensuite l écran Sélectionnez l emplacement actuel de votre ordinateur Choisissez parmi Domicile Travail par défaut et Lieu public LORS DE VOTRE PREMIÈRE INITIALISATION DU SYSTÈME WINDOWS L ÉCRAN SERA VIDE PENDANT ENVIRON DEUX MINUTES CELA EST NORMAL APRÈS L INITIALISATION UNE BOÎTE DE DIALOGUE CONFIGURATION DE WINDOWS APPARAÎT IMPORTANT PENDANT LA PROCÉDURE DE CONFIGUR...

Page 249: ...démarrage de Windows le Centre d accueil du panneau de configuration apparaît Si vous ne voyez pas l icône Enregistrer Windows en ligne dans la fenêtre cliquez sur Afficher les xx éléments où xx est le nombre de sujets disponibles dans le Centre d accueil 2 Cliquez sur Enregistrer Windows en ligne et suivez les instructions qui apparaissent pour enregistrer votre copie de Windows Enregistrement de...

Page 250: ...que vous cliquez sur l icône Click Me votre système configure automatiquement les icônes appropriées dans zone de notification en bas à droite de l écran Ces icônes fournissent des liens vers les utilitaires d accès fréquent tels que le logicielde réseau local sans fil fourni par le fabricant de la carte réseau sans fil Utilitaire de mise à jour des pilotes Fujitsu Driver Update Votre système disp...

Page 251: ...terie Pa r exemple vous pouvez créer un profil de gestion de l alimentation vous pouvez mettre votre ordinateur en mode sommeil lorsqu il n exécute aucune opération ou vous pouvezlimiter l utilisation des périphériques consommant le plus d énergie À l instar de tous les ordinateurs por tables alimentés par batterie vous devez trouverle meilleur compromis entre performance et rendement énergétique ...

Page 252: ...centrale l écran ledisque dur et tous les au tres composants internes sauf ceux qui sont nécessaires pour conserver la mémoire du système et permettre son redémarrage Votre ordinateur portable peut être mis en sommeil de plusieurs façons En appuyant sur le bouton d alimentation veille reprise si l ordinateur est allumé Lorsque le délai d inactivité est atteint En laissant la charge de la batterie ...

Page 253: ...US NE PUISSIEZ PAS PLACER L ORDINATEUR EN MODE SOMMEIL OU EN VEILLE PROLONGÉE POUR DE PLUS AMPLES INFORMATIONS CONSULTEZ LA DOCUMENTATION DE VOTRE CARTE PC CARD LORSQUE DES CARTES PC CARD OU DES PÉRIPHÉRIQUES EXTERNES SONT UTILISÉS L ORDINATEUR NE PEUT RETROUVER EXACTEMENT SON ÉTAT ANTÉRIEUR APRÈS AVOIR ÉTÉ EN VEILLE PROLONGÉE ENREGISTREMENT SUR LE DISQUE CAR TOUS LES PÉRIPHÉRIQUES EXTERNES SONT R...

Page 254: ...ez sur OK Gestion de l alimentation dans Windows L icône des options d alimentation disponible dans lePanneau de configuration Windows vous permet de configurer certains paramètres de gestion de l alimentation Parexemple vous pouvez utiliser les Options d alimentation pour régler les valeurs de temporisation délai d inactivité afin d éteindre l écran et les disques durs selon que l ordinateur est ...

Page 255: ... et vous évitez les risques d erreur La procédure appropriée est la suivante Dans Windows 7 1 Cliquez sur le bouton Démarrer puis positionnez le curseur sur le bouton Arrêter l ordinateur située en bas à droite de la fenêtre 2 Cliquez sur le bouton Arrêter l ordinateur SI VOUS ARRÊTEZ VOTRE ORDINATEUR SANS FERMER WINDOWS OU SI VOUS L ALLUMEZ MOINS DE 10 SECONDES APRÈS L AVOIR ARRÊTÉ VOUS RISQUEZ D...

Page 256: ...ALLER APRÈS AVOIR ÉTEINT LE SYSTÈME ATTENDEZ QUE LE PANNEAU DE VOYANTS D ÉTAT INDIQUE BIEN LE STATUT HORS TENSION C EST À DIRE QU AUCUN VOYANT N EST ALLUMÉ IL EST POSSIBLE QUE L APPAREIL NE SE METTE PAS AUTOMATIQUEMENT EN MODE HORS TENSION OU VEILLE PROLONGÉE APRÈS QUE VOUS AVEZ FERMÉ LE COUVERCLE CETTE SITUATION PEUT SE PRODUIRE EN FONCTION DES PARAMÈTRES DE SÉCURITÉ PAR MOT DE PASSE QUI GÈRENT L...

Page 257: ...tonomie peut en être réduite Lorsque la température ambiante est inférieure à 5 C ou supérieure à 35 C Les températures extrêmes réduisent la capacité de charge et peuvent accélérer ladétérioration de la batterie Si vous tentez de charger une batterie sous une température ambiante dépassa nt les seuils de tolérance vous voyez clignoter l icône de charge en cours sur le tableau de voyants d état Vo...

Page 258: ...UR EN UTILISANT TOUT LE COURANT DISPONIBLE L AUTONOMIE RÉELLE DE LA BATTERIE PEUT VARIER SELON LA LUMINOSITÉ DE L ÉCRAN SELON LES APPLICATIONS LES FONCTIONS ET LES PARAMÈTRES DE GESTION DE L ALIMENTATION QUE VOUS UTILISEZ SELON L ÉTAT DE LA BATTERIE ET SELON D AUTRES PRÉFÉRENCES QUE VOUS POUVEZ CONFIGURER L UTILISATION DU LECTEUR OPTIQUE OU DU DISQUE DUR PEUT ÉGALEMENT AVOIR UN IMPACT SIGNIFICATIF...

Page 259: ...jusqu à ce qu elle ne puisse plus faire fonctionner le système Lorsque cela se produit l ordinateur se place en mode sommeil Dans un tel cas rien ne garantit que toutes vos données seront sauvegardées L UTILISATION DE PÉRIPHÉRIQUES ÉNERGIVORES TELS QUE LE MODEM OU L ACCÈS FRÉQUENT AU LECTEUR DE DVD CD RW CD ROM PEUVENT EMPÊCHER UNE RECHARGE COMPLÈTE LORSQUE L AVIS DE BATTERIE FAIBLE APPARAÎT VOUS ...

Page 260: ...de veille de batterie épuisée vos données peuvent être sauvegardées pendant une certaine période mais sivous ne connectez pas rapidementune source d alimentation valide le voyant d alimentation cesse de clignoter et s éteint Vous avez alors perdu toutes les données n ayant pas été enregistrées Si vous connectez un adaptateur vous pouvez poursuivre l utilisation de l ordinateur pendant que la batte...

Page 261: ...tterie chargée prête à l installation 2 Arrêtez l ordinateur portable et débranchez l adaptateur secteur 3 Tout en poussant le bouton de dégagement dans la direction opposée à la batterie glissez le bouton de dégagement de la batterie vers la gauche Ceci dégagera la batterie et laissera voir un bouton de levage orange brillant qui permet de retirer la batterie du compartiment 4 Insérez une nouvell...

Page 262: ...hors tension AVANT D ENLEVER LA BATTERIE ASSUREZ VOUS QUE L ADAPTATEUR SECTEUR EST BIEN CONNECTÉ L ORDINATEUR NE DISPOSE D AUCUNE BATTERIE TEMPORAIRE POUR FAIRE FONCTIONNER LE SYSTÈME DURANT LE REMPLACEMENT DE LA BATTERIE SI VOUS N UTILISEZ PAS L ADAPTATEUR SECTEUR VOUS PERDREZ TOUTES LES DONNÉES NON ENREGISTRÉES SI LE CONNECTEUR DE LA BATTERIE AU LITHIUM ION N EST PAS BIEN ENFONCÉ VOUS RISQUEZ DE...

Page 263: ... On ne peut graver qu une seule fois un DVD R alors qu on peut graver à maintes reprises les DVD RW Les disques DVD R et les disques DVD RW peuvent être lus sur la plupart des lecteurs de DVD Les disques CD R et CD RW peuvent contenir jusqu à 640 Mo de données Un disque CD R ne peut être gravé qu une seule fois alors que les disques CD RW peuvent être gravés à maintes reprises Le graveur de DVD mu...

Page 264: ...disque dans le plateau de chargement l étiquette vers le haut avec l orifice au milieu du disque Enfoncez le disque dans le cercle surélevé situé au centre du plateau 4 Fermez le plateau de chargement en le poussant doucement jusqu à ce que vous entendiez un clic Figure 16 NE FAITES FONCTIONNER VOTRE LECTEUR OPTIQUE QUE SI VOTRE ORDINATEUR PORTABLE LIFEBOOK SE TROUVE SUR UNE SURFACE PLATE L UTILIS...

Page 265: ...NREGISTRÉS SUR LES TITRES DE DVD VIDÉO POUR PUBLICATION DANS DIFFÉRENTES RÉGIONS À TRAVERS LE MONDE SI LE CODE RÉGIONAL DU LECTEUR DE DVD NE CORRESPOND PAS AUX CODES DES TITRES LA LECTURE EST IMPOSSIBLE VOUS POUVEZ CHANGER LE CODE RÉGIONAL DU LECTEUR DE DVD EN UTILISANT LE MENU PROPRIÉTÉS DU LOGICIEL DE DVD TOUTEFOIS VEUILLEZ PRENDRE NOTE QUE VOUS NE POUVEZ CHANGER LE CODE RÉGIONAL QUE QUATRE FOIS...

Page 266: ... du lecteur optique Le lecteur s arrêtera et le plateau sortira légèrement de l ordinateur LifeBook 2 Tirez doucement le plateau jusqu à ce le disque puisse en être facilement retiré 3 Retirez doucement le disque du plateau de chargement 4 Fermez le plateau de chargement en le poussant doucement jusqu à ce que vous entendiez un clic ...

Page 267: ...ateau du lecteur média en insérant un trombone ou un outil similairedans le trou d éjection situ é tout à droite sur le de vant du plateau Redressez une extrémité du trombone et insérez la doucement dans le trou Le plateau sortira Trou pour ouverture d urgence Figure 17 Ouverture d urgence du plateau ...

Page 268: ...ultimédia vous permet de visionner un film tout comme le fait un magnétoscope à cassettes Vous pouvez faire une pause rembobiner avancer rapidement ou arrêter un film à tout moment 1 Pour suspendre le film cliquez sur le bouton d écran 2 Pour faire reculer le film cliquez sur le bouton pour revenir jusqu à un point spécifique de votre choix ou cliquez sur le bouton pour revenir à l écran de bienve...

Page 269: ...a UNE UTILISATION PROLONGÉE DU LECTEUR OPTIQUE NOTAMMENT POUR VOIR UN FILM DVD RÉDUIT CONSIDÉRABLEMENT LA LONGÉVITÉ DE VOTRE BATTERIE LA DURÉE D UN GRAND NOMBRE DE FILMS EST SUPÉRIEURE À L AUTONOMIE D UNE SEULE BATTERIE SI VOUS REGARDEZ UN FILM DVD AVEC UNE ALIMENTATION PAR BATTERIE VOUS AUREZ PROBABLEMENT BESOIN D UNE BATTERIE ADDITIONNELLE CHARGÉE OU DE BRANCHER UN ADAPTATEUR SECTEUR DURANT LE F...

Page 270: ...imentation veille reprise Cette opération n est pas nécessaire si vous avez connecté un adaptateur secteur sans utiliser le mode sommeil 6 Redémarrez votre lecteur multimédia et retrouvez l endroit où vous avez laissé le film 7 Poursuivez la lecture du film DVD CERTAINS FILMS PLUS COURTS PEUVENT ÊTRE ENTIÈREMENT VUS SANS NÉCESSITER DE BATTERIE SUPPLÉMENTAIRE OU LE BRANCHEMENT D UN ADAPTATEUR SECTE...

Page 271: ...ergie pour conserver les données Les cartes Memory Stick permettent l enregistrement le transfert et le partage de contenus numériques tels que photos films sons voix données et applications Les cartes Secure Digital SD sont très similaires aux cartes Memory Stick Comme les Memory Stick les cartes SD permettent de stocker des informations et de les transférer sur des appareils très variés téléphon...

Page 272: ...le haut 4 Poussez fermement la carte dans la fente jusqu à ce qu elle soit logée dans le connecteur Retrait d une carte Memory Stick SD Pour retirer une carte Memory Stick ou SD procédez comme suit Poussez la carte Memory Stick ou SD dans la fente puis retirez la d un trait L INSERTION OU LE RETRAIT D UNE CARTE PENDANT QUE LE LIFEBOOK EST EN COURS DE DÉMARRAGE OU D ARRÊT PEUT ENDOMMAGER LA CARTE O...

Page 273: ...e les cartes ExpressCardTM de type I et de type II lesquelles peuvent exécuter de nombreuses fonctions différentes selon le type de carte que vous insérez Voici quelques cartes ExpressCard disponibles Cartes de réseau local Ethernet Gigabit Cartes IEEE 1394 Cartes S ATA II Pour plus d informations référez vous aux instructions fournies avec votre vos carte s ...

Page 274: ... vous qu aucune autre carte n est déjà installée dans la fente Si c est le cas consultez la rubrique Retrait d une carte ExpressCard ci dessous 3 Insérez votre carte dans la fente l étiquette vers le haut 4 Poussez fermement la carte dans la fente jusqu à ce qu elle soit logée dans le connecteur L INSTALLATION OU LE RETRAIT D UNE CARTE EXPRESSCARD PENDANT LE DÉMARRAGE OU L ARRÊT DE VOTRE ORDINATEU...

Page 275: ...ombreuses possibilités comme faire des achats sécurisés payer des appels téléphoniques enregistrer des données de sécurité et fournir des informations personnelles et d identification Pour pouvoir utiliser le lecteur de carte à puce vous devez acquérir un logiciel tiers qui n est pas fourni Fente pour carte Smart Card à puce Figure 21 Fente pour carte Smart Card WINDOWS OFFRE UNE PROCÉDURE D ARRÊT...

Page 276: ...IMENT DU MODULE DE MÉMOIRE ADDITIONNELLE À L EXCEPTION DE CELLES SPÉCIFIQUEMENT INDIQUÉES DANS LES DIRECTIVES D INSTALLATION ET DE RETRAIT CORRESPONDANTES LE MODULE DE MÉMOIRE ADDITIONNELLE PEUT ÊTRE FORTEMENT ENDOMMAGÉ PAR UNE DÉCHARGE ÉLECTROSTATIQUE DES POUR MINIMISER CE RISQUE VEUILLEZ PRENDRE LES PRÉCAUTIONS SUIVANTES AVANT DE MANIPULER UN MODULE DE MÉMOIRE TOUCHEZ UN OBJET MÉTALLIQUE MIS À L...

Page 277: ...igure 23 Installation un module de mémoire secondaire 7 Insérez le module de mémoire additionnelle en oblique à 45 Poussez fermement le bord du connecteur du module vers le bas et appuyez sur le connecteur jusqu à ce qu il se loge sous la clé de serrage Vous entendrez un clic lorsque celui ci sera bien en place 8 Replacez le couvercle et les vis 2 2 1 Clé de serrage Clavettes d alignement LE MODUL...

Page 278: ...rification de la capacité de mémoire Lorsque vous avez changé la capacité de mémoire du système en remplaçant le module installé par un module plus puissant assurez vous que votre ordinateur a reconnu le changement Dans Windows 7 Vérifiez la capacité de mémoire en cliquant sur Démarrer Panneau de configuration puis en mode d affichage par catégories en cliquant sur l icône Système et Sécurité Séle...

Page 279: ...lle qui est affichée peuvent varier Cela peut se produire si votre système est configuré avecune carte graphique laquelle utilise unepartie de la mémoire du système pour accélérer les performances graphiques SI LA MÉMOIRE TOTALE AFFICHÉE EST INCORRECTE VÉRIFIEZ SI LE MODULE DE MÉMOIRE ADDITIONNELLE EST BIEN INSTALLÉ SI LE MODULE EST BIEN INSTALLÉ MAIS QUE LA CAPACITÉ N EST TOUJOURS PAS BIEN RECONN...

Page 280: ...re 25 Connecter un modem Au début il se peut que les sons du modem soient désactivés Pour activer les sons suivez les étapes simples ci dessous Dans Windows XP 1 Faites un clic droit sur l icône Haut parleur de votre zone de notification 2 Sélectionnez Contrôle du volume 3 Puis Option Propriétés 4 Sous Afficher les commandes de volume suivantes cliquez sur Téléphone puis sur OK 5 Décochez la case ...

Page 281: ...E MODEM INTERNE OU À LA TOTALITÉ DE VOTRE ORDINATEUR PORTABLE LIFEBOOK POUR DE PLUS AMPLES INFORMATIONS CONSULTEZ LA DOCUMENTATION DU FABRICANT DE L AUTOCOMMUTATEUR CERTAINS HÔTELS UTILISENT UN AUTOCOMMUTATEUR NUMÉRIQUE N OUBLIEZ PAS DE VÉRIFIER AVANT DE CONNECTER VOTRE MODEM LE MODEM INTERNE EST CONÇU SELON LA NORME UIT T V 90 SA VITESSE MAXIMALE DE 53 000 BIT S CORRESPOND À LA PLUS HAUTE VITESSE...

Page 282: ...usqu à ce qu elle s enclenche 3 Branchez l autre extrémité du câble sur une prise de réseau local Figure 26 Connexion à un réseau local Ports USB Les ports Universal Serial Bus 2 0 USB vous permettent de connecter divers périphériques USB tels que des tablettes de jeu externes des dispositifs de pointage des claviers et ou des haut parleurs Votre LifeBook est doté de trois ports USB 2 0 deux à gau...

Page 283: ...n dans le port jusqu à ce qu elle s enclenche UTILISATEURS DE MICROSOFT WINDOWS VISTA UNIQUEMENT POUR CONNECTER UN PÉRIPHÉRIQUE USB EFFECTUEZ L UNE DES OPÉRATIONS SUIVANTES VEILLEZ À CONNECTER LE PÉRIPHÉRIQUE AVANT DE METTRE VOTRE ORDINATEUR EN MARCHE OU ATTENDEZ ENVIRON TROIS MINUTES APRÈS LE DÉMARRAGE DU SYSTÈME AVANT DE CONNECTER LE DISPOSITIF USB SI VOUS PRÉFÉREZ NE PAS ATTENDRE POUR CONNECTER...

Page 284: ...ichiers volumineux sur un disque dur externe Pour brancher un périphérique E SATA Figure 28 Connexion E SATA Port E SATA Connecteur pour duplicateur de ports Ce connecteur permet de raccorder votre ordinateur portable à un duplicateur de ports en option Pour savoir comment procéder consultez la documentation livrée avec le duplicateur LORSQUE VOUS APPUYEZ SUR LES TOUCHES FN F10 VOUS POUVEZ CHANGER...

Page 285: ...ndre un processus de dépannage complexe 1 Arrêtez votre ordinateur portable LifeBook 2 Assurez vous que l adaptateur secteur est connecté à votre ordinateur portable et à une source d alimentation secteur active 3 Assurez vous que toute carte insérée dans la fente pour carte PC Card est bien en place Vous pouvez également enlever la carte de la fente pour vous assurer qu elle n est pas la raison d...

Page 286: ... veuillez avoir les informations suivantes à portée de main pour que notre préposé du service à la clientèle puisse vous venir en aide le plus rapidement possible Nom du produit Numéro de configuration du produit Numéro de série du produit Date d achat Conditions dans lesquelles le problème est survenu Texte des messages d erreur reçus Types de périphériques connectés si applicable Pour les numéro...

Page 287: ... colonne Solutions possibles Il est po ssible que certaines causes et solutions possibles ne s appliquent pas à votre ordinateur Tableau de dépannage Problème Page Problèmes audio page 96 Problèmes de lecteur DVD CD ROM page 97 Problèmes de duplicateur de ports page 98 Problèmes de disque dur page 98 Problèmes de clavier ou de souris page 98 Problèmes de mémoire page 99 Problèmes de modem page 99 ...

Page 288: ...n utilisée Des écouteurs sont branchés sur votre ordinateur Le branchement d écouteurs désactive les haut parleurs incorporés enlevez les écouteurs Le lecteur de logiciel n est pas bien configuré Le pilote audio peut être installé ou réinstallé à l aide du CD de pilotes et d applications livré avec votre LifeBook Consultez la documentation de votre application et de votre système d exploitation po...

Page 289: ...nité a été utilisé pour le disque Vérifiez si l identificateur d unité utilisé par l application est le même que celui utilisé par le système d exploitation Lorsque le système d exploitation démarre à partir d un DVD CD les identifications des lecteurs sont automatiquement ajustées Veuillez noter que l identification d une unité peut être changée avec l outil Gestion des disques situé dans Outils ...

Page 290: ...qu un disque d amorçage a été utilisé pour démarrer votre ordinateur Assurez vous que la lettre d unité utilisée par l application est bien celle qu utilise le système d exploitation Lorsque le système d exploitation est démarré à partir d un CD les identifications du lecteur sont ajustées automatiquement Les paramètres de sécurité exigent un mot de passe pour le démarrage du système d exploitatio...

Page 291: ... périphérique et du système d exploitation puis installez le pilote approprié Le système s est planté Essayez de redémarrer votre ordinateur portable I Problèmes de mémoire L écran Système n indique pas la quantité de mémoire installée correctement Votre module de mémoire additionnelle n est pas bien installé Enlevez et réinstallez votre module de mémoire additionnelle Voir Module de mémoire addit...

Page 292: ...utes après le démarrage pour le connecter Vous devez attendre quelques minutes Utilisateurs de Microsoft Windows Vista uniquement Pour connecter un périphérique USB effectuez l une des opérations suivantes Veillez à connecter le périphérique avant de mettre votre ordinateur en marche OU attendez environ trois minutes après le démarrage du système avant de connecter le périphérique Si vous préférez...

Page 293: ...otre ordinateur portable n a donc pas détecté son installation Fermez l application et redémarrez votre ordinateur portable Votre logiciel pourrait ne pas disposer du bon pilote actif Consultez la documentation relative à votre logiciel et activez le bon pilote L adresse d E S sélectionnée pour la carte est incorrecte Consultez la documentation de la carte PC Card ExpressCard pour connaître l adre...

Page 294: ...ifiez le tableau de voyants d état pour déterminer la présence et l état des batteries Voir Tableau de voyants d état en page 23 Utilisez un adaptateur d alimentation en attendant que la batterie se charge ou installez une batterie chargée L adaptateur secteur ou auto avion est mal branché Vérifiez si votre adaptateur est branché de façon appropriée Voir Sources d alimentation en page 47 L adaptat...

Page 295: ...les valeurs de temporisation afin qu elles répondent mieux à vos besoins L ordinateur est alimenté par batterie et vous n avez pas tenu compte d un avertissement de batterie faible l ordinateur est donc maintenant en mode veille car batterie épuisée Installez un adaptateur de courant puis appuyez sur le bouton d alimentation veille reprise Voir Sources d alimentation en page 47 Votre batterie est ...

Page 296: ...apidement Les fonctions d économies d énergie sont peut être désactivées Consultez le menu Options d alimentation du Panneau de configuration pour changer les paramètres en fonction de vos besoins Une des applications que vous exécutez utilise beaucoup d énergie en raison d un accès fréquent à un lecteur ou de l utilisation d un modem d un dispositif de réseau sans fil ou Bluetooth Dans la mesure ...

Page 297: ...equiert un mot de passe pour charger votre système d exploitation Assurez vous d avoir le bon mot de passe Accédez à l utilitaire de configuration et vérifiez les paramètres de sécurité puis modifiez les en conséquence Voir Utilitaire de configuration du BIOS en page 54 Le disque dur interne n a pas été détecté Essayez de détecter automatiquement le disque dur interne en utilisant l utilitaire de ...

Page 298: ...ur externe seulement Gardez la touche Fn enfoncée et appuyez sur la touche F10 pour changer votre sélection et choisir où envoyer votre affichage Chaque fois que vous appuyez sur ces touches vous passez au choix suivant Les choix par ordre sont affichage intégré seulement moniteur externe seulement affichage intégré et moniteur externe ensemble L angle de l affichage et les paramètres de luminosit...

Page 299: ...aire de configuration pour ajuster les valeurs de temporisation afin qu elles répondent mieux à vos besoins Voir Utilitaire de configuration du BIOS en page 54 Les temporisations de gestion de l alimentation peuvent être trop courtes et vous n avez pas remarqué que l écran s est allumé puis éteint de nouveau Appuyez sur n importe quelle touche sur le clavier ou déplacez votre souris pour restaurer...

Page 300: ...ion Votre moniteur externe n est pas bien installé Réinstallez votre périphérique Voir Port vidéo externe en page 92 Votre système d exploitation n utilise pas le bon pilote Consultez la documentation du périphérique et du système d exploitation puis installez le pilote approprié Vous avez connecté un moniteur externe et il ne s allume pas Votre moniteur externe n est pas compatible avec votre ord...

Page 301: ...Vérifiez si le lecteur est défini avec le type de disquette approprié dans l utilitaire de configuration Utilitaire de configuration du BIOS en page 54 et que le lecteur de disquette est bien installé Si le lecteur est correctement défini et installé ne l utilisez pas Communiquez avec le service d assistance Échec de la mémoire RAM étendue au décalage nnnn La mémoire étendue ne fonctionne pas ou n...

Page 302: ...rde pasavec le type détecté par l auto diagnostic de mise sous tension Exécutez l utilitaire de configuration pour corriger cette irrégularité Type de lecteur B incorrect exécution de la CONFIGURATION Type de lecteur de disquette B mal identifié dans la Configuration Cela pourrait signifier que le type de lecteur de disquette identifié dans vot re utilitaire de configuration ne concorde pasavec le...

Page 303: ...ice d assistance Système d exploitation introuvable Le système d exploitation ne peut pas être localisé ni sur le lecteur A ni sur le lecteur C Accédez à l utilitaire de configuration etvérifiez si le disquefixe et le lecteurA sont bien identifiés et si la séquence d amorçage est bien configurée Le système d exploitation devrait être sur le lecteur C sauf si vous avez changé sensiblement votre ins...

Page 304: ...st du BIOS Une réparation de la ca rte mère pourrait être nécessaire Communiquez avec le service d assistance Échec de la mémoire fantôme RAM au décalage nnnn La mémoire fantôme RAM a échoué au décalage nnnn du bloc 64k à partir duquel l erreur a été détectée Vous risquez de subir une corruption des données si vous continuez Communiquez avec le service d assistance nnnn Mémoire RAM fantôme accepté...

Page 305: ...iquez avec le service d assistance concernant les réparations nnnn de la mémoire RAM système accepté nnnn est la capacité de la mémoire système en kilo octets qui a été testée avec succès Erreur du temporisateur du système Le test du temporisateur a échoué L horloge principale qui fait fonctionner l ordinateur est défectueuse Une réparation de la carte mère est nécessaire Communiquez avec le servi...

Page 306: ...de résultat détaillés standard peuvent dans certains cas être affichés sur votre écran pour vous informer des actions qui se passent sur votre modem Le système d exploitation et le logiciel d application peuvent supprimer l affichage des codes de résultat Exemples de codes de résultats OK PAS DE PORTEUSE PAS DE TONALITÉ DE COMPOSITION CONNECTER 53 000 Connexion complète à 53 000 bit s ERREUR TÉLÉC...

Page 307: ...s individuels Le disque de pilotes et applications peut être utilisé pour réinstaller de façon sélective les pilotes et ou applications qui auraient pu être désinstallés ou corrompus Pour réinstaller des pilotes et ou applications 1 Lancez le système et insérez le disque PRA après que Windows a démarré Un écran d installation Fujitsu s affiche une fois que le disque est inséré 2 Lorsque vous avez ...

Page 308: ... dur à l origine Après avoir restauré le SE vous devrez réinstaller les pilotes et les applications à partir du disque de pilotes et derestauration des applications ainsi quede tous disquesqui étaient fournis avec l ordinateur lorsque vous l avez acheté L utilitaire Supprimer les données sur le disque dur permet de supprimer toutes les données sur votre disque dur et d en empêcher leur réutilisati...

Page 309: ...ser le menu TrustedCore pour savoir si l utilitaire est pré chargé en mettant l ordinateur sous tension avec la touche Entrée lorsque le logo Fujitsu apparaît à l écran Le menu TrustedCore apparaîtra et l option Restauration et Utilitaires s y affichera Exécution de la fonctionnalité Restauration et Utilitaires à partir du disque dur 1 Avec le curseur allez en bas de page jusqu à Restauration et U...

Page 310: ...D DVD 4 Mettez le disque de restauration et d utilitaires sur le plateau du lecteur 5 Cliquez sur OK Une barre de progression apparaîtra en bas de l écran pendant le transfert des fichiers à partir du disque 6 Lorsque l écran Restauration et utilitaires apparaît trois onglets sont présents Diagnostics Restauration et Utilitaires Onglets Restauration et Utilitaires Onglet Diagnostics L outil de dia...

Page 311: ...met de supprimer toutes les données sur votre disque dur et d en empêcher leur réutilisation REMARQUE N utilisez pas l utilitaire Supprimer les données sur le disque dur à moins que vous soyez absolument certain de vouloir effacer votre disque dur en entier y compris toutes les partitions L utilitaire Créer des partitions vous permet de créer une nouvelle partition D ou de modifier la taille des p...

Page 312: ...r Pendant le processus de téléchargement l icône affiche une barre rouge indiquant qu elle ne peut pas être utilisée pendant que le téléchargement est en cours Lorsque la mise à jour est terminée un message apparaît pour vous en informer Activer les notifications de mises à jour automatiques Recherches automatiques de nouvelles mises à jour sur une base régulière environ tous les 3 jours Afficher ...

Page 313: ...ORPS ASSUREZ VOUS DE METTRE VOTRE SYSTÈME HORS TENSION AVANT D AJOUTER OU DE RETIRER DES COMPOSANTS DU SYSTÈME MÊME SI LE SYSTÈME EST EN ÉTAT DE SOMMEIL OU DE VEILLE PROLONGÉE DES DONNÉES POURRAIENT ÊTRE PERDUES ET LA MÉMOIRE ENDOMMAGÉE SI LE COURANT QUI ALIMENTE LE SYSTÈME N EST PAS COUPÉ LORSQUE VOUS INSTALLEZ OU RETIREZ UN MODULE DE MÉMOIRE TENEZ LE PAR LE BORD DE FAÇON À NE TOUCHER AUCUN CONTA...

Page 314: ...ou sur une surface molle comme un lit ou un coussin Si vous renversez par accident un liquide sur votre ordinateur portable LifeBook 1 Éteignez le 2 Positionnez le de sorte que le liquide puisse sortir 3 Laissez le sécher pendant 24 heures ou plus si nécessaire 4 S il ne démarre pas une fois sec contactez le service d assistance N utilisez pas votre ordinateur portable LifeBook Fujitsu dans un env...

Page 315: ...nettoyer ou de désinfecter l extérieur de votre ordinateur le clavier ou l écran ACL prenez garde à toujours éteindre le sy stème à débrancher l adaptateursecteur et à retirer la batterie REMARQUE Dans tous les cas évitez de mouiller le revêtement de type peau retournée Suivez les procédures de nettoyage en utilisant des produits nettoyants recommandés disponibles dans le commerce Extérieur et cla...

Page 316: ...ncy ou Agence américaine de protection de l environnement en tant que désinfectant hospitalier SI VOUS N UTILISEZ PAS LES BONS PRODUITS L AFFICHAGE DE L ÉCRAN ACL OU L ORDINATEUR LUI MÊME PEUT EN ÊTRE ENDOMMAGÉ POUR SAVOIR COMMENT UTILISER ET MANIPULER CONVENABLEMENT LES PRODUITS NETTOYANTS PRENEZ GARDE À TOUJOURS CONSULTER LES PROCÉDURES DE NETTOYAGE DU FABRICANT AINSI QUE LES FICHES TECHNIQUES D...

Page 317: ...u système RETIRER L ADAPTATEUR SECTEUR AVANT DE RETIRER LE FILTRE ÉTEIGNEZ LE SYSTÈME AINSI QUE LES PÉRIPHÉRIQUES ET DÉBRANCHEZ L ADAPTATEUR C A NETTOYAGE DU FILTRE N UTILISEZ PAS DE DÉTERGENT ÉVITEZ D ENDOMMAGER LE FILTRE LES DÉGÂTS CAUSÉS À CE COMPOSANT NE SONT PAS COUVERTS PAR LA GARANTIE UTILISEZ DES OUTILS EN PLASTIQUE POUR LE NETTOYER LES OUTILS EN MÉTAL OU EN BOIS RISQUENT DE L ENDOMMAGER D...

Page 318: ...duit d air 5 Mettez le filtre à nouveau en place en insérant d abord une extrémité puis poussez jusqu au bout jusqu à ce qu il s enclenche Figure 29 Retrait installation du filtre anti poussière 126 1 Éteignez votre ordinateur et débranchez l adaptateur c a ASSUREZ VOUS TOUJOURS QUE LE FILTRE ANTI POUSSIÈRE EST INSTALLÉ AVANT DE METTRE VOTRE SYSTÈME EN MARCHE DANS LE CAS CONTRAIRE VOUS RISQUEZ DE ...

Page 319: ...age apportez toujours avec vous le CD de remise en état du système fourni avec votre ordinateur portable Si vous éprouvez des problèmes de logiciel d exploitation pendant votre voyage vous pourriez en avoir besoin pour trouver la solution au problème ÉTEIGNEZ TOUJOURS VOTRE ORDINATEUR AVANT DE LE TRANSPORTER ET OU DE L EMBALLER APRÈS AVOIR ÉTEINT LE SYSTÈME ATTENDEZ QUE LE PANNEAU DE VOYANTS D ÉTA...

Page 320: ...tine Moyen Orient certains pays d Afrique Hongkong Inde la plupart des pays de l Asie du Sud Chine Australie Nouvelle Zélande Ne faites jamais passer votre ordinateur portable au détecteur de métal Faites inspecter votre ordinateur portable manuellement par le personnel de sécurité Toutefois vous pouvez faire passer votre portable sur un appareil à rayon X syntonisé Pour éviter les problèmes place...

Page 321: ... deux La chaleur pourrait réduire la durée de vie des batteries Ne rangez pas la batterie pendant plus de 6 mois sans la recharger Augmenter la durée de vie des batteries Alimentez votre ordinateur portable LifeBook avec l adaptateur secteur ou l adaptateur d auto avion optionnel chaque fois que vous le pouvez Si votre ordinateur portable fonctionne sur l alimentation par batterie pendant tout une...

Page 322: ...e sur les disques multimédias Ne laissez pas la poussière s accumuler sur les disques multimédia ne les rayez pas N écrivez jamais sur la surface de l étiquette avec un stylo à bille ou un crayon Utilisez toujours un crayon feutre Si un disque multimédia subit un changement soudain de température une condensation froid chaud pourrait se former sur la surface Essuyez l humidité avec un chiffon doux...

Page 323: ...ésassemblez pas ou ne démontez pas le lecteur optique L usage d un nettoyant spécial pour lentilles est recommandé pour l entretien régulier du lecteur Entretien de vos cartes Les cartes ExpressCard sont durables mais vous devez en prendre soin La documentation fournie avec votre carte vous donnera des renseignements spécifiques mais vous devriez aussi faire attention aux points suivants Pour les ...

Page 324: ...tion L étiquette de configuration qui est située sur le dessous de votre ordinateur portable comporte des informations spécifiques à propos des opt ions que vous avez choisies pourvotre ordinateur V oici un exemple d étiquette de configuration A79xxxxxxxxxxx S710 14WXGA i5 520M W7HP DL S MULTI 1GB 160G MDM LAN WLAN No Part No FPC0xxxxxxxxxxxxx Disque dur Identifiant de configuration Numéro de pièc...

Page 325: ... ou 4 Mo selon la configuration du système Vidéo Écran couleur plat TFT à rétroéclaira ge par DEL et à matrice active av ec possibilité d affichage simultané sur deux moniteurs Couleur et résolution Vidéo ECRAN TFT HD 14 po Résolution Interne Résolution 1366 x 768 pixels 16 mln couleurs Résolution Externe Résolution 1600 x 1200 pixels 16 mln couleurs En simultané Résolution 1 280 x 768 pixels 16 m...

Page 326: ...re Options de mémoire de masse Disque dur Serial ATA tampon de 150 Mbit s 5 400 tr min 2 5 po 9 5 mm Pour connaître la capacité de votre disque dur consultez l étiquette de configuration située sur le dessous de l ordinateur Lecteur multimédia Selon la configuration de votre ordinateur les lecteurs suivants sont fournis Graveur de DVD multiformat double couche Lecture CD ROM 24x CD R 24x DVD ROM 8...

Page 327: ...au sans fil Carte intégrée Intel Centrino Advanced N 6200 802 11agn 2x2 ou carte Atheros XSPAN 801 11bgn Bluetooth pour communications personnelles sur réseau local sans fil en option Puce Trusted Platform Module TPM Le LifeBook S710 est pourvu d une puce T rusted Platform Module TPM installéepour plus de sécurité sur le système Tableau de sécurité et d applications LifeBook Le tableau de sécurité...

Page 328: ...uteur stéréo Une prise de microphone stéréo Fente pour carte à puce nécessite un logiciel tiers Sur le duplicateur de ports en option Un connecteur analogique D SUBà 25 broches pour périphériques parallèles d entrée ou de sortie bidirectionnel sortie seulement ou ECP Connecteur D SUB à 15 broches pour moniteur VGA externe cf spécifications techniques d affichage Un connecteur D SUB à 9 broches pou...

Page 329: ...einte digitales Commande de curseur Quick Point Repose main intégré Prise en charge de clavier et de souris externes Compatible USB Alimentation Batteries Batterie rechargeable standard au lithium ion 6 accumulateurs 10 8V 5 200 mAh 56 1 Wh Batterie au lithium rechargeable en option 6 accumulateurs 10 8V 5 800 mAh 63 Wh ou Batterie modulaire en option Batterie au lithium ion à 6 accumulateurs rech...

Page 330: ...tterie et lecteur optique Environnement d exploitation Température Utilisation 5 C à 35 C 41 F à 95 F Stockage 15 C à 60 C 5 F à 140 F Humidité Utilisation 20 à 85 d humidité relative sans condensation Stockage 8 à 85 d humidité relative sans condensation Altitude Utilisation 3 048 m 10 000 pieds maximum Accessoires préférés des utilisateurs Pour commander des accessoires ou demander des informati...

Page 331: ...urnis avec votre système Adobe Reader Norton Internet Security essai gratuit de 60 jours Roxio Easy Media Creator sur certains modèles Cyberlink Makedisc modèles Windows 7 uniquement Cyberlink PowerDirector Cyberlink PowerDVD Cyberlink YouCam Google Picasa Google Toolbar Barre d outils Google OmniPass application de reconnaissance des empreintes digitales Utilitaire de mise à jour des pilotes Fuji...

Page 332: ...Internet Security La suite Norton Internet Security fournit des outils pour protéger votre ordinateur LifeBook des virus des pirates des logiciels espions et du pourriel Il aide à la protection des données actuellement sur votre disque dur contre toute infection oudestruction La version d essai est ac tivée après acceptation du contrat de licence du logiciel Après 60 j ours vous devrez vous pr ocu...

Page 333: ...e réaliser une gamme variée de tâches pour rendre votre utilisation d Internet plus facile et plus plaisante OmniPass application de reconnaissance des empreintes digitales Le capteur d empreintes digitales utilise le logiciel Softex OmniPass qui fournit des fonctions de gestion de mot de passe aux systèmes d exploitation Microsoft Windows OmniPass vous permet d utiliser un mot de passe principal ...

Page 334: ... un revendeurinformatique ou en ligne sur le site de Microsoft Microsoft Windows Live Essentials Windows Live Essentials est une suite de programmes vou s permettant d utiliservotre LifeBook avec plus d aisance et de plaisir Live Essentials comprend six applications Live Messenger Photo Gallery Writer Mail Movie Maker et Silverlight Messenger vous permet de communiquer et d échanger avec des perso...

Page 335: ...nce Office 2007 qui convient pour débloquer la version complète de votre choix Fujitsu offre un kit de lic ence multimédia pour Microsof t Office Petite Entreprise 2007 V ous n avez qu à saisir votre clé de produit et le logiciel est immédiatement prêt à l emploi Vous pouvez aussi acheter un kit de licence Microsoft Office 2007 sans multimédia MLK auprès de votre détaillant de matériel informatiqu...

Page 336: ...ale en tension c c nécessaire à l alimentation de votre ordinateur portable Adresse IP Un identifiant pour un ordinateur ou un périphérique sur un réseauTCP IP Les réseaux qui utilisent le protocole TCP IP acheminent des messages en fonction de l adresse IP de la destination Le format d une adresse IP est une adresse numérique de 32 bits qui s écrit avec quatre nombres séparés par des points Chaqu...

Page 337: ... Ethernet les trois premiers octets sont utiliséspour indiquer le code du vendeur contrôlé et attribué par l IEEE Les trois autres octets sont contrôlés par chaque fabricant pour empêcher toute superposition en conséquence chaque carte Ethernet reçoit une adre sse physique unique au monde ce qui permet de la distinguer parmi d autres cartes Lo rsque la technologie Ethernet est ut ilisée des trames...

Page 338: ...puissance et une durée de vie importantes compte tenu de sa taille et ne subissant pas l effet de mémoire qui caractérise les batteries au nickel cadmium BIOS Acronyme signifiant Basic Input Output System Programme et ensemble de paramètres par défaut stockés dans la mémoire morte ileffectue des diagnostics et fait fonctionnervotre ordinateur lorsque vous le mettez sous tension et agit ainsi jusqu...

Page 339: ...ges La clé de chiffrement protège les données contre les interceptions non autorisées Ce dispositif utilise la même clé de chiffrement pour coder oudécoder les données cette dernière est obligatoire pour que l émetteur et le receveur puissent communiquer Clé de réseau Clé utilisée pour le chiffrement des données sur le réseau La clé de réseau étant utilisée par l ordinateur personnel pour crypter ...

Page 340: ...ermet à un ordinateur qui se connecte sur un réseau d obtenir dynamiquement sa configuration Il est utilisé pour récupérer automatiquement des paramètres nécessaires à la communication tels des adresses IP L émetteur d une adresse IP s appelle un serveur DHCP et celui qui reçoit est un client DHCP DIMM Barrette de mémoire à double rangée de connexions Disque Support circulaire et plat pour le stoc...

Page 341: ...nt le nom est connu Données Les informations stockées et traitées par un système DOS Disk Operating System Littéralement Système d exploitation de disque MS DOS est un sy stème d exploitation de disque Microsoft DVMT Dynamic Video Memory Technology Technologie DVMT ou de mémoire vive pour les fonctions vidéo Topologie de mémoire vidéo permettant d améliorer l efficacité de la carte mère grâce à un...

Page 342: ...802 11a fonctionnent dans les bandes de fréquences UNII inférieures et intermédiaires de 5 GHz IEEE 802 11b Norme de réseau sans fil autorisant un débit maximum théorique de 11 Mbit s Les cartes de norme 802 11b fonctionnent dans les bandes de fréquences ISM de 2 4 GHz IEEE 802 11g Norme de réseau sans fil autorisant un débit maximum théorique de 54 Mbit s Les cartes de norme 802 11g fonctionnent ...

Page 343: ...tif qui fait tourner le disque et qui contient les têtes et les circuits de commande permettant la lecture et l écriture de données sur le disque Masque de sous réseau Le réseau TCP IP est commandé àl aide d une division en plusieurs sous réseaux Une adresse IP se compose d une adresse de sous réseau et de l adresse de l ordinateur Le masque de sous réseau détermine le nombre de bits formant l adr...

Page 344: ... de la mémoire additionnelle à l ordinateur sans outil spécial Mono Système qui utilise un seul canal pour traiter le son provenant de toutes les sources MTU Maximum Transmission Unit Unité maximum de transmission Taille maximum de données pouvant être transférées en une fois par Internet ou d autres réseaux Si vous rencontrez des difficultés à transférer des données à cause d une taille maximum M...

Page 345: ...l gère en conséquence Pas de touche clavier La distance entre les centres des touches de lettres d un clavier PCMCIA PCMCIA est une marque de commerce de la Personal Computer Memory Card International Association La PCMCIA association internationale des cartes de mémoire pour ordinateur personnel est l organisme qui définit les normes relatives aux cartes d extension pour ordinateurs Pilote Progra...

Page 346: ...a commande du périphérique et non au transfert de données POST Power On Self Test Auto diagnostic ou auto test de mise sous tension Programme faisant partie duBIOS qui vérifie la configuration et les conditions defonctionnement de votre matériel chaque fois que votre portable est allumé Des messages d état et d erreur peuvent être affichés avant que le système d exploitation ne se charge Si l auto...

Page 347: ... LifeBook qui stocke des informations binaires programme et données tant qu il est alimenté par une source de courant RAM CMOS Complementary metal oxide semiconductor random access memory Mémoire vive avec Semi conducteur complémentaire à l oxyde de métal Technologie de fabrication de mémoire vive nécessitant une très faible alimentation Redémarrage Voir Réinitialisation Reprise Continuer après un...

Page 348: ...donné doivent utiliser le même identifiant Un périphérique ne peut être autorisé à accéder au BSS que s il fournit le SSID unique Le SSID étant diffusé en texte clair il n assure aucune sécurité du réseau Stéréo audio Système qui utilise deux canaux pour traiter le son provenant de deux sources différentes SVGA Super VGA S Vidéo Super Vidéo Système vidéo à composantes servant à gérer un écran de t...

Page 349: ...e Mode dans lequel l ordinateur est temporairement inactif Votre LifeBook utilise plusieurs modes de veille afin de réduire la consommation électrique et de prolonger la charge de votre batterie Voyant d état Voyant indiquant l état de certains composants de votre système Sur votre ordinateur portable LifeBook il s agit d un écran ACL situé juste au dessus du clavier VRAM Video Random Access Memor...

Page 350: ...x instructions il peut être la cause de parasites nuisibles aux communications radio Iln est toutefois pas garanti qu auc une interférence ne soit observée dans un environnement particulier Si ce matériel cause des interférencesnuisibles à la réception des ondes de radio ou de télévision ce qui peutêtre vérifié en le mettant hors tension puis sous tension l utilisateur devra tenter de les corriger...

Page 351: ...rme Le numéro d équivalence sonnerie N ES de cet appareil est 0 1B commel indique l étiquette Le numéro NES sert à déterminer le nombre d appareils pouvant êtreconnectés à une ligne téléphonique S il y a trop de NES sur une ligne téléphonique il se peut que les appareils ne sonnent pas lorsqu un correspondant vous appelle Dans la plupart des régions le total des NES ne doit pas dépasser cinq 5 0 M...

Page 352: ...phonique assurez vous que l installation de cet ordinateur ne mette pas votre alarme hors service Pour toutes questions concernant les éléments qui mettent l alarme hors service consultez votre entreprise de téléphone ou un installateur agréé La Loi de 1991 sur la protection desutilisateurs du téléphone stipule qu ilest illégal pour toute personne d utiliser un ordinateur outout autre dispositif é...

Page 353: ...fectuées par un service de maintenance agréé au Canada Toute réparation ou modification qui n est pas expressément approuvée par Fujitsu ou toute défaillance de l équipement peut entraîner la compagnie de télécommunications à exiger que l utilisateur déconnecte l équipement de la ligne téléphonique AVIS Le numéro d équivalence sonnerie NES du présent matériel est de 0 1B Le NES assigné à chaque di...

Page 354: ...ulaires La carte réseau sans fil peut être utilisée en toute sécurité car son fonctionnement est conforme aux recommandations et aux normes de sécurité en matière de radiofréquences L usage d une carte réseau sans fil peut être limité dans certaines situations ou certains environnements notamment à bord d un avion dans un lieu contenant des matières explosives dans des situations où le risque d in...

Page 355: ...forme aux limites définies dans la Partie 15 des règlements de la FCC Son fonctionnement est soumis aux deux conditions suivantes 1 cet appareil ne doit pas causer d interférence nuisible 2 cet appareil doit accepter toutes les interférences reçues y compris celles pouvant causer un mauvais fonctionnement de l appareil Déclaration concernant les dispositions de la FCC sur les interférences Cet app...

Page 356: ...t appareil ne doit pas causer d interférence nuisible 2 cet appareil doit accepter toutes les interférences reçues y compris celles pouvant causer un mauvais fonctionnement de l appareil Toute modification n ayant pas été expressément approuvée par la société Fujitsu Computer Systems peut annuler le droit de l utilisateur de se servir du matériel Avis pour le Canada Le matériel destiné à un usage ...

Page 357: ...r portable Elle fonctionne dans les bandes RFpouvant être utiliséessans autorisation spéciale ce qui élimine le besoin d obtenir une licence de la FCC pour les radiocommunications Elle fonctionne dans la bande industrielle scientifiqueet médicale ISM de 2 4 GHz et da ns les bandes UNII Unlicensed National Information Infrastructure inférieures intermédiaires et supérieures 5 GHz La carte de réseau...

Page 358: ...é est établie uniquement à l aide de périphériques clients dans une configuration égal à égal Les réseaux Ad hoc sont donc également connus sous le nom de réseaux d égal à égal Un réseau Ad hoc est une méthode aisée et peu coûteuse de relier plusieurs ordinateurs en réseau Le mode Ad hoc exige que les paramètres de nom de réseau SSID d authentification réseau et de clé de chiffrement soient config...

Page 359: ... réseau câblé Les réseaux sans fil d entreprise fonctionnent en mode Infrastructure car ils nécessitent une connexion au réseau local sans fil pour accéder aux ordinateurs aux périphériques et aux services par exemple serveurs de fichier imprimantes et bases de données Modem ADSL modem câble ou similaire Internet Réseau local câblé Point d accès Réseau local sans fil Un concentrateur en option pou...

Page 360: ...de IEEE 802 11a car celui ci utilise la bande radiofréquence de 5 GHz Les appareils sans fil qui émettent dans la bande de fréquences de 2 4 GHz peuvent nuire au fonctionnement des périphériques IEEE 802 11b g n Les symptômes associés aux interférences incluent une réduction du débit des coupures intermittentes de connexion et un nombre important d erreurs de trames Ilest FORTEMENT recommandéde me...

Page 361: ...nu Bluetooth sélectionnez Paramètres Bluetooth 3 Dans le menu apparaissant en haut de la fenêtre Paramètres Bluetooth sélectionnez Bluetooth puis Connexion ou Déconnexion selon votre préférence 169 Activation de la carte réseau sans fil La carte réseau sans fil peut être activée de la même façon que pour sa désactivation LE COMMUTATEUR DE L INTERFACE RÉSEAU SANS FIL BLUETOOTH PERMET D ÉTEINDRE SIM...

Page 362: ...artage Dans Windows 7 Si le Panneau de configuration n est pas en mode d affichage par icônes sélectionnez soit Grandes Icônes soit Petites Icônes en mode d Affichage en liste déroulante Double cliquez sur l icône du Centre de réseau et partage 3 Dans le panneau de gauche sélectionnez Se connecter à un réseau 4 Sélectionnez un des réseaux de la liste puis cliquez sur Connexion 5 Suivez les instruc...

Page 363: ...z faire faites une sélection Pour un réseau en mode infrastructure sélectionnez Configurer ma connexion manuellement Pour un réseau ad hoc sélectionnez Choisir dans une liste de fournisseurs de services Internet 7 Entrez les informations requises Il se peut que vous deviez consulter votre administrateur de réseau pour certaines informations 8 Si vous avez besoin d aide allez au menu Démarrer Aide ...

Page 364: ... même clé WEP que ceux du point d accès Attribuez la même valeur d authentification réseau que celle du point d accès Consultez votre administrateur de réseau si cette valeur est requise Signal faible et ou mauvaise qualité de la liaison Connexion en mode Ad hoc Essayez de rétablir la connexion après avoir rapproché l ordinateur ou retiré les éventuels obstacles Connexion en mode point d accès Inf...

Page 365: ...d authentification réseau de chiffrement et de sécurité Si les paramètres de sécurité sont mal configurés en raison par exemple d une clé WEP comportant une faute de frappe d un nom d utilisateur LEAP incorrect ou d un mauvais choix de méthode d authentification la carte réseau sans fil s associera au réseau sans fil mais ne s y authentifiera pas Paramètres réseau mal configurés Vérifiez la config...

Page 366: ...es 300 pi à 1 Mbit s 802 11g 30 mètres 100 pi à 54 Mbit s 91 mètres 300 pi à 1 Mbit s 802 11n selon les estimations les portées des modes 802 11g et 802 11a dans leurs fréquences respectives sont multipliées par deux Nombre de canaux 802 11a 8 indépendants 802 11b g 11 dont 3 sans chevauchement 802 11n 2 4 GHz 3 sans chevauchement si la liaison entre réseaux n est pas utilisée 2 sans chevauchement...

Page 367: ...eurs par exemple nombre de murs réflectivité des matériaux ou interférences provenant d autres sources de radiofréquences Le chiffrement par clé de réseau WEP est effectué avec le nombre de bits indiqué ci dessus mais l utilisateur peut définir une clé de 40 ou 104 bits après avoir soustrait la longueur fixe de 24 bits Selon l environnement le nombre maximum d ordinateurs peut être inférieur ...

Page 368: ...tient un guide de l utilisateur complet qui vous aidera à maîtriser son fonctionnement Pour accéder au fichier d aide cliquez sur Démarrer Tous les programmes Bluetooth puis sur Guide d utilisation Pour en savoir davantage sur la technologie Bluetooth visitez le site Web www bluetooth com Énoncé de la FCC relatif à l exposition aux rayonnements Cet équipement respecte les normes de la FCC relative...

Page 369: ...rieur et à distance des fenêtres Si l équipement ou l antenne de transmission est installé à l extérieur une licence peut être nécessaire Garantie Les utilisateurs ne sont pas autorisés à modifier ce produit Toute modification annule la garantie Cet équipement ne peut être modifié altéré ou changé en aucune façon sans l autorisation écrite de Fujitsu Toute modification nonautorisée annulera les au...

Page 370: ...capteur d empreintes digitales Il est possible que votre LifeBook soit équipé d un capteur d empreintesdigitales sous le pavé tactile TouchPad entre les boutons gauche et droit Ce capteur sert aussi de bouton de défilement Figure 31 Capteur d empreintes digitale ...

Page 371: ...un mot de passe principal pour tous les écrans en ligne toutes les applications Windows et d autres applications demandant un mot de passe OmniPass demande aux utilisateurs de s authentifier à l aide du capteur d empreintes digitales avant de leur donner accès au bureau Windows Ce périphérique comporte un système d authentification sécurisé qui limite l accès à votre ordinateur à vos applications ...

Page 372: ...e coin inférieur droit de l écran L application Softex apparaît dans le groupe de Programmes du menu Démarrer Configuration de système nécessaire L application OmniPass nécessite de l espace sur votre disque dur ainsi qu un système d exploitation spécifique SE Les exigences minimales sont les suivantes Système d exploitation Windows XP Professionnel Au moins 35 Mo d espace disque disponible Instal...

Page 373: ...quement une icône Softex OmniPass dans le panneau de configuration Windows ainsi qu une icône dorée en forme de clé dans la zone de notification Vérification des informations concernant votre version d OmniPass Après avoir installé OmniPass et redémarré votre système vous pouvez décider de vérifier la version du logiciel Pour vérifier votre version d OmniPass 1 Double cliquez sur l icône en forme ...

Page 374: ... que vous consultez vos courriels que vous effectuez des opérations bancaires sur Internet que vous payez des factures ou que vous accédez aux ressources d un réseau il vous est souvent demandé de vous identifier Il se peut alors que vous ayez besoinde dizaines de mots de passe dont vous devez vous rappeler AVANT DE DÉSINSTALLER L APPLICATION DÉCRYPTEZ TOUS LES FICHIERS CRYPTÉS OMNIPASS ET EXPORTE...

Page 375: ...ations d identification de l utilisateur Jean_01 et freq14 Pour ce faire il devra utiliser le système sur lequel il s est enregistré à titre d utilisateur OmniPass En fait OmniPass ne change pas les informations d identification de laressource protégée par mot de passe SiJean veut accéder à son courriel depuis un ordinateur sur lequel le compte Omnipass n existe pas il devra saisir ses information...

Page 376: ...hes en mode débutant et Invites audio sur au moins Invite avec signaux sonores uniquement jusqu à ce que le fonctionnement d OmniPass vous soit familier Cliquez sur Suivant pour procéder à l enregistrement de l utilisateur Un écran de félicitations indiquant que l enregistrement de l utilisateur est terminé apparaîtra 5 Cliquez sur Terminé pour quitter l assistant d enregistrement Il vous sera dem...

Page 377: ...rement d empreinte digitale Votre système est équipé d un capteur d empreintes digitales à glissement Les capteurs à glissement sont de taille réduite et ressemblent à un mince rectangle allongé Pour prendre une empreinte digitale faites glisser ou tirez doucement vers vous le bout de votre doigt sur le capteur à partir de la deuxième articulation Un glissement trop rapide ou trop lent pourrait fa...

Page 378: ...st appelé Ce système peut être appelé fréquemment pendantl ouverture d une session Windows lors de la connexion à OmniPass lorsque vous déverrouillez votre poste de travail lorsque vous reprenez le système depuis le mode sommeil ou veille prolongée lorsque vous déverrouillez un économiseur d écran activé par mot de passe lors du remplacement du mot de passe d un site mémorisé ou des noms de connex...

Page 379: ...ur ce curseur dans la zone d invite de connexion mais ne cliquez pas sur le bouton Connexion ou Envoyer Association d un nom convivial Après avoir cliqué sur le curseur en forme de clé près de l invite de connexion OmniPass vous invitera à entrer un nom convivial pour ce site Vous devez entrer un terme qui vous rappelle le site Internet la société ou le service auquel vousvous connectez Dans sa ba...

Page 380: ... paramètres d authentification OmniPass correspondant à ce site sont désormais sauvegardés dans la base de données sécurisée d OmniPass Les paramètres d authentification d OmniPass Paramètres pour ce site protégé par mot de passe peuvent toujours être modifiés dans Gestion du coffre fort Connexion à un site mémorisé Selon les informations contenues dans Paramètres pour ce site protégé par mot de p...

Page 381: ...tte interface graphique cliquez deux fois sur la clé OmniPass dans la zone de notification Cliquez sur Gestion du coffre fort vous serez invité à vous authentifier Lorsque vous avez accédé à Gestion du coffre fort cliquez sur Gérer les mots de passe sous Paramètres du coffre fort L interface Gérer les mots de passe apparaît avec une liste de noms conviviaux Si vous désirez afficher les information...

Page 382: ...d biblomail com Si OmniPass ne vous a pas fourni d identités vous ne pourrez mémoriser qu un seul compte par site Pour créer et gérer des identités cliquez deux fois sur la clé OmniPass dans la zone de notification Cliquez sur Gestion du coffre fort OmniPass vous invite à vous authentifier Lorsque vous avez accédé à Gestion du coffre fort cliquez sur Gérer les identités sous Paramètres du coffre f...

Page 383: ...électionnez l identité souhaitée puis cliquez sur OK Changement d identité de l utilisateur Pour changer les identités à tout moment cliquez avec le bouton droit de la souris sur l icône OmniPass dans la zone de notification puis cliquez sur Changer l identité de l utilisateur dans le sous menu La boîte de dialogue Changer d identité apparaît Sélectionnez l identité souhaitée puis cliquez sur OK G...

Page 384: ...cliquez sur Importer exporter un utilisateur sous Gérer les utilisateurs VOUS NE POUVEZ PAS IMPORTER UN UTILISATEUR DANS OMNIPASS SI UN UTILISATEUR PORTANT LE MÊME NOM Y EST DÉJÀ ENREGISTRÉ VOUS DEVEZ EXPORTER PÉRIODIQUEMENT VOTRE PROFIL UTILISATEUR ET LE SAUVEGARDER DANS UN ENDROIT SÛR S IL DEVAIT ARRIVER QUELQUE CHOSE À VOTRE SYSTÈME VOUS POUVEZ IMPORTER VOTRE PROFIL OMNIPASS SUR UN NOUVEAU SYST...

Page 385: ... de l utilisateur exporté Ces références sont celles qu ilfallait soumettre lorsque le profil d utilisateur a étéexporté Vous aurez besoin du Nom d utilisateur du Mot de passe et du Domaine Si vous avez oubliéla valeur pour Domaine celle ci doit correspondre au nom de votre ordinateur dans un environnement PC ou SOHO OmniPass vous informe si le profil utilisateur a été correctement importé Informa...

Page 386: ...nférieur droit du bureau Cliquez sur le bouton Démarrer sélectionnez Tous les programmes puis le groupe de programmes Softex et enfin cliquez sur la sélection Centre de contrôle OmniPass Ouvrez le Panneau de configuration Windows accessible à partir du bouton Démarrer Paramètres Panneau de configuration et double cliquez sur l icône Softex OmniPass Gestion des utilisateurs L onglet Gestion des uti...

Page 387: ... Enregistrement vous permet d enregistrer des empreintes digitales Si vous désirez des informations sur la procédure d enregistrement d un périphérique d authentification reportez vous au Chapitre 2 3 Pour enregistrer des empreintes digitales supplémentaires cliquez sur Enregistrer un périphérique d authentification et authentifiez vous dans OmniPass Sélectionnez le périphérique de reconnaissance ...

Page 388: ...ecter Vous pouvez vous connecter manuellement à OmniPass en cliquant avec le bouton droit de la souris sur l icône d OmniPass dans la zone de notification et sur Connecter l utilisateur dans le menu généré Dépannage Vous ne pouvez pas utiliser OmniPass pour créer des utilisateurs Windows Vous devez d abord créer l utilisateur Windows ce qui nécessite des droits d administrateur Une fois l utilisat...

Page 389: ...llé OmniPass sur votre système vous pouvez choisir de vous connecter à Windows à l aide d OmniPass Vous vous authentifiez avec OmniPass à l aide du mot de passe principal ou d un périphérique de sécurité enregistré et OmniPass vous connecte à Windows Au cours du processus d authentification il se peut que la boîte de dialogue Erreur de connexion s affiche Cette boîte de dialogue apparaît si OmniPa...

Page 390: ...s 104 105 recharge 66 remplacement 69 remplacement hors tension 69 Battery level indicator 24 BIOS guide 55 utilitaire de configuration 54 Bluetooth informations supplémentaires 176 Bouton d alimentation veille reprise 13 59 C Câble de sortie c c 48 Capteur d empreintes digitales 178 barre d outils d authentification OmniPass 186 connexion à un site mémorisé 188 désinstallation d OmniPass 182 enre...

Page 391: ...Coordonnées pour contacter Fujitsu 9 D Dans Windows Vista configuration de la carte réseau sans fil 170 restauration du système d exploitation 116 Dans Windows XP configuration de la carte réseau sans fil 171 Déballage 11 Dépannage 93 DIMM 84 Disque dur problèmes 98 Double cliquer 31 Duplicateur de ports connecteur pour duplicateur de ports 22 problèmes 98 E Écran 14 49 fermeture 51 loquet 14 lumi...

Page 392: ...reurs 109 Mode sommeil veille 60 Modem 18 problèmes 99 O Ordinateur portable Fujitsu LifeBook rangement 125 voyager avec votre ordinateur 127 P Pavé tactile TouchPad 14 commandes 31 voir TouchPad 29 Périphériques modulaires 35 installation 35 retrait 35 Port de connexion 92 Port pour moniteur externe 17 92 Ports de périphériques 88 135 Ports USB Universal Serial Bus 90 Ports USB 2 0 18 20 Prise d ...

Page 393: ...plications LifeBook 13 désinstallation 42 lancement d applications 44 mots de passe 38 utilisation 40 Tableau de voyants d état 14 23 Téléchargement automatique des mises à jour de pilotes 119 Touche de fonction F10 28 F3 28 F4 28 F6 28 F7 28 F8 28 33 F9 28 33 Fn 28 Touches de curseur 27 Touches Windows 27 touche Application 27 touches Démarrer 27 U USB 90 100 problèmes 100 Utilitaire de mise à jo...

Reviews: