34
L i f e B o o k P 7 0 0 0 N o t e b o o k – S e c t i o n F o u r
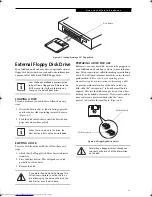
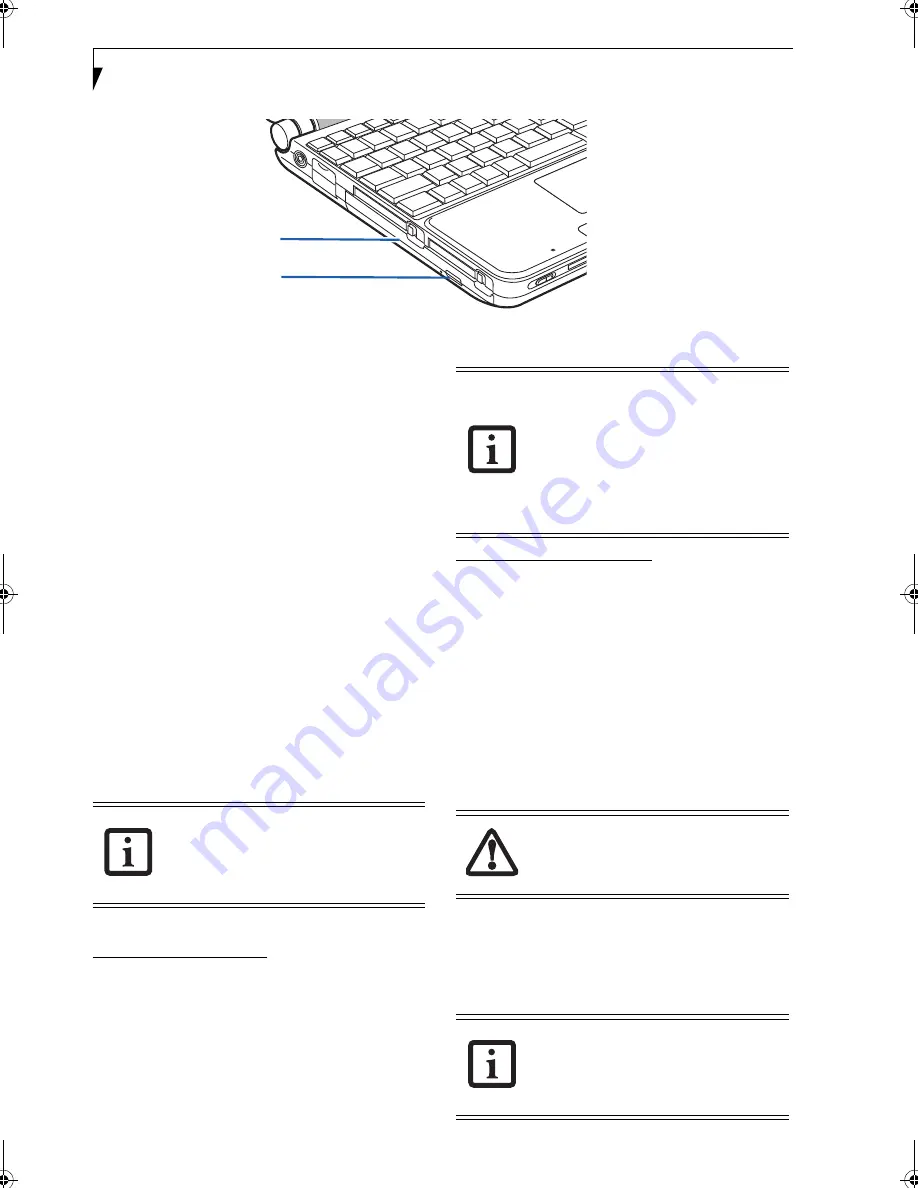
Figure 4-3 Optical Disk Drive
Optical Drive
There is a variety of media available to use with your
system, depending upon the system configuration you
have selected. Super-Multi DVD drives and DVD/CD-
RW Combo drives are collectively known as “optical
drives”.
A CD-R or DVD-R disc can only be written to once;
CD-RW or DVD-RW discs can be written to over and
over. CD-R and CD-RW discs hold up to 700MB of data.
DVD-R and DVD-RW discs hold up to 4.7 GB of data.
Depending upon the configuration of your LifeBook
notebook, you may have one of the following drives:
■
Super-Multi DVD:
The Super-Multi DVD drive com-
bines seven recordable formats in a single drive (DVD-
R, DVD+R, DVD-RW, DVD+RW, DVD-RAM, CD-R,
and CD-RW), making it the most versatile drive to
date.
■
DVD/CD-RW combo:
A DVD/CD-RW combo drive
allows you to access movie, software, data, or audio
DVD/CDs, and to write data onto recordable CD-R
and CD-RW discs.
MEDIA PLAYER SOFTWARE
Super-Multi DVD model only: With the Super-Multi
DVD drive and media player software you can play DVD
movies and music CDs on your LifeBook notebook. The
media player includes controls which allow you to take
full advantage of the features of a DVD movie, as well as
standard features such as fast forward, fast reverse,
pause, etc. With this drive you can also burn onto
recordable DVD-R/RW, DVD+R/RW, or CD-R/RW
discs.
DVD/CD-RW Combo model only: With the combo drive,
you can play DVD movies, read audio CDs, and write
data onto recordable CD-R or CD-RW discs.
LOADING A DVD, CD, CD-R, OR CD-RW
(“MEDIA”)
To load a disc into your DVD/CD-RW drive, follow
these steps (Figure 4-4):
1. Push and release the eject button on the front of the
DVD/CD-RW drive to open the holder tray. The
tray will come out of the notebook a short distance.
2. Gently pull the tray out until a media disc can easily
be placed in the tray.
3. Place the media into the tray, label side up, with the
hole in the center of the disc. Snap the disc onto the
raised circle in the center of the tray.
4. Gently push the holder tray back in until you hear a
click.
Media Holder Tray
Media Eject Button
Install your media player software before
first using the DVD, DVD/CD-RW, or CD-
ROM media drives. Refer to the applicable
readme file on the Driver Applications CD-
ROM.
The Super-Multi DVD drive also supports
burning and reading DVD-RAM. Windows
XP supports burning and reading of DVD-
RAM as a standard feature; Windows
2000 does not support either. To burn
and/or read DVD-RAM with Windows
2000, use the DLA (Drive Letter Access)
utility which comes with RecordNow and
WinDVD Creator.
There may be a protective sheet in the tray
from when it was shipped; make sure it is
removed before operating the drive, other-
wise you may damage the drive.
If you have disabled the Auto Insert Notifi-
cation Function, you will have to start the
drive from your desktop, since your note-
book will not automatically recognize that
media has been loaded.
P7010.book Page 34 Tuesday, April 20, 2004 2:26 PM
Summary of Contents for Lifebook P7010
Page 2: ...L i f e B o o k P 7 0 0 0 N o t e b o o k ...
Page 6: ...L i f e B o o k P 7 0 0 0 N o t e b o o k ...
Page 7: ...1 Preface ...
Page 8: ...L i f e B o o k P 7 0 0 0 N o t e b o o k ...
Page 10: ...2 L i f e B o o k P 7 0 0 0 N o t e b o o k S e c t i o n O n e ...
Page 11: ...3 2 Getting to Know Your LifeBook Notebook ...
Page 12: ...4 L i f e B o o k P 7 0 0 0 N o t e b o o k S e c t i o n T w o ...
Page 28: ...20 L i f e B o o k P 7 0 0 0 N o t e b o o k S e c t i o n T w o ...
Page 29: ...21 3 Getting Started ...
Page 30: ...22 L i f e B o o k P 7 0 0 0 N o t e b o o k S e c t i o n T h r e e ...
Page 37: ...29 4 User Installable Features ...
Page 38: ...30 L i f e B o o k P 7 0 0 0 N o t e b o o k S e c t i o n F o u r ...
Page 55: ...47 5 Using the Integrated Wireless LAN ...
Page 56: ...48 L i f e B o o k P 7 0 0 0 N o t e b o o k S e c t i o n F I v e ...
Page 73: ...65 6 Troubleshooting ...
Page 74: ...66 L i f e B o o k P 7 0 0 0 N o t e b o o k S e c t i o n S i x ...
Page 88: ...80 L i f e B o o k P 7 0 0 0 N o t e b o o k S e c t i o n S i x ...
Page 89: ...81 7 Care and Maintenance ...
Page 90: ...82 L i f e B o o k P 7 0 0 0 N o t e b o o k S e c t i o n S e v e n ...
Page 94: ...86 L i f e B o o k P 7 0 0 0 N o t e b o o k S e c t i o n S e v e n ...
Page 95: ...87 8 Specifications ...
Page 96: ...88 L i f e B o o k P 7 0 0 0 N o t e b o o k S e c t i o n E i g h t ...
Page 100: ...92 L i f e B o o k P 7 0 0 0 N o t e b o o k S e c t i o n E i g h t ...
Page 104: ...96 L i f e B o o k P 7 0 0 0 N o t e b o o k S e c t i o n E i g h t ...
Page 105: ...97 9 Glossary ...
Page 106: ...98 L i f e B o o k P 7 0 0 0 N o t e b o o k S e c t i o n N i n e ...
Page 111: ...103 Appendix A Using the Fingerprint Sensor Optional Device ...
Page 112: ...104 L i f e B o o k P 7 0 0 0 N o t e b o o k A p p e n d i x ...
Page 120: ...112 L i f e B o o k P 7 0 0 0 N o t e b o o k A p p e n d i x ...


