145
6
T
he Shooting M
enus
SHOOTING SETTING
Color Shading Correction
Color Shading Correction
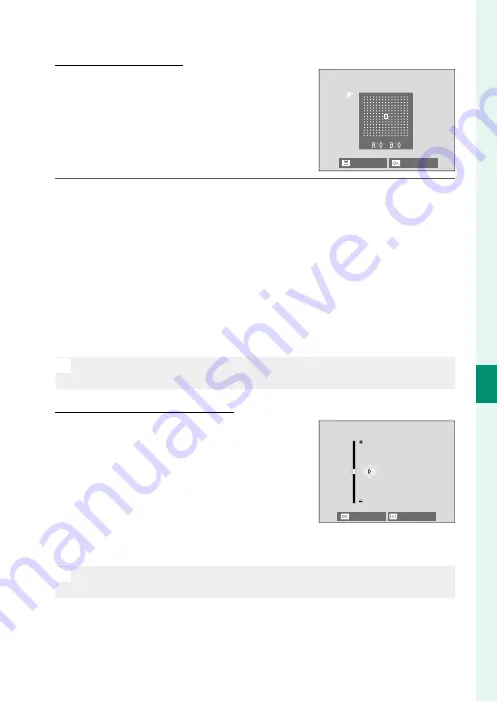
Color (shading) variations between the
center and edges of the frame can be ad-
justed separately for each corner.
To use color shading correction, follow the
steps below.
NEXT
SET
1
Rotate the rear command dial to choose a corner. The select-
ed corner is indicated by a triangle.
2
Use the focus stick (focus lever) to adjust shading until there is
no visible diff erence in color between the selected corner and
the center of the image.
•
Press the focus stick left or right to adjust colors on the
cyan–red axis.
•
Press the focus stick up or down to adjust colors on the
blue–yellow axis.
N
To determine the amount required, adjust color shading correction
while taking photos of blue sky or a sheet of gray paper.
Peripheral Illumination Correction
Peripheral Illumination Correction
Choose from values between –5 and
+5. Choosing positive values increases
peripheral illumination, while choosing
negative values reduces peripheral il-
lumination. Positive values are recom-
mended for vintage lenses, negative val-
ues to create the eff ect of images taken
with an antique lens or a pinhole camera.
N
To determine the amount required, adjust peripheral illumination cor-
rection while taking photos of blue sky or a sheet of gray paper.
CANCEL
SET
Summary of Contents for GFX100
Page 1: ...Owner s Manual BL00004999 200 EN ...
Page 21: ...1 Before You Begin ...
Page 57: ...37 First Steps ...
Page 75: ...55 Basic Photography and Playback ...
Page 81: ...61 Movie Recording and Playback ...
Page 87: ...67 Taking Photographs ...
Page 123: ...103 The Shooting Menus ...
Page 191: ...171 Playback and the Playback Menu ...
Page 216: ...196 MEMO ...
Page 217: ...197 The Setup Menus ...
Page 268: ...248 MEMO ...
Page 269: ...249 Shortcuts ...
Page 283: ...263 Peripherals and Optional Accessories ...
Page 300: ...280 MEMO ...
Page 301: ...281 Connections ...
Page 315: ...295 Technical Notes ...


