


45
When trouble occurs
4
When
trouble
occurs
44
When trouble occurs
4
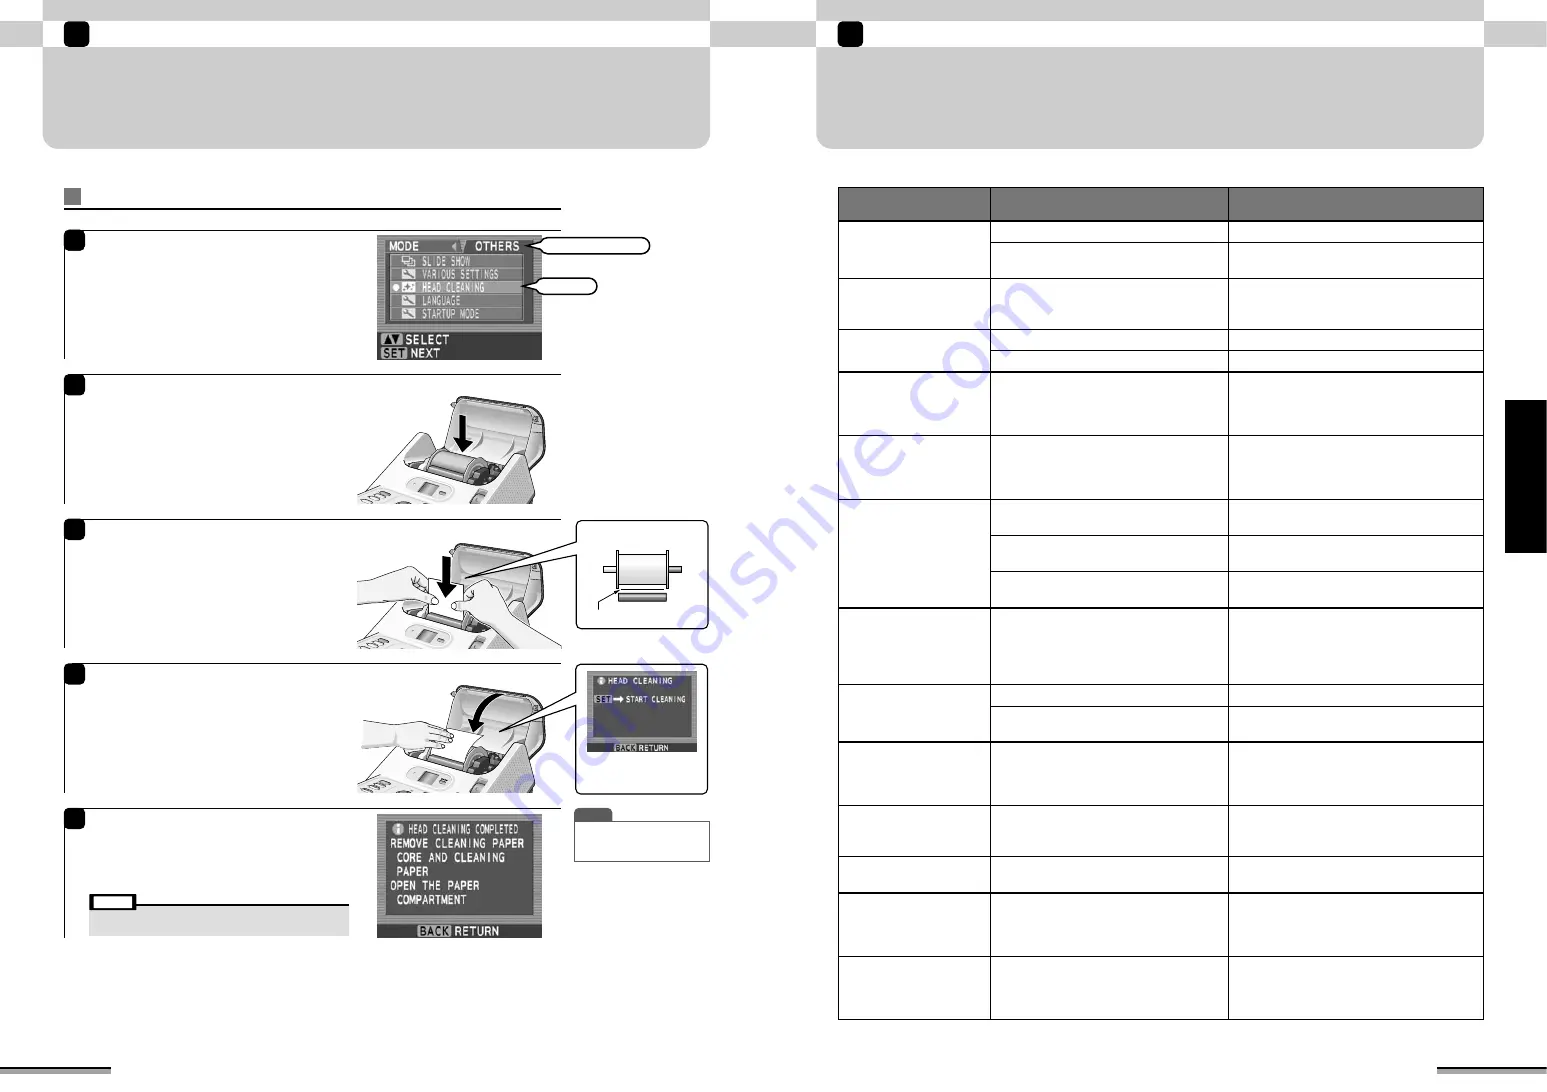
HEAD CLEANING
To print cleanly all the time, the printer must be serviced. When the print quality deteriorates or there
are white lines running down the length of the paper, perform head cleaning.
Executing head cleaning
1
Press the [CUSTOM] button on the top of the
printer.
Use
c
to select the “OTHERS” tab, and then
use
ab
to select “HEAD CLEANING” and press
the [SET] button.
2
Set the cleaning paper core at the paper holder
and set the paper holder from the top of the
printer.
3
Set the cleaning paper at the printer.
Hold the cleaning paper with the white side at
the front and set it straight into the paper holder.
Insert the cleaning paper between the cleaning
paper core and printer body and push it in
approximately 1 cm using both hands.
4
After pressing the cleaning paper with your hand
so that the sheet enters the printer, close the
paper compartment cover.
After that, execute head cleaning by pressing
the [SET] button.
The “Executing head cleaning” window is
displayed.
5
At the end of head cleaning, the “HEAD
CLEANING COMPLETED” window is displayed.
Remove the cleaning paper and cleaning paper
core from the printer.
The monitor returns to the “OTHERS” window.
T I P
• To continue printing, load the
printing paper into the
printer.
PRINTER BODY
Select
Use
c
to select
Top view
Cleaning paper
When the image above is
not displayed, re-set the
cleaning paper.
• When printing is not clean even when head cleaning is
executed, contact your FUJIFILM dealer.
Note
Symptom
Cause
Remedy
Power is not supplied.
Is the power plug disconnected from the outlet?
Plug the power plug firmly into the outlet.
Is the power cord disconnected from the
rear panel power socket?
Plug the power cord firmly into the socket.
Picture does not appear
on the TV screen.
Cable to TV set is connected incorrectly.
Connect the video cable correctly.
When a wide screen TV set
is used, the characters, etc.
overflow from the screen
and cannot be seen.
TV display mode is not [Normal].
Switch the TV display mode to [Normal].
Refer to the TV set owner's manual for the
operating instructions.
LCD monitor is difficult to
see.
—
Execute [LCD monitor brightness adjustment] of
the various settings and adjust to an easy-to-
view brightness. When adjusting the brightness,
watch the LCD monitor from the front.
Memory card cannot be
inserted.
The direction in which the memory card is
inserted is incorrect.
Insert the memory card in the correct
direction.
Slot into which the memory card is being
inserted is incorrect.
Insert the memory card into the correct slot.
Card select lever selection is incorrect.
Switch the card select lever to the position of
the memory card to be used.
Paper cannot be loaded.
—
Refer to Loading the paper on page 12 and
the sticker on the back of the paper
compartment cover and load the paper
correctly while paying attention to the
direction of the paper holder and paper.
Cannot print even by
pressing the [PRINT]
button.
Quantity of prints is not set.
Set the quantity of prints.
Printer cuts and ejects the
paper.
• When the power is turned on, there is paper
remaining in the printer paper feed path.
• The trash box or the paper compartment
cover may have been opened while printing.
Do not open the trash box or paper
compartment cover while printing. Also, do
not unplug the power cord while printing.
Printed picture is fuzzy or
there are vertical scratches
running down the picture.
Head is dirty.
Use the accessory cleaning paper to clean
the head (
→
P. 44).
The quantity of prints (sets)
does not increase even
when the [QUANTITY]
button is pressed.
Total quantity of prints is set to 1000 or
more or 100 or more for each frame.
Set the total quantity of prints up to 1000 and
up to 100 for each frame.
Print picture is grainy.
Picture was magnified and printed
because the picture size was too small.
It is recommended that printing be performed
at a picture size of 640
×
480 pixels or more.
—
Plug the power cord into the power outlet and turn
on the power by pressing the [POWER] button.
After paper is ejected after the mechanism of the
printer is formatted, turn off the power.
Error state.
Check the message on the LCD monitor and
refer to page 46 and subsequent pages.
TV input is not [Video].
Switch TV input to [Video].
Power is turned on, but
the printer does not
operate.
A safety device may have operated.
Unplug the power cord from the power outlet,
wait a while, and then plug the power cord
back in and turn on the power.
Power cord was unplugged
while printing.


