23
7. DISASSEMBLY AND ASSEMBLY
7-1 PREPARATION and PRECAUTIONS
(1) Be sure to memorize the location of individual parts when disassembling the generator so that
the generator can be reassembled correctly. Tag the disassembled part with the necessary
information to facilitate easier and smoother reassembly.
(2) For more convenience, divide the parts into several groups and store them in boxes.
(3) To prevent bolts and nuts from being misplaced or installed incorrectly, replace them
temporarily to their original position.
(4) Handle disassembled parts with care; clean them before reassembly using a neutral cleaning
product.
(5) Remove the battery before disassembling the generator. (Electric start models)
(6) Use all disassembly/assembly tools properly, and use the proper tool for each specific job.
(7) Be sure to attach the foam rubber linings inside the covers on their original position when
reassembling the generator. When deformation or damage or falling-off of foam rubber lining
is found, replace it with new parts. Failure to do so will result in poor performance and
durability of the generator.
(8) Bind the wires and fuel pipes using wire bands as they have been done in original
configuration.
NOTE: As to detailed information for servicing procedures on the engine portion, please refer to
Subaru engine service manual for "EX35/40".
7-2 DISASSEMBLY PROCEDURES
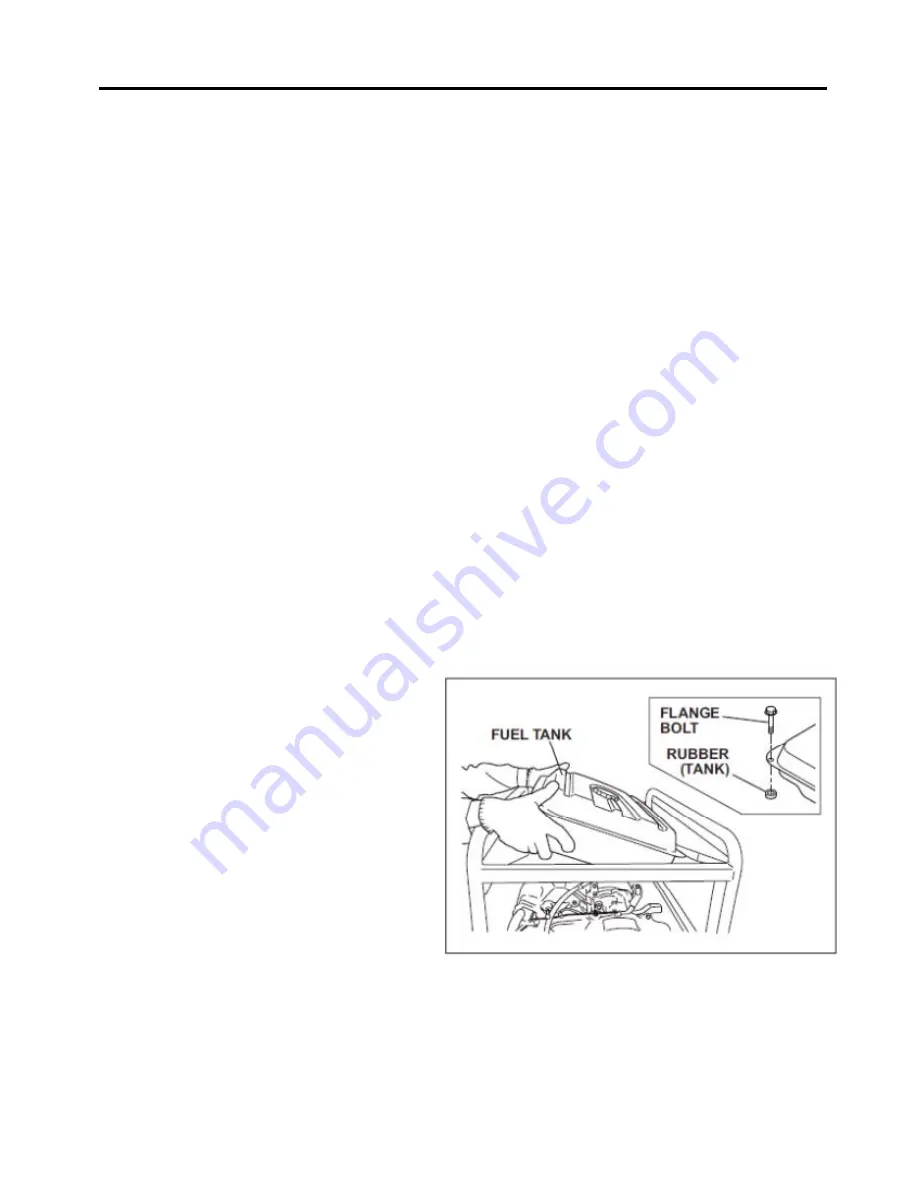
7-2-1 FUEL TANK
(1) Shut the fuel strainer and discharge fuel
from carburetor.
(2) Disconnect rubber pipe from the strainer.
(3) Remove the fuel tank.
M6 flange bolt . . . 4 pcs.
Rubber (tank) . . . 4 pcs.
Summary of Contents for ROBIN RGX6500
Page 1: ...1 RGX6500 RGX7500 FUJI HEAVY INDUSTRIES LTD...
Page 2: ...2...
Page 3: ...3 1 SPECIFICATIONS...
Page 4: ...4 2 PERFORMANCE CURVES RGX6500 60Hz 240V RGX7500 60Hz 240V...
Page 5: ...5 3 GENERAL DESCRIPTION Canister...
Page 6: ...6 CONTROL PANEL 50Hz 220V 240V 60Hz 220V 240V 60Hz 110 220V...
Page 7: ...7 SERIAL NUMBER CONSTRUCTION RGX6500 RGX7500 Isolator Slip Ring Through Bolt...
Page 11: ...11 5 MEASURING PROCEDURES...
Page 12: ...12...
Page 27: ...27 4 Remove the stator cover Bushing...
Page 44: ...44 50Hz 220V 50Hz 240V 60Hz 220V 60Hz 240V RGX6500 7500 Electric starter model...
Page 45: ...45 50Hz 220V 50Hz 240V 60Hz 220V 60Hz 240V RGX6500 7500...
Page 46: ...46 60Hz 110 220V RGX6500 7500 Electric starter model...
Page 47: ...47 60Hz 110 220V ISSUE EMD GSxxxx Ver 1...
Page 48: ...48...


