


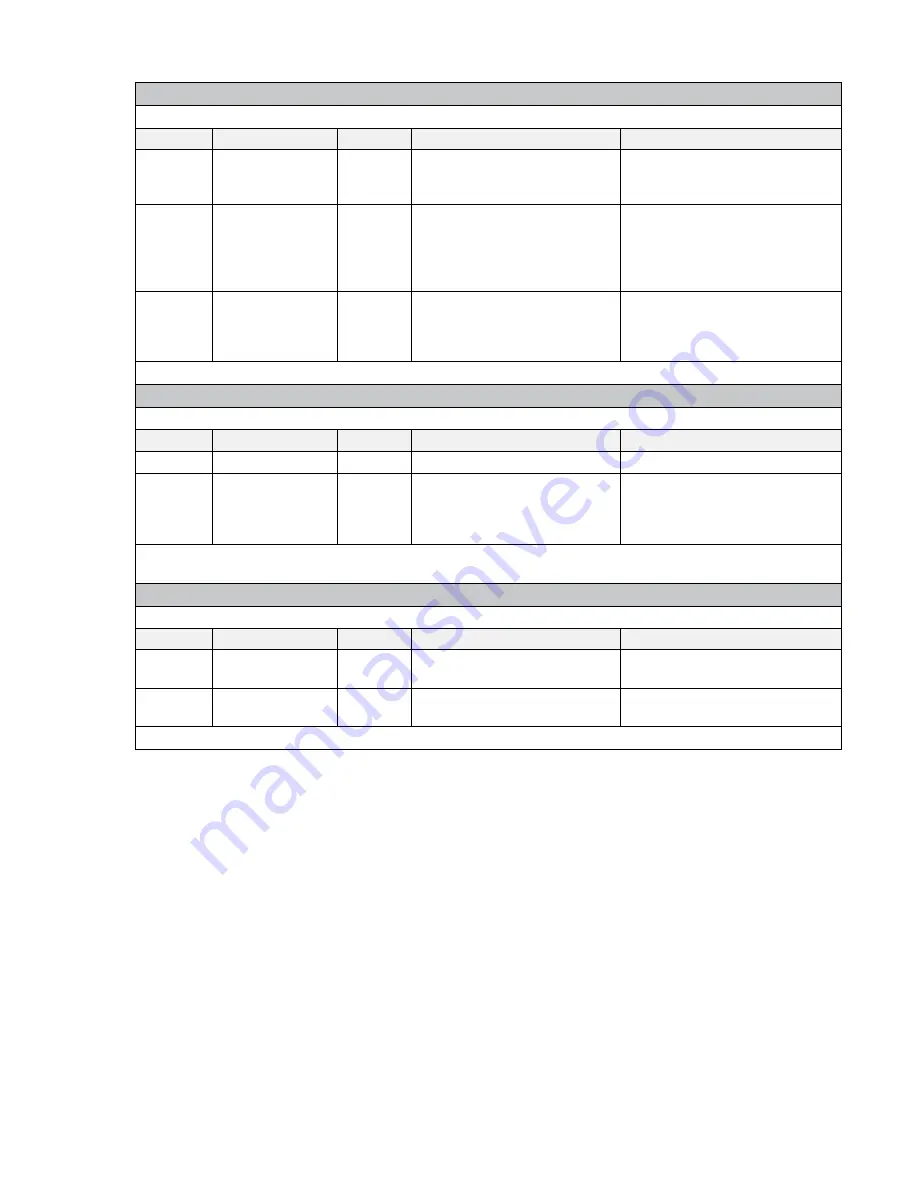
Serial (COM) Commands*
Syntax:
#COM
n
[
StringType
,”
Command
”];
Name
Required/Optional
Data Type
Format
Description
n
Required
Variant
Use 1 for COM1; use 2 for
COM2.
Denotes the COM port to be
used, corresponding to the serial
device to be controlled.
StringType
Optional
Variant
T
n
where
n
is 1 or 2
Defines the string type:
• ASCII string (1)
• Hexadecimal (2)
If you leave
StringType
blank, a
default of T1 is assumed.
Command
Required
Variant
Specific to device. For CA1000
commands, see Appendix E;
for other device commands see
manufacturer’s instructions.
A string expression that contains
the command.
Example
(turns on a projector via COM 1 using an ASCII string command): #COM1[T1,”PWR ON\r”];
IR-Out Universal Commands*
Syntax:
#XRO
n
[F2,”
Command
”];
Name
Required/Optional
Data Type
Format
Description
n
Required
Variant
Use 1 for IR port 1.
Denotes the IR port to be used.
Command
Required
Variant
Specific to device. See
the IR Learning section
under Appendix A.5 or see
manufacturer’s instructions.
A string expression that contains
the command.
Example
(turns on a DVD player):
#XRO1[F2,” 40000300015430309DA03F508FC03A704D6039...3A704D803F808FC03A704D403A104FB03A704D903”];
Alarm Commands*
Syntax: #ALM[“
Command
”,D
Time
];
Name
Required/Optional
Data Type
Format
Description
Command
Required
Variant
Use
ON
to start the alarm. Use
OFF
to stop the alarm.
Starts/stops the beep.
Time
Required
Variant
Integer representing multiples of
4ms duration.
Sets the duration
Example
(turns on the beep with a 200ms duration): #ALM[“ON”,D50];
*For complete programming guidance, refer to the Calypso Action Control Language (CACL) manual in the Guides
and Resources section of the gofrontrow.com website: gofrontrow.com/guides-resources.
•
If the CB6000 has been physically installed, you can test the action you created by clicking the
Test Action
button. Note that you can also test Actions via the Action Viewer by clicking on the checkmark to the right of
each Action. Alternatively, the
Enter Command
screen can be a useful tool for testing and troubleshooting
Actions (see Appendix A.6).
10. Define Events
With your collection of discrete Actions defined, you can now specify what Events will cause one or more of those
Actions to be executed.
In most cases, a user pressing a button on the touch screen is what tells the CB6000 that an Event has occurred;
however, you are also free to specify any general purpose input or NOP signal you wish as a Trigger. Alternatively,
you can schedule an Event.
20
Summary of Contents for CB6000
Page 1: ...CB6000 Installer Guide ...


