


16 | © Frio 2021 - Rev. 0.3 - Updated 3/2/2021
4
I
NSTALLATION
I
NSTRUCTIONS
NOTE: THE CONTROLLER MUST BE INSTALLED BY A LICENSED ELECTRICIAN OR QUALIFIED PROFESSIONAL IN
ACCORDANCE WITH LOCAL AND NATIONAL ELECTRICAL CODES. THE CONTROLLER MUST BE CONNECTED
TO A CERTIFIED CIRCUIT BREAKER RATED FOR 30 A OR LESS. NO OTHER TYPES OF DEVICES MAY BE PLACED ON THE
CIRCUIT BREAKER.
4.1
S
TEP
1:
I
NITIAL
I
NSPECTION AND
P
LANNING
1.
Inspect the Frio S1 controller for any damage that may have occurred during shipping.
2.
Layout and plan the heat tracing system, including all sensors, wiring, conduit, and junction boxes.
3.
Determine the controller location. The controller should be mounted on a fixed vertical surface. The controller
may be mounted outside but should not be mounted in direct sunlight to reduce the chance of condensation
forming in the controller.
4.2
S
TEP
2:
A
SSEMBLY AND
M
OUNTING
1.
Once you have determined the wiring layout and conduit sizes, mark the
bottom face of the controller for power and sensor connections. If the
controller is mounted outside, use only NEMA Type 4X (or higher) liquid-
tight conduit fittings and cable glands.
2.
Drill holes on the bottom face of the controller (mount fittings inside of
the dashed line shown in Figure 1) and mount your conduit and cable
fittings. Do not drill holes within 0.5” of the edge
of the enclosure. After
drilling the holes, ensure that all plastic shavings have been removed from
the controller.
3.
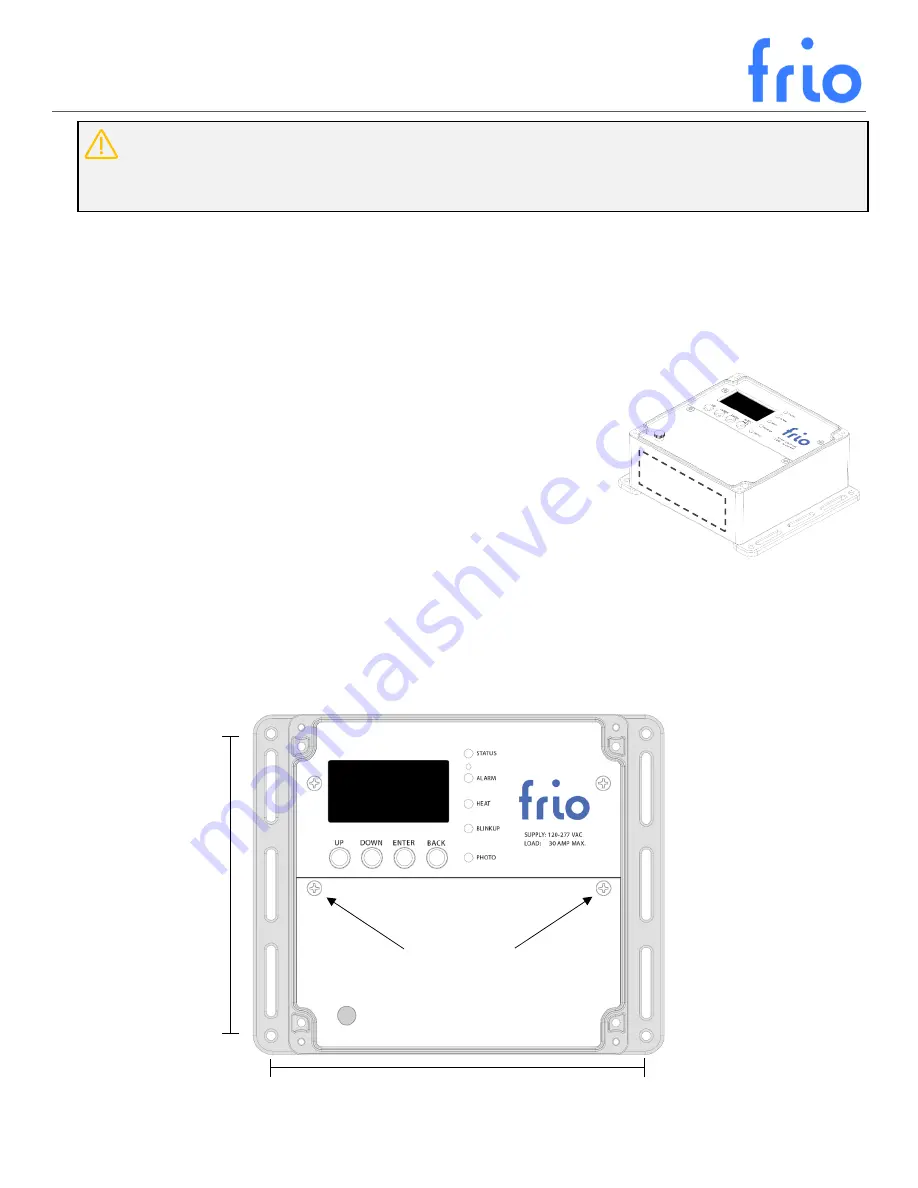
Mark hole locations on the vertical surface where you will mount the controller according to the dimensions
shown in Figure 2. Ensure the mounting surface is flat, permanent, and the controller is protected from damage.
4.
Mount the controller to the vertical surface.
Figure 1: Frio S1 controller showing the
bottom side where to drill wiring holes.
5.
60
in
.
6.95 in.
Screws to remove
Wiring Cover
Figure 2: Top View of the Frio S1 controller showing mounting hole dimensions.