11
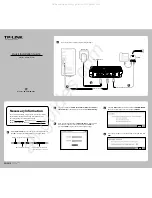
Step 2: Check the drive’s SCSI ID
1
Determine whether you need to change the SCSI ID from the default of 3.
2
Change the tape drive’s SCSI ID, if necessary.
Use a small screwdriver or a ball-point pen to press the indented SCSI ID selector buttons on
the rear panel (see Figure 3) until the required value is displayed. Do not use a pencil
because small bits of lead could contaminate the drive.
Note
The computer and the tape drive SCSI IDs are only checked at power-on. To change the SCSI
ID after installation, power down both the computer and the tape drive, change the drive’s
SCSI ID, power up the tape drive, and then power up the computer.
Your Ultrium drive is shipped with a default SCSI ID of 3, but it can be assigned any
unused
ID between 0 and 15. Do not use SCSI ID 7, which is reserved for
the SCSI controller, or SCSI ID 0, which is typically assigned to the boot disk.
gen2 external oem.fm Page 11 Thursday, February 13, 2003 3:02 PM
Summary of Contents for Ultrium Generation 2
Page 1: ...8OWULXP HQHUDWLRQ WHUQDO 7DSH ULYHV HWWLQJ 6WDUWHG XLGH...
Page 2: ......
Page 12: ...10 3 Figure 3 checking the SCSI ID...
Page 14: ...12 Figure 4 connecting the SCSI cable SCSI IN Connector SCSI OUT Connector...
Page 16: ...14 Figure 5 connecting the power cable...
Page 22: ...20 Figure 8 write protecting cartridges padlock indicates cartridge is protected...
Page 36: ...34...