Installation
Centellis CT Series 16000 User’s Manual
Page 12
20000325 420 000 AB
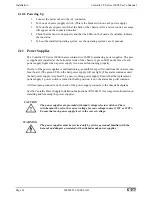
battery only with the same or an equivalent type recommended by the manufacturer.
Dispose of used batteries according to the manufacturer’s instructions. Force
Computers strongly suggests that only authorized service personnel exchange the
RTC/NVRAM and the lithium battery.
2.8
CompactPCI Slots
CompactPCI boards can be installed in or removed from the system chassis after one or both of the
7-slot 6U front panels are removed. If all seven slots in a segment are not occupied by CPCI
boards, however, a 6U blank panel (with EMI gasket) must be installed in each unoccupied slot.
All slots of the chassis must be either occupied by a board or closed off with a covering panel to
maintain the EMI integrity of the system. The chassis holds up to fourteen CPCI 6U boards.
2.9
Integrated Peripheral Tray
The chassis contains an integrated peripheral tray that holds one external (front-accessible) 5.25"
half-height disk drive and one internal 3.5" disk drive. The 5.25" disk drive bay normally holds a
CD-ROM drive (SCSI or IDE), but it can be used for a tape backup device. The 3.5" disk drive bay
accommodates either a SCSI or IDE 3.5" hard disk drive.
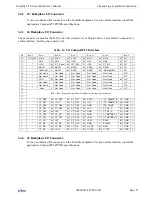
There are eight possible combinations of SCSI and IDE CD-ROM and hard disk drives that can be
installed in the peripheral tray. Table 1 shows these different combinations.
* If none, use the EMI cover plate.
To install either a 5.25" CD-ROM or a 3.5" hard disk drive in the peripheral tray:
1. Unscrew the two thumb screws on the face plate of the peripheral tray, and pull the tray
out of the chassis.
2. Install the CD-ROM or the hard disk drive to the peripheral tray.
Table 1:
Peripheral Tray Disk Drive Combinations
CD-ROM Drive
Hard Disk Drive
IDE
SCSI (Narrow)
IDE
SCSI (Wide)
IDE
IDE
SCSI (Narrow)
SCSI (Narrow)
SCSI (Narrow)
IDE
SCSI (Narrow)
SCSI (Wide)
IDE
none
SCSI (Narrow)
none
none*
none


