


45
Removing and Replacing the Hard Drive
Removing and Replacing the Hard Drive
The hard drive can be removed from the OptiView XG for secure data management.
Caution
To prevent damage to the OptiView XG and/or the removable hard drive, use standard ESD
(electrostatic discharge) control procedures and equipment.
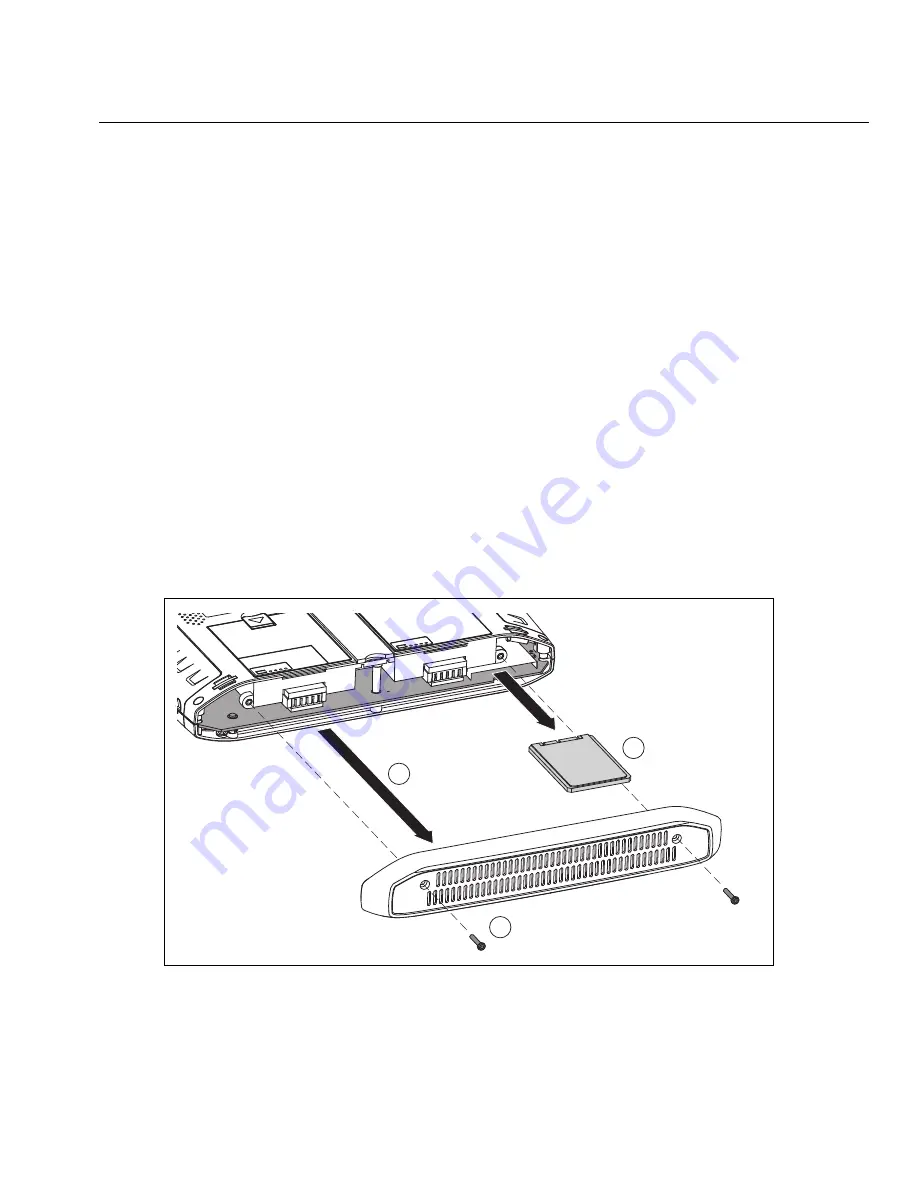
Removing the Hard Drive
The analyzer’s “Computer name” is stored on the hard drive. You can view the Computer name by
following the instructions in “Computer Name” on page 46. If desired, make note of the
analyzer’s Computer name so you can restore it after replacing the hard drive.
1. Power-off the OptiView XG by selecting Shut down in Windows 7.
2. Disconnect all cables from the OptiView XG.
3. Use a Phillips screwdriver to remove the two screws that secure the bottom panel.
4. Slide the hard drive out.
GLZ10.EPS
Figure 18. Replacing the Hard Drive
1
2
3


