FLI R
Duo P ro R Us e r Guide
Duo Pro R User Guide, Rev. 1.0
Information on this page is subject to change without notice
16
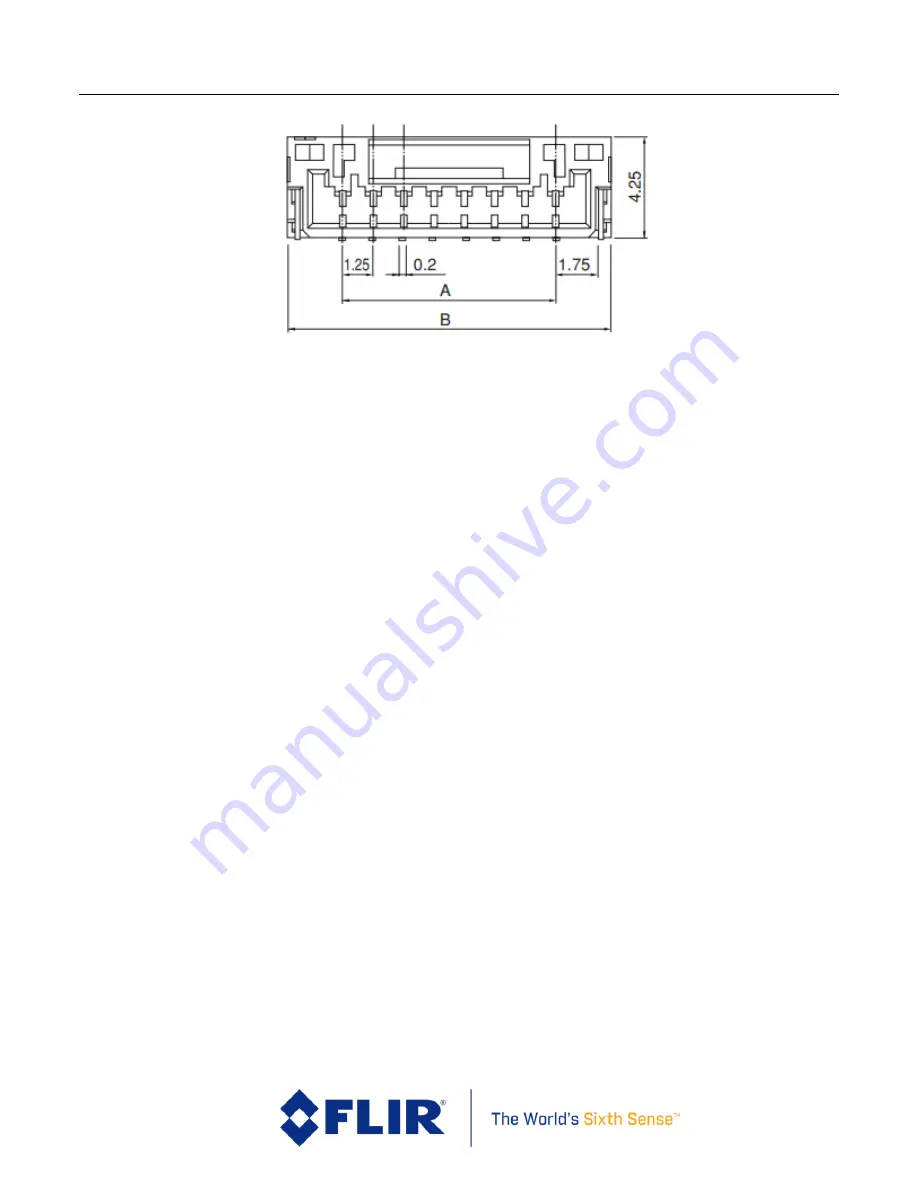
Figure 6. Accessory Port drawing. Dimension A is 11.25mm, Dimension B is 15.75mm
4.3
Software Interface
The Duo Pro R camera is configured and operated through the FLIR UAS mobile app. See Section 5
for additional details.
Note: The Duo Pro R camera is not compatible with the FLIR Camera Controller User Interface
software. When connected to the USB port on a computer, the camera appears as two mass storage
devices (one for each microSD card) only.
There is no Software Developer’s Kit
or API currently available for the Duo Pro R.
4.4
Connecting to a MAVLink Compatible Flight Controller
The FLIR Duo Pro R camera is software- and connector-compatible with many MAVLink autopilots.
Other flight controllers or I/O modules may require different cables or connectors. Refer to the
integration cable pinout in Table 2 and the documentation for your flight controller to correctly
connect your camera.
4.5
Camera Operation
The Duo Pro R does not have an on/off switch.
•
When power is applied to the camera, the Status LED blinks red for approximately 15
seconds, then changes to solid blue. When this happens, Bluetooth becomes enabled. FLIR
Duo Pro R beeps three times and the Record LED goes from off to solid green. (If the FLIR
Duo Pro R is connected to a computer, or if no SD card is inserted, the Record LED blinks
yellow.)
•
Launch the FLIR UAS App on your mobile device. Use the App to configure any desired
camera settings and then disable the Bluetooth radio in preparation for flight. The Duo Pro
R will automatically disable the Bluetooth radio after 2 minutes if no commands are received
from the App. It can be re-enabled by pressing the Bluetooth button on the camera.


