3
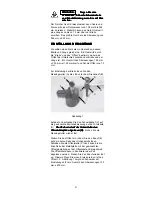
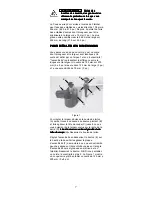
Figure 3
Start with the beam at about the 1 oclock position.
Slowly rotate the beam clockwise with barely enough
downward force to cause the wheel to line up with
the direction of travel, but not enough force to score
the glass. When the beam reaches the 3 or 4 oclock
position, and the wheel has lined up, apply additional
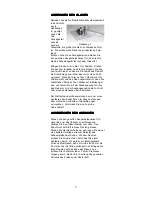
force on the pivot knob, Figure 2, and continue the
rotation until the wheel
just reaches its starting
position. Do not score on top of a previous score.
The amount of force should be enough to create a
visible score or crack in the glass, but not enough to
produce a flaky chipped score line. Avoid too much
downward force.
HO
HO
HO
HO
HOW
W
W
W
W T
T
T
T
TO BREAK OUT
O BREAK OUT
O BREAK OUT
O BREAK OUT
O BREAK OUT THE SCORE
THE SCORE
THE SCORE
THE SCORE
THE SCORE
Rotate the knurled vacuum disk
counterclockwise (do not force
when you feel resistance) to
release the vacuum and
remove the cutter from the
glass. Turn the glass over and
place it on a pliable surface
such as foam board or corru-
gated cardboard. Use your thumb to press down on
the glass directly over the score line now visible
through the glass. When you hear a slight snap you
will see the score has progressed about an inch or
two, (25mm to 50mm), along the score line. Move
your thumb to the end of the enlarged crack and
press again. Continue this technique until the score
has been "run" all the way around the circle or oval.
Turn the glass right side up and place it on the table.
Use a Fletcher hand cutter and make three or four
scores which start about 1/8 inch, (3mm) from the
circle or oval and run completely off the glass. See
Figure 3. These are called radial cuts. Carefully
break out the radial cuts with Fletcher cut running
pliers. The scrap will separate from the circle or oval
and can be discarded.
HO
HO
HO
HO
HOW
W
W
W
W T
T
T
T
TO REPLA
O REPLA
O REPLA
O REPLA
O REPLACE A
CE A
CE A
CE A
CE A WHEEL
WHEEL
WHEEL
WHEEL
WHEEL
The cutting wheel should last a long time if properly
cared for and not damaged, but If necessary, it can
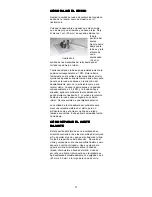
be easily replaced. Pry the wheel and its metal clip
(J) out of the slot in the cutting head with a paper clip
as shown in Figure 4. Slide
a replacement wheel unit
(Order #03-131) in the slot
as far as it will go.
If after considerable use
the lower part of the head
does not swivel freely, you
may place a small drop of
light oil in the gap between
the upper and lower
sections of the head. It is
also a good idea to
lubricate the cutting wheel
axle periodically.
J
Figure 4


