


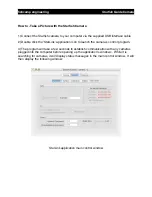
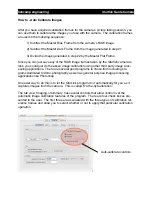


4) Press the
‘
Camera
’
sub tab under the
‘
Imaging
’
main tab view.
Select a Camera
Then press
‘
Connect
’
5) Select a camera from the camera popup control and then hit
‘
connect
’
. This defines
the camera that you will be using for subsequent operations.
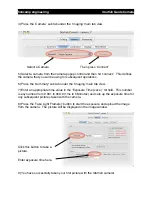
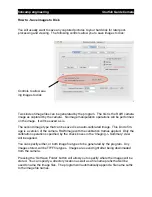
6) Press the
‘
Summary
’
sub tab under the
‘
Imaging
’
main tab view.
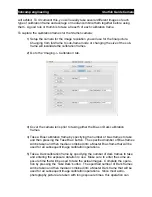
7) Enter an appropriate time value in the
‘
Exposure Time (secs.)
’
txt field. This number
is any number from 0.001 to 300.0 (1ms to 5 Minutes) and sets up the exposure time for
any subsequent pictures taken with the camera.
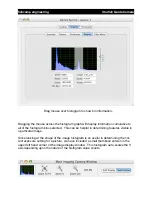
8) Press the
‘
Take Light Frame(s)
’
button to start the exposure and upload the image
from the camera. The picture will be displayed in the image window.
Click this button to take a
picture.
Enter exposure time here.
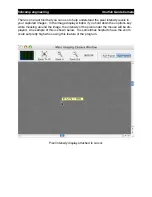
9) You have successfully taken your first picture with the Starfish camera!
fishcamp engineering
Starfish
Guide Camera


