24
16.1 REMOTE CONTROL OF THE
WELDING CURRENT
With remote connector 13 in Fig. 1, it is
possible to adjust the current near to the
point where the welding is being carried out.
To do so, it is necessary to create a
connection with potentiometer P, shown in
figure 7. The value of the potentiometer is not
a critical factor: between 2.2kOhm and
10kOhm 1/2W can be used.
Turn the potentiometer and select the
welding current in a range between minimum
current from display and the set value and
the set value.
17.
CONNECTING THE OUT-PUTS
Connection of the welding cables occurs
via a Dinse quick-connect system with
appropriate connectors.
18.
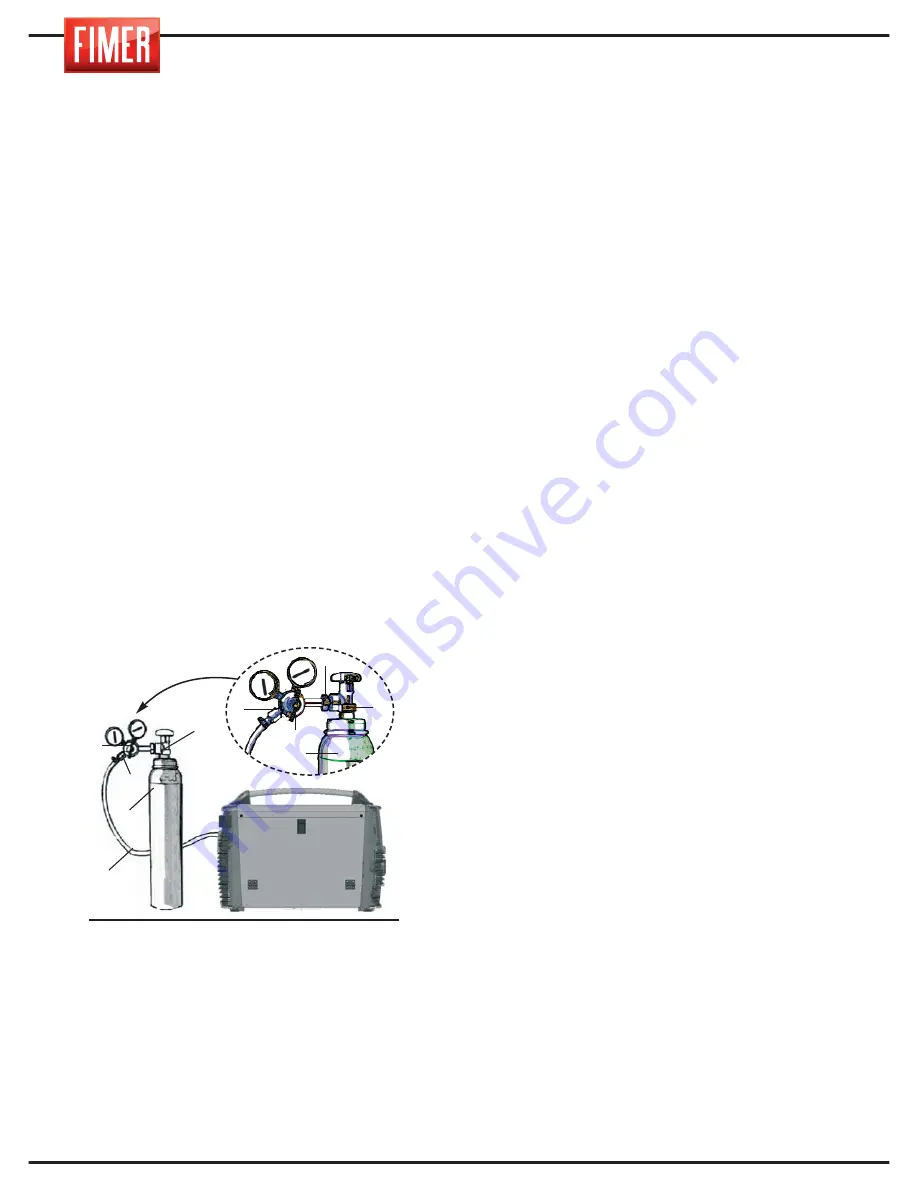
CONNECTING THE GAS CYLINDER
AND THE GAS REGULATOR
For TIG and MIG welding only. For MMA
welding, skip this paragraph entirely.
1.
Connect the pressure regulator (2) to the
cylinder (3). Make sure the regulator is suita-
ble for the cylinder pressure. Attach the con-
nector nut (6) of the regulator (2) to the cylin-
der (3). (Do not screw too tightly; excessive
force could damage the valve (1) of the cylin-
der (3).)
2.
Connect the gas tube (4) to the regulator
(2) and secure with a cable tie (5).
3.
Make sure that the gas tube is connected
to the welder correctly.
4.
Open the valve (1) of the cylinder (3).
Press the torch trigger and check the gas is
flowing correctly.
Warning:
Cylinders contain high-pressure
gas; handle with extreme care. Inappropriate
handling and use could cause serious acci-
dents. Never stack the cylinders or expose to
excessive heat, flames or sparks. Do not
bash the cylinders together. Contact your
supplier for further information on the use
and maintenance of the cylinders.
Warning:
Never use damaged cylinders: in
this case, advise your supplier immediately.
19. ORDINARY MACHINE
MAINTENANCE
Every three months periodically remove
dust from the suction nozzle using com-
pressed air. Always direct the air from the
inside towards the outside of the machine
to avoid blowing dirt inside the welder.
When carrying out this operation, always
make sure the machine is not connected to
the power supply.
4
3
2
1
6
2
5
1
3
5
Fig.8
Summary of Contents for TM 236
Page 2: ......
Page 3: ...TM 236 DUAL PULSE SYNERGIC ...
Page 4: ...TARGA DATI NOMINAL DATA LEISTUNGSCHILDER PLAQUE DONÉES PLACA DE CARACTERÌSTICAS ...
Page 38: ...2 WARNING SYMBOLS ...
Page 39: ...3 ...
Page 40: ...4 ...
Page 70: ...2 VERWENDETE SYMBOLE ...
Page 71: ...3 ...
Page 72: ...4 ...
Page 102: ...2 SYMBOLES UTILISÉS ...
Page 103: ...3 ...
Page 104: ...4 ...
Page 134: ...2 SÌMBOLOS UTILIZADOS ...
Page 135: ...3 ...
Page 136: ...4 ...
Page 165: ...NOTE ...
Page 166: ...NOTE ...
Page 167: ......
Page 168: ......


