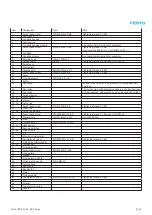
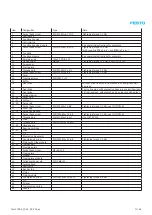


23 / 48
Festo 7DGE_25-63_ZR_KFb_en
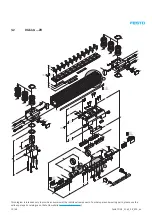
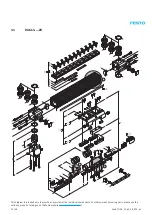
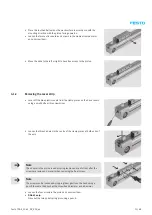
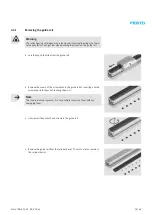
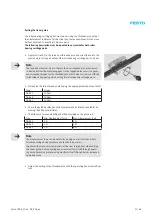
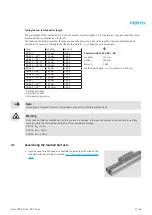
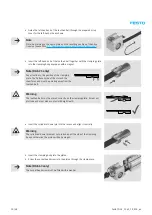
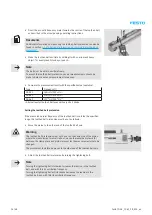
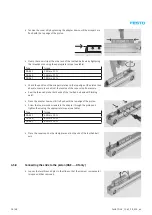
• Align the guide rail parallel as well as radially and axially centred with the
cylinder barrel with the help of a vernier calliper. Note the tolerances indi-
cated in the sketch.
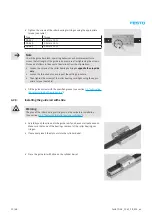
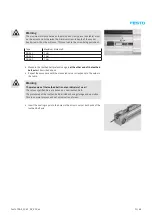
Note
The use of two setting brackets, which you can fabricate yourself in accord-
ance with the drawing in section
6.4 “Devices for in-house assembly”
permits
simplified parallel as well as axially centred alignment of the guide rail with the
cylinder barrel.
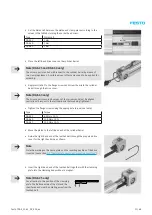
HL
L
R
VL
(HL = HR = VL = VR) ± 0.05 mm
(L = R) ± 0.3 mm
HR
VR
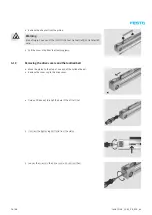
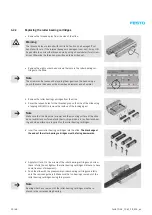
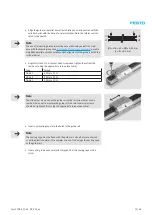
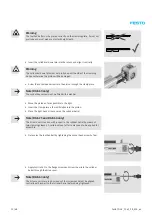
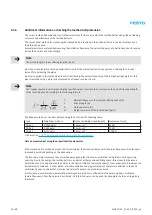
• Apply Loctite 243 to all socket head screws and tighten these from the
inside out using the appropriate torque (see table).
Type
Torque
DGE-25
2.9 Nm ± 10 %
DGE-40
2.9 Nm ± 10 %
DGE-63
5.9 Nm ± 10 %
Note
The slide must be moved on the guide rail so that all screw holes can be
reached. So as not to displace the guide rail, the two innermost screws
should be tightened first using the appropriate torque (see table).
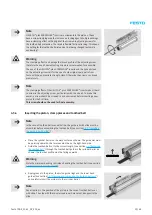
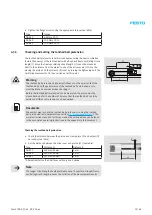
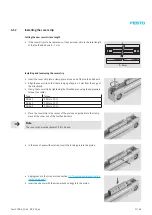
• Insert new sealing caps into the holes in the guide rail.
Note
The sealing caps must be flush with the guide rail. Use a flat piece of wood
or a wide plastic hammer, for example, so as not to damage the sealing caps
or the guide rail.
• If necessary, remove any material chipped from the sealing caps with a
cloth.
Summary of Contents for DGE-25 ZR RF Series
Page 47: ......
Page 48: ......
Page 49: ...Operating instructions en Toothed belt pretension test equipment 7Tension01_TBb_en...


