FaroTek
Configuring the TouchTek network
24
7.
Dispensers:
Shows how many FaroTek dispensers are connected to each FaroTek power pack.
8.
Chart of all FaroTek pens:
The number at each field shows to which “FaroTek pen number” each individual
FaroTek dispenser is assigned to.
Configure the PioNet extensions as follows:
1. Click
Scan
and wait until the chart is refreshed.
Make sure that all connected FaroTek power packs (indicated by green checks) and their FaroTek dispensers
(indicated by green cells) are shown at the chart
2. Click
Settings
to switch the section to the
setting mode
. At the screen the message window
adjust the
FaroTek dispensers
will appear. In the setting mode the display of all FaroTek dispensers are showing the
assigned FaroTek pen number (flashing).
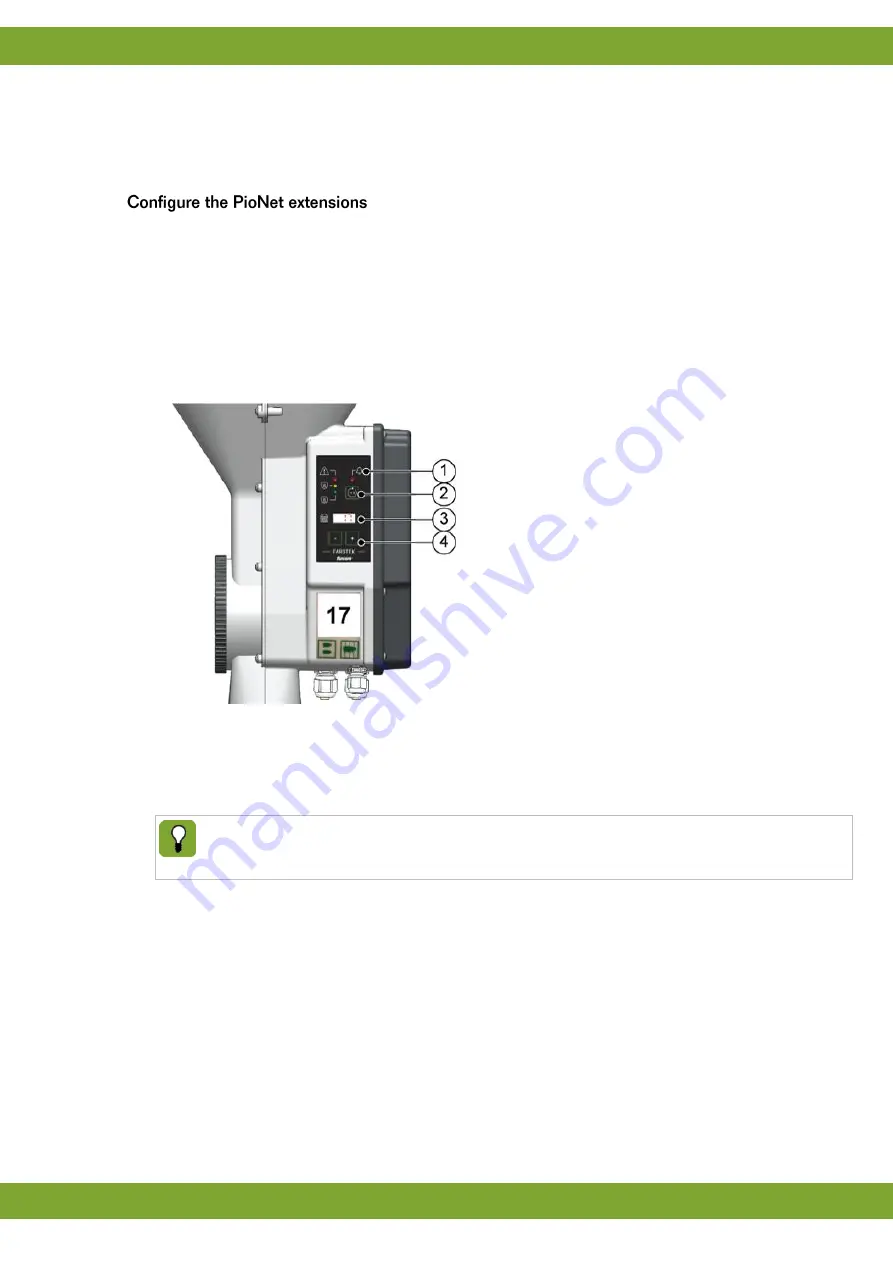
FaroTek display in setting mode:
1. Can’t save LED
: This LED indicates red
light as long not all FaroTek dispensers are
assigned to a FaroTek pen number or if two
FaroTek dispensers are assigned to the same
FaroTek pen number. The LED will switch off if
all FaroTek dispensers in this section are
adjusted correctly and the section is ready to
save at the TouchTek box.
2. +1 Button
: Identifies the currently highest
adjusted FaroTek pen number of this section
and adjusts this dispenser to the next higher
number.
3. Display
: Shows the assigned FaroTek pen
number of this dispenser (must always be the
same number as shown on the label!)
4. +/- Buttons
: Use these buttons to manually
adjust the FaroTek pen number of this
dispenser.
3. Adjust the FaroTek pen number at the displays of all connected FaroTek dispensers. After you have adjusted
a FaroTek dispenser to a unique (valid) FaroTek pen number the display stops flashing. If all FaroTek
dispensers of this section are correctly adjusted, the
Can
’t save LED
switch off.
The easiest way to adjust the FaroTek dispensers of a section is to start with the FaroTek pen number
1 and just increase the number of the next higher pen number by the +1 button. However, it is also
possible to manually adjust the dispenser by the +/- buttons.
4. Click
OK
at the message-window
adjust the FaroTek dispensers
at the TouchTek box to leave the
setting
mode
. Now the Chart at the screen shows the adjusted FaroTek pen numbers of each FaroTek dispenser. If
a FaroTek dispenser was not adjusted or if two FaroTek dispensers are assigned to the same FaroTek pen
number the cells will be highlighted in red color. In that case you have to repeat this procedure until all cells
are green. You can delete all assigned FaroTek pen numbers by click the
# Delete
button to start at the
beginning.
5. Click
Save
to save the setting.
Summary of Contents for FaroTek
Page 1: ...g...


