


NOTICE
for a more precise setting, the Kalibrationsgitter can be used.
►
Using the mouse, the individual grid points are used and moved.
Alternatively, selected grid points with the arrow keys on the
keyboard to be moved.
►
By simultaneously pressing the “Ctrl” key, you can jump to the next
grid point with the arrow keys.
►
Holding down the “Ctrl”key and move a grid point with the mouse
instead of a grid point can an entire grid area to be moved..
►
With the “P”, “O, “ “I” and “L” you can toggle between the target grid to
the output grid, vectors and lines back and forth..
The movements of the grid will not be displayed in real time. The
mathematical term of the new grid has to be taken first. This is done by
pressing the “F” key. Now the modified grid is also displayed on the
output channel.
)
note:
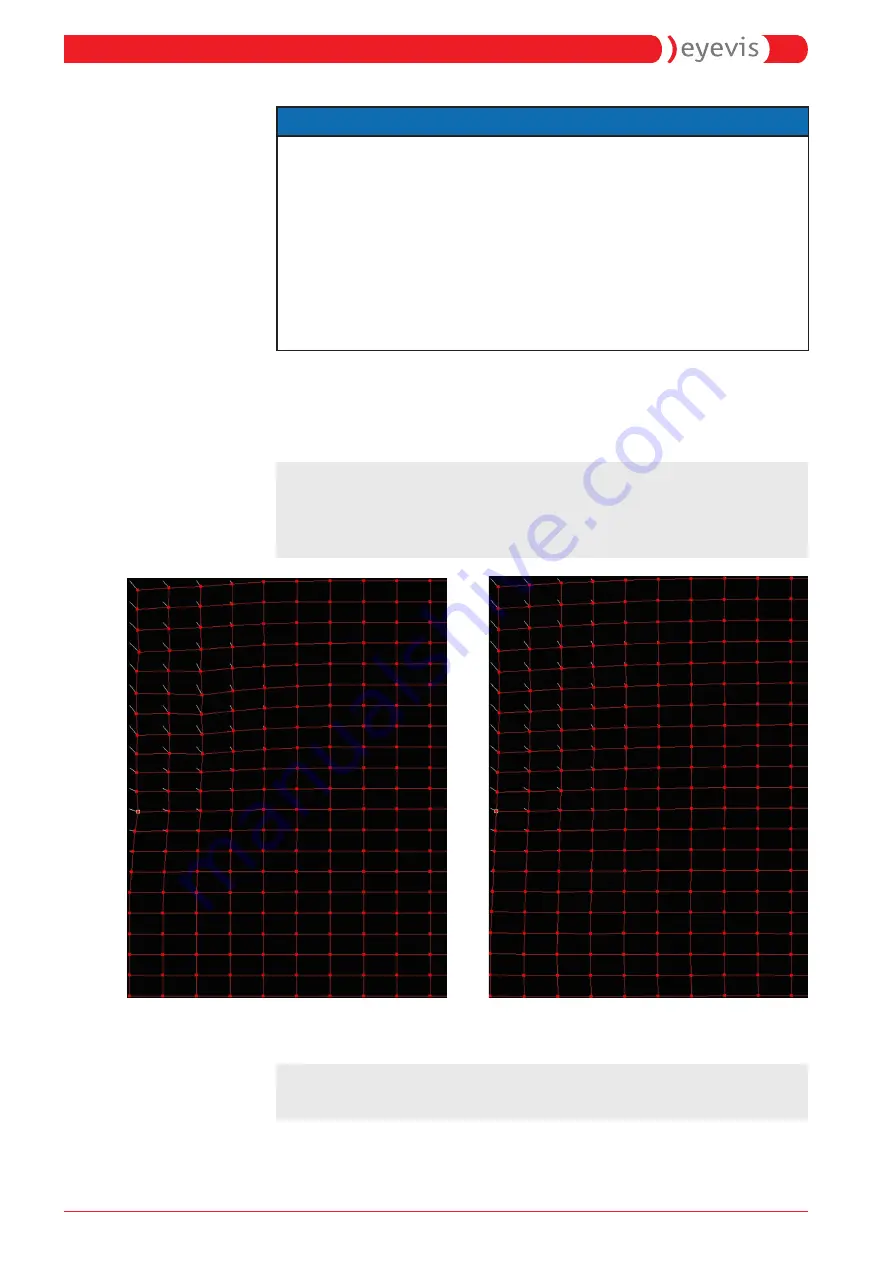
Not every movement of the grid points is possible. The software
automatically adjusts the grid of the mathematical equation (fifth-
order polynomial). Here you can see possible outcomes:
)
note:
Save your changes to the grid so often as possible.
Left: grid after manual adjustment
Right: grid after mathematical conversion
18
openWARP²(-LC) User Manual
wArPing settings


