


34 |
P a g e
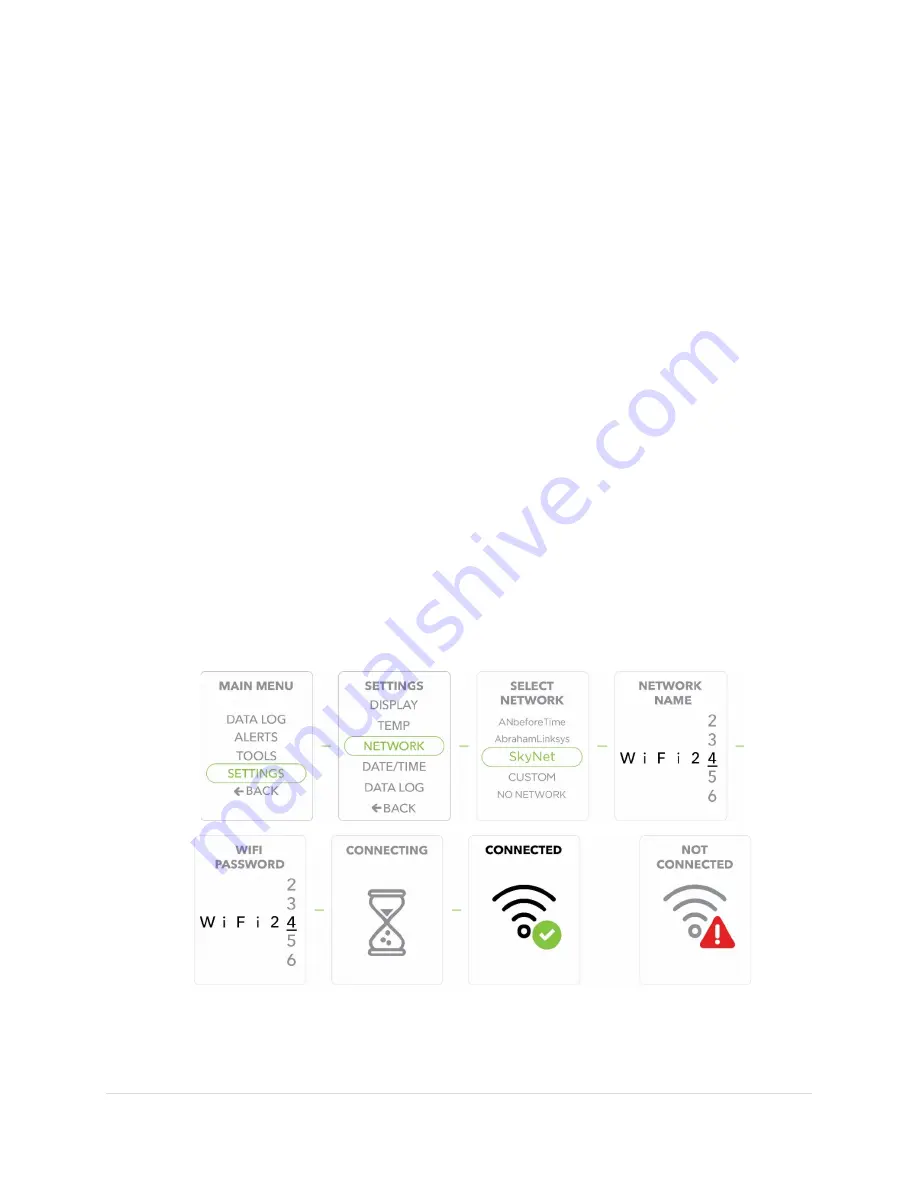
WiFi Connection/Connecting to a Network
1)
Press the Select/Control button to display the Main Menu.
2)
Use the Scroll buttons to move to the Settings option, Press the Select/Control
button to confirm/select Settings.
3)
Scroll to the Network option, Press the Select/Control button to confirm/select
Network.
4)
All available Networks should appear in the display screen. Scroll to select the desired
Network and press the Select/Control button to confirm (proceed to Step 7).
5)
If the desired Network does not appear in the display, Scroll to Custom and press the
Select/Control button to select Custom.
6)
Use the Scroll buttons to enter the Network name one letter, number or symbol at a
time. Press the Select/Control button to confirm/select each character entered before
proceeding to the next. You must enter this information accurately with all upper and
lower case letters, numbers and symbols correctly identified.
7)
Use the Scroll buttons to enter the WiFi Password one letter, number or symbol at a
time. Press the Select/Control button to confirm/select each character entered before
proceeding to the next. You must enter this information accurately with all upper and
lower case letters, numbers and symbols correctly identified.
8)
Once the WiFi Password is completely entered and confirmed, the display will show
Connecting. It may take several seconds for the connection to complete. Once the
unit has made the connection the display will show Connected. At this point the unit
is Connected and will begin the sequence of data pushed to the SilverPoint™ portal.
9)
If the unit does not complete the connection to WiFi the display will show Not
Connected. This can occur from an incorrect Password entry or weak Network signal.
In this case, repeat the steps above.


