


EAN Series
59
7.6
User
7.6.1
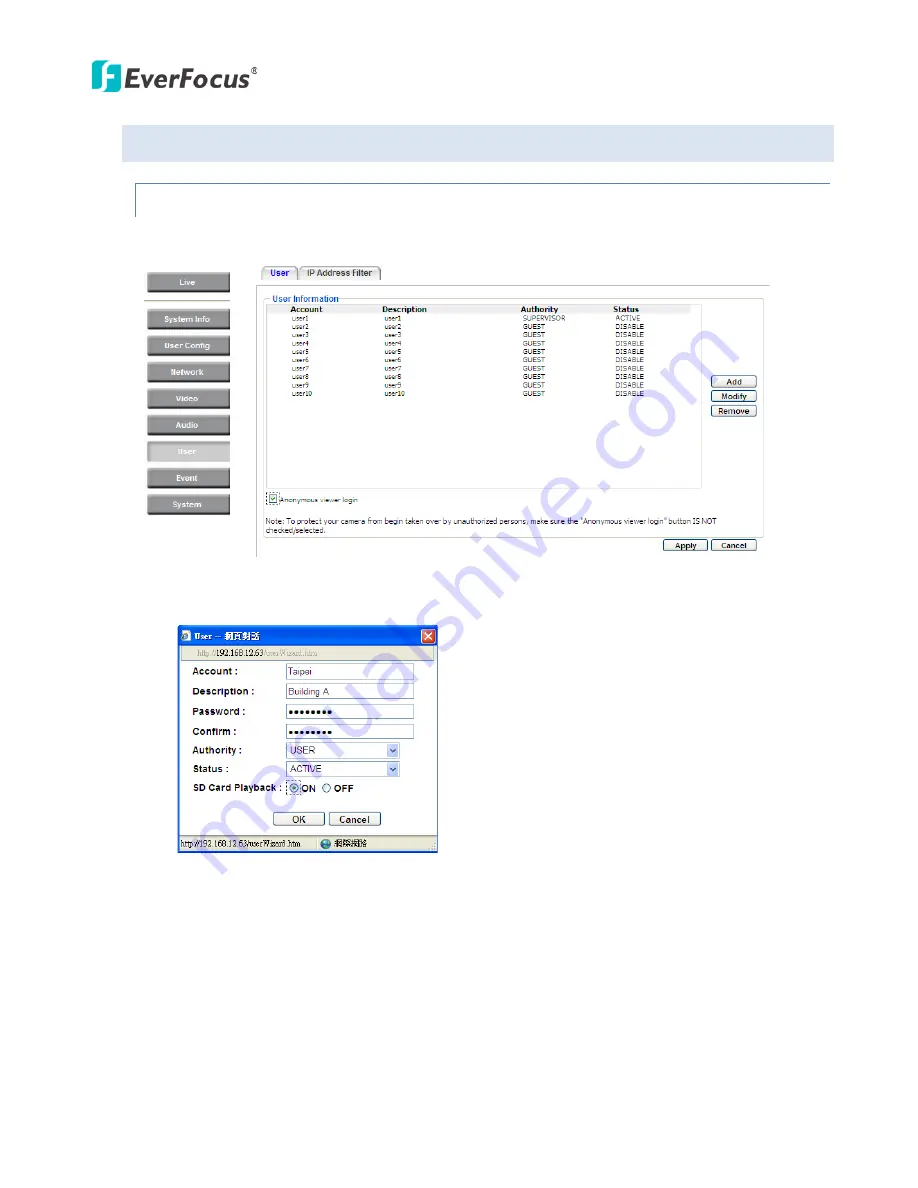
User Information
The system administrator can create up to ten user accounts on this page.
To set up a user account:
1.
Highlight a user account and click the
Modify
button. The following dialog box appears.
2.
Type the account name, account description and password for the account. Type the password
again in the Confirm field.
3.
Select an authority level for the user account from the Authority drop-down list.
•
Supervisor / Administrator:
The only difference between a supervisor and administrator is
that a supervisor can edit an administrator’s account and password, but an administrator
cannot edit the supervisor’s account and password. Multiple administrators can be
configured, but there can be only one supervisor. The supervisor and administrators all
have unrestricted access to the Settings submenus and can determine the registration of
all other users.
Summary of Contents for EAN Series
Page 57: ...EAN Series 51 EAN3300...


