background image

SigNET 200/300 User Guide  


E-LAB-1543  

15 


Zone Chart 


Zone # 

Description 


Summary of Contents for SigNET 200

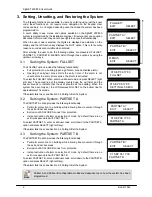
Page 1: ...SigNET 200 300 User Guide E LAB 1543 1 SigNET 200 300 User Guide...

Page 2: ...7 When changing or installing expanders on the SigNET 200 300 system always ensure that all anti static precautions are adhered to while handling connectors wires terminals and PCBs Europlex Technolog...

Page 3: ...ORCE SETTING THE SYSTEM 7 3 6 UNSETTING THE SYSTEM 7 3 7 RESTORING AN ALARM ACTIVATION ALERT 7 3 8 USING X10 FEATURES 8 4 USER MENU OPTIONS 8 4 1 ISOLATING A ZONE OR FAULT 8 4 2 INHIBITING A ZONE 9 4...

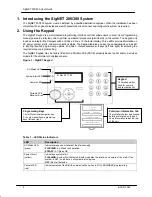
Page 4: ...SigNET Keypad may be factory fitted with a Portable ACE PACE proximity device reader and or a wireless module for the enrolment of wireless sensors Figure 1 SigNET Keypad Table 1 LED Status Indicators...

Page 5: ...advances the user through the menus in the same way as pressing the SELECT option right soft key When no more menu options can be selected this key has no function In data entry mode press this key to...

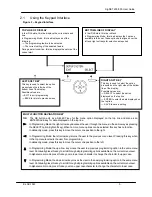
Page 6: ...user should exit the building When the system has been fully set the LCD displays FULLSET on the bottom line for approximately 10 seconds If the alarm fails to set see Section 3 4 Failing to Set the S...

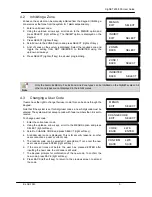
Page 7: ...age PANEL DISARMED is displayed on the Keypad for approximately 5 seconds 4 The source of the alarm condition is displayed on the Keypad and the Alert LED flashes The Keypad continues to display the a...

Page 8: ...ilable to users through the navigational menus on the Keypad In navigation mode the user selects one of a number of pre defined programming options from a list Pressing the up down arrow keys scrolls...

Page 9: ...e with fewer numbers than it is set to receive To change a user code 1 Enter the current user code 2 Using the up down arrow keys scroll to the MENUS option and press SELECT right soft key 3 Scroll to...

Page 10: ...he left and right arrow keys Press ENTER right soft key to save the new date If an attempt is made to save an invalid date value the text INVALID VALUE is displayed for 1 second and the user is prompt...

Page 11: ...system on the bottom line and all previous events are displayed for 1 second in turn 5 To view an event from a particular date enter the date with the numeric keys 4 8 Enabling the Chime Function The...

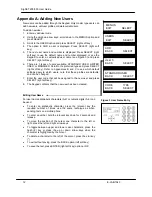
Page 12: ...se profiles are defaults and can be changed 7 Enter the user code that will be assigned to the new user and press SELECT right soft key 8 The Keypad confirms that the new user has been created Editing...

Page 13: ...of this mode An exit timer can be applied to this mode by enabling the Partset A timed variable To perform a PARTSET A see Section 3 2 PARTSET B Standard Master The PARTSET B option applies protection...

Page 14: ...event log when reporting system events To set the date and time see Section 4 5 TEST Standard Master This menu option provides the following test features 1 Bell test The bell test activates the exte...

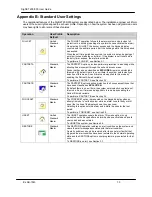
Page 15: ...SigNET 200 300 User Guide E LAB 1543 15 Zone Chart Zone Description...

Reviews: